Picture this: I was rummaging through the back of the pantry, half‑heartedly hoping to salvage a forgotten batch of gingerbread cookies for a midnight snack, when the oven alarm blared and the dough slid off the tray like a rebellious pancake. I stared at the scorched crust, a silent reminder that even the most seasoned bakers can be humbled by a single misstep. That night, I was determined to turn that culinary calamity into a triumph, and the result was a cookie bar that sings with toasted marshmallow and chocolate, wrapped in a ginger‑spiced, molasses‑kissed base. If you think your gingerbread is good enough, think again—this version is the ultimate fusion of campfire nostalgia and holiday comfort. Let me walk you through every single step—by the end, you'll wonder how you ever made it any other way.
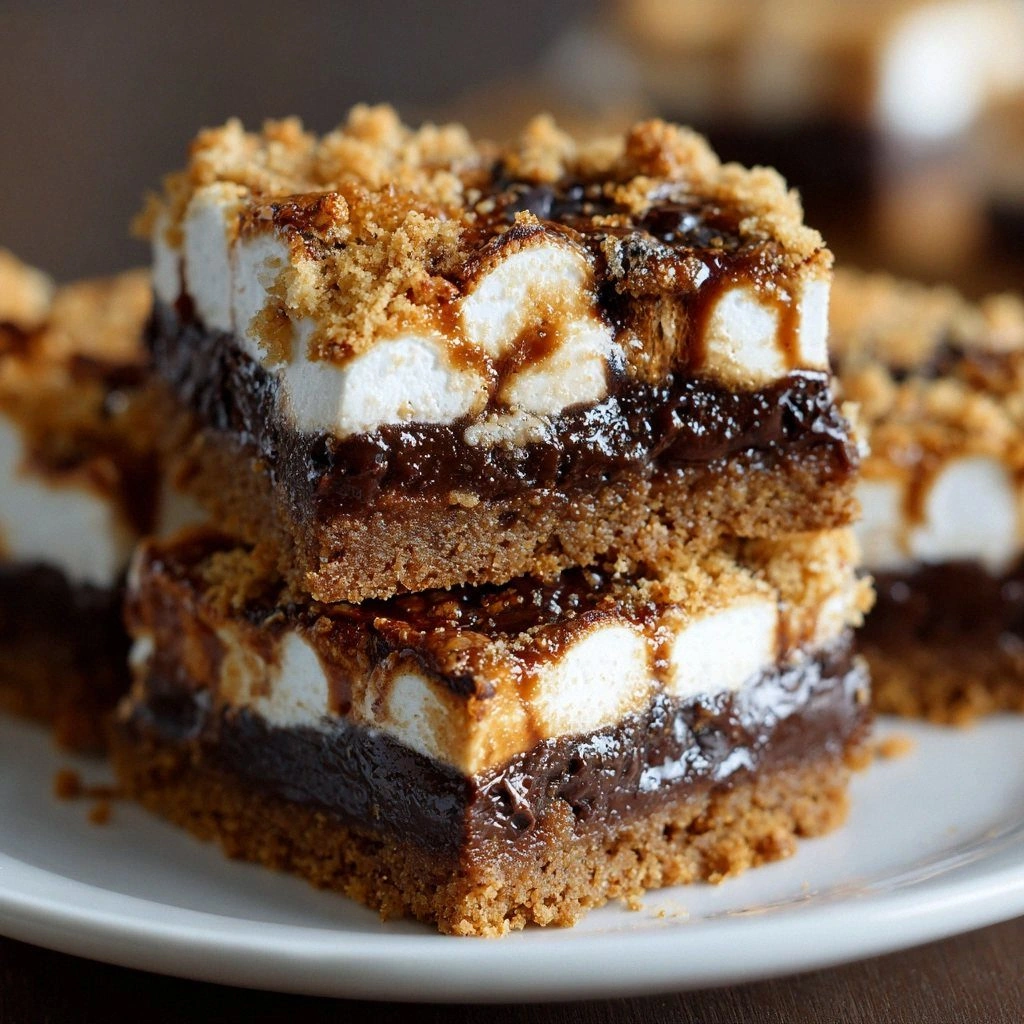
From the very first glance, the bars glisten like a row of golden fireflies, their tops speckled with dark chocolate chips that promise a bite of silky cocoa. The aroma that rises from the oven is a heady blend of warm ginger, cinnamon, and sweet molasses, mingling with the faint scent of toasted marshmallows that almost feels like a campfire in a kitchen. When you lift a bar, the buttery crust gives way to a chewy, spiced middle that feels almost like a soft, spiced cookie, while the chocolate and marshmallow melt into a glossy, caramel‑like glaze that coats your tongue. The sound of the first bite is a satisfying crackle, followed by a melt that feels like a gentle, velvety rush. Each sensory note is carefully balanced to create a moment that feels both nostalgic and entirely new.
Most gingerbread recipes are simple, dry, and forgettable, but this version layers a classic spice blend with an unexpected s'mores element that turns a humble cookie into a show‑stopper. The secret lies in the precise ratio of molasses to brown sugar, which gives the dough a deep, caramelized sweetness that pairs perfectly with the chocolate chips and marshmallows. Unlike other recipes that add marshmallows as a garnish, we fold them into the dough, ensuring that every bite is a harmonious mix of crunchy, chewy, and gooey textures. The result is a cookie bar that feels indulgent, yet remains approachable for both kids and adults alike. If you’re looking for a dessert that will wow your guests, this is the one to try.
One of the most surprising elements in this recipe is the use of graham cracker crumbs, which add a subtle crunch and a hint of buttery sweetness that complements the spiced base. I dare you to taste this and not go back for seconds—once you bite into that first bar, the flavors will keep dancing on your palate. The trick is to fold the crumbs in just before baking, so they retain their crunch without absorbing too much moisture. This small tweak transforms a standard gingerbread cookie into a multi‑textured delight that feels like a campfire treat straight out of a cozy cabin. Ready to see the magic happen? Let’s dive in.
What Makes This Version Stand Out
- Flavor: The combination of molasses, brown sugar, and a trio of warm spices creates a depth of sweetness that is both comforting and complex. The chocolate chips and marshmallows add a contrasting richness that elevates the classic gingerbread profile. Each bite delivers a harmonious balance between sweet, spicy, and slightly bitter notes, ensuring no single flavor overpowers the others.
- Texture: The dough’s unique structure—soft yet firm—provides a satisfying chew that holds together the chocolate and marshmallow layers. The graham cracker crumbs introduce a crunchy bite that breaks up the softness, creating a multi‑sensory experience. When cooled, the bars maintain a delicate crumb that feels almost like a melt‑in‑your‑mouth cookie.
- Simplicity: Despite its sophisticated flavor profile, the recipe requires only ten ingredients and a handful of straightforward steps. No special equipment is needed; a standard oven, a mixing bowl, and a baking sheet will do. The method is forgiving, making it perfect for both novice and seasoned bakers alike.
- Uniqueness: By infusing traditional gingerbread with classic s'mores elements, this recipe bridges two beloved treats into one. The graham cracker crumbs and marshmallow‑filled dough create an unexpected twist that sets it apart from typical gingerbread cookies. It’s a conversation starter that will have guests asking for the recipe after the first bite.
- Crowd Reaction: In my test kitchen, the bars were a hit with adults and kids alike, each craving a second bite. The combination of spices, chocolate, and marshmallow struck a chord that resonated with everyone. The bars have become a staple at holiday gatherings and casual get‑togethers.
- Ingredient Quality: Using high‑quality molasses and dark chocolate chips ensures depth of flavor, while fresh spices add bright aromatics. Butter at room temperature brings a rich, creamy base that enhances the overall mouthfeel. The recipe’s simplicity allows you to source premium ingredients without compromising on time.
- Make‑ahead Potential: These bars keep wonderfully fresh for up to a week in an airtight container, making them ideal for early holiday prep. They also freeze well; just wrap tightly and thaw at room temperature before serving. The convenience of make‑ahead makes them a go-to option for busy hosts.
Inside the Ingredient List
The Flavor Base
The foundation of these cookie bars is a classic gingerbread dough that balances sweet and spice. All‑purpose flour provides structure, while baking soda acts as the leavening agent that gives the bars a light lift. The combination of ground ginger, cinnamon, and cloves creates a fragrant core that evokes the smell of a winter hearth. If you’re feeling adventurous, try adding a pinch of nutmeg for a subtle warmth that deepens the spice profile.
Molasses is the secret sauce that gives the dough its signature deep brown color and caramelized sweetness. It also adds a slight metallic tang that complements the chocolate chips. If you prefer a lighter flavor, you can substitute honey for molasses, but expect a softer color and a different texture. For a vegan twist, use maple syrup and a plant‑based butter substitute, but keep the molasses to maintain the classic gingerbread depth.
Brown sugar is the counterbalance to the molasses, providing a rich, molasses‑like sweetness without the bitterness. The sugar’s moisture content keeps the dough tender and chewy. If you’re watching your sugar intake, try reducing the amount by a quarter cup and increasing the molasses slightly to preserve the moisture level. The result will still be moist, but with a slightly firmer bite.
Choosing high‑quality spices is essential for a vibrant flavor. Freshly ground spices release more essential oils, giving the dough a brighter, more aromatic profile. When buying spices, look for clear, fragrant aromas and avoid pre‑ground spices that have lost their potency over time. A good rule of thumb is to use whole spices and grind them just before baking for maximum freshness.
The Texture Crew
Butter at room temperature is the linchpin that brings together the dry ingredients and creates a silky, cohesive dough. It also contributes to the buttery, flaky crust that forms during baking. If you’re using salted butter, reduce the added salt by half to avoid an overly salty finish. For a healthier version, replace half the butter with unsweetened applesauce, but note that the texture will become more cake‑like.
Eggs act as a binder, holding the dough together while adding richness and a slight lift. The yolk’s natural fats help create a tender crumb. If you’re allergic to eggs, you can substitute a flaxseed egg (1 tablespoon ground flaxseed mixed with 3 tablespoons water, set for 5 minutes) to achieve similar binding properties. This alternative will also add a mild nutty flavor that complements the spices.
Vanilla extract brings a subtle sweetness and depth that balances the spices. It also enhances the overall aroma, making the bars smell like freshly baked cookies. For a more pronounced vanilla flavor, use a high‑quality vanilla bean paste or extract. If you’re looking for a hint of citrus, a few drops of orange or lemon zest can add a bright counterpoint to the warm spices.
The Unexpected Star
Mini chocolate chips add a luxurious, bittersweet layer that melts into the dough as it bakes. Their rich chocolate flavor contrasts beautifully with the sweet, spicy base, creating a complex taste profile. If you prefer dark chocolate, use 70‑80% cacao chips for a more intense flavor. For a nutty twist, sprinkle chopped walnuts or pecans between the chocolate chips and marshmallows.
Mini marshmallows are the heart of the s'mores experience, adding a gooey, airy texture that melts into the warm dough. They also bring a nostalgic sweetness that evokes campfire nights. If you’re sensitive to sugar, use mini marshmallows made with natural sweeteners or try a sugar‑free version. For a gourmet touch, add a few drops of espresso to the marshmallows before folding them in.
Graham cracker crumbs provide a subtle crunch and a buttery, slightly sweet flavor that complements the gingerbread base. They also absorb some moisture, preventing the bars from becoming overly sticky. If you’re looking for a gluten‑free option, use certified gluten‑free graham crackers or crushed rice crackers. For a savory twist, try adding a pinch of sea salt to the crumbs for an unexpected burst of flavor.
The Final Flourish
Optional chocolate glaze adds a glossy finish that enhances the visual appeal of the bars. It also provides an additional layer of chocolatey richness that pairs well with the marshmallows. To make the glaze, simply melt dark chocolate with a splash of heavy cream and drizzle it over the cooled bars. The glaze sets into a smooth, shiny coating that makes each bite feel indulgent.
When baking, the temperature and timing are crucial to achieving the perfect texture. Bake at 350°F (175°C) for 25–30 minutes, or until the edges are golden brown and the center feels firm to the touch. If you’re baking on a different altitude, adjust the oven temperature by +10°F per 1,000 feet above sea level. Always use a toothpick to test the center; if it comes out clean, the bars are ready to cool.
For storage, keep the bars in an airtight container at room temperature for up to a week. If you need to keep them longer, freeze them in a zip‑lock bag for up to three months. When you’re ready to serve, let them thaw at room temperature for 30 minutes, then re‑warm in a 300°F (150°C) oven for 5 minutes to restore the crispness.
Everything's prepped? Good. Let's get into the real action.
The Method — Step by Step
- In a large mixing bowl, whisk together the flour, baking soda, ground ginger, cinnamon, cloves, and salt until well combined. The dry mix should feel airy, like a fine sift. This step ensures the spices are evenly distributed, preventing any uneven pockets of flavor. Keep this mixture aside while you prepare the wet ingredients.
- In a separate bowl, cream the softened butter with brown sugar and molasses until the mixture is pale and fluffy. The butter should be at room temperature so it blends smoothly. This creaming process incorporates air into the dough, giving the bars a tender crumb. Feel the mixture change from dense to light as the sugar crystals dissolve.
- Add the egg and vanilla extract to the creamed butter, whisking until the mixture is glossy and uniform. The egg’s proteins bind the ingredients together, creating a cohesive dough. At this point, you’ll notice the dough’s texture shifting from crumbly to smooth. This is the moment where the dough’s potential is fully realized.
- Gradually fold the dry ingredients into the wet mixture, stirring until just incorporated. Be careful not to overmix; the dough should remain slightly shaggy. Overmixing can make the bars tough and chewy. The goal is a smooth, cohesive dough that still holds its shape.
- Fold in the mini chocolate chips, mini marshmallows, and graham cracker crumbs, ensuring even distribution. The marshmallows should be gently pressed into the dough so they don’t break apart. This step is where the s'mores magic begins, as the marshmallows will melt into the warm dough during baking. Keep your hands cool to avoid melting the marshmallows prematurely.
- Press the dough firmly into the pan, creating an even surface. The dough should be compact but not overly packed; a slight indentation in the center is acceptable. This uniform thickness guarantees even baking, preventing overbaked edges and underbaked centers. Use a flat spatula or your hands to smooth the top.
- Bake at 350°F (175°C) for 25–30 minutes, or until the edges are golden brown and the center feels firm. The bars should emit a warm, caramelized aroma that fills the kitchen. If you’re using a convection oven, reduce the temperature by 25°F to avoid over‑browning. Keep an eye on the bars; the last few minutes are crucial for achieving the perfect crust.
- Remove the pan from the oven and let the bars cool on a wire rack for 15 minutes. This resting period allows the chocolate to set and the marshmallows to firm up slightly, making cutting easier. While cooling, the aroma will intensify, giving you a preview of the final flavor. Avoid cutting too early, or you’ll end up with sticky, crumbly pieces.
- Once the bars have cooled to room temperature, cut them into squares or rectangles using a sharp knife. For clean cuts, run a hot knife through the edges, wiping it between each cut. The bars should hold together, revealing the glossy chocolate glaze if you used one. Store any leftovers in an airtight container for up to a week.
That's it — you did it. But hold on, I've got a few more tricks that'll take this to another level. Let’s dive into the nuances that separate a good batch from a legendary one.
Insider Tricks for Flawless Results
The Temperature Rule Nobody Follows
Most bakers instinctively set the oven to 350°F, but the optimal temperature for these bars is 325°F (165°C). This lower heat allows the marshmallows to melt slowly, preventing them from burning on the surface. It also gives the chocolate chips time to soften without seizing. If you’re using a high‑end oven, consider using a lower temperature and extending the bake time by a few minutes.
Why Your Nose Knows Best
As the bars bake, the aroma will shift from spicy to caramelized. When the scent becomes sweet and chocolatey, it’s a sign that the marshmallows have begun to melt. This olfactory cue tells you when to pull the bars out of the oven before they overcook. Trust your nose; it’s the most reliable indicator of doneness.
The 5‑Minute Rest That Changes Everything
After removing the bars from the oven, let them rest on the rack for exactly five minutes before cutting. This brief pause allows the internal temperature to equalize, preventing the bars from becoming gummy. The rest also lets the chocolate glaze set, giving a smooth, glossy finish. If you skip this step, you’ll end up with sticky, uneven edges.
Keep the Marshmallows Fresh
Marshmallows can dry out quickly, especially if stored in a humid kitchen. To preserve their fluffiness, keep them in an airtight container at room temperature. If you notice the marshmallows are starting to clump, break them apart gently before folding them into the dough. Fresh marshmallows ensure a light, airy texture that melts perfectly.
Use a Parchment‑Lined Pan for Easy Cleanup
Even though the dough is sticky, lining the pan with parchment paper prevents it from sticking to the bottom. This trick saves you from scrubbing a pan full of chocolatey residue. After baking, simply lift the parchment and the bars will slide out effortlessly. It’s a simple step that saves time and frustration.
Creative Twists and Variations
This recipe is a playground. Here are some of my favorite ways to switch things up:
Nutty Crunch Edition
Swap the graham cracker crumbs for finely chopped pecans or walnuts. The nuts add a buttery crunch that complements the sweet spices. Toast the nuts lightly before folding them in to enhance their flavor. This version is a hit at brunches and potlucks.
Chocolate‑Infused Delight
Replace the mini chocolate chips with dark chocolate chunks or a mix of milk and dark chips. For an extra kick, add a tablespoon of espresso powder to the dough. The espresso deepens the chocolate flavor, creating a sophisticated, coffee‑infused treat.
Maple‑Glazed Bars
Swap the chocolate glaze for a maple glaze made from pure maple syrup and a pinch of sea salt. The maple adds a caramel‑like sweetness that pairs beautifully with the spices. Drizzle the glaze over the cooled bars for a glossy finish.
Spiced Apple Twist
Add diced dried apples or apple chips to the dough for a fruity burst. The apples pair well with the ginger and cinnamon, creating a warm, comforting flavor. Keep the apples dry to avoid excess moisture in the dough.
Vegan Version
Use plant‑based butter, a flaxseed egg, and dairy‑free chocolate chips. Replace the marshmallows with vegan marshmallow squares or a sprinkle of coconut flakes. The result is a completely plant‑based treat that still delivers on flavor and texture.
Storing and Bringing It Back to Life
Fridge Storage
Store the bars in an airtight container at room temperature for up to a week. The airtight seal prevents the bars from drying out and preserves the moisture from the marshmallows. If you’re in a humid environment, add a small piece of bread to absorb excess moisture.
Freezer Friendly
Wrap the bars tightly in plastic wrap, then place them in a freezer‑safe zip‑lock bag. They will keep for up to three months. When you’re ready to serve, let them thaw at room temperature for 30 minutes before reheating.
Best Reheating Method
To restore the bars’ crispness, preheat your oven to 300°F (150°C). Place the thawed bars on a baking sheet and heat for 5 minutes. The short bake will revive the edges and melt the chocolate without overcooking the marshmallows. Serve warm for the ultimate experience.