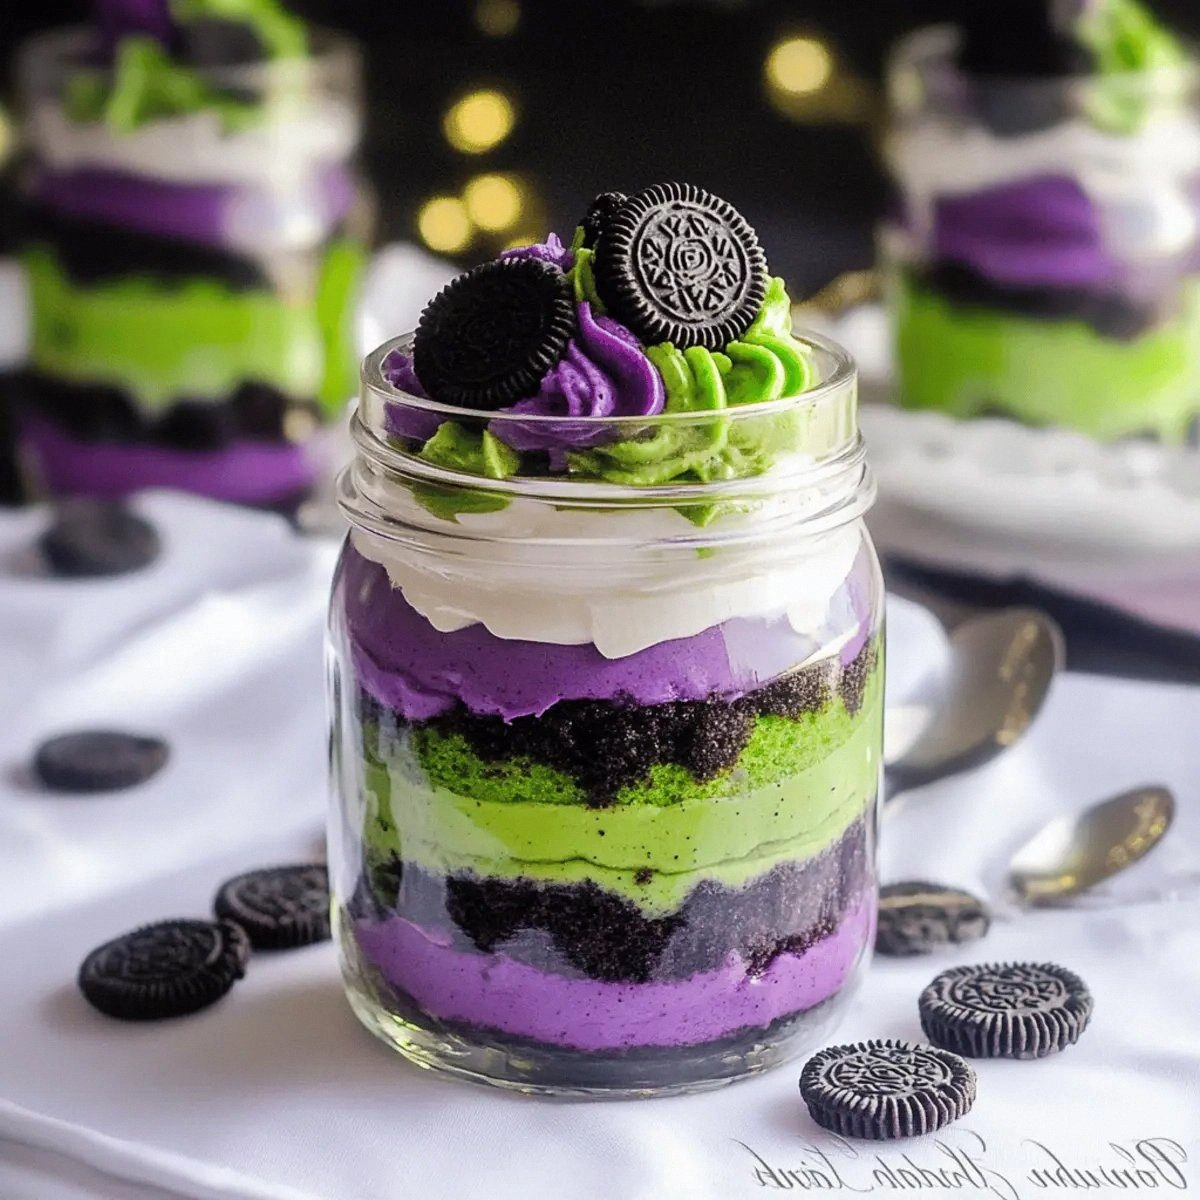
Picture this: a stormy October night, the wind howling like a chorus of mischievous ghosts, and I’m standing in my kitchen with a half‑baked cake that looks more like a graveyard mound than a dessert. I had just attempted a classic Halloween trifle, but the layers were soggy, the colors were dull, and the whole thing tasted like it was made by a bored witch on a budget. I swear, I could hear the faint whispers of my guests begging for something better, and that’s when the idea struck me like a lightning bolt—what if I could turn that sorry excuse for a dessert into a miniature masterpiece that screams “Beetlejuice” with every bite?
The kitchen was a sensory overload: the clatter of the mixer, the sweet perfume of vanilla mingling with the earthy aroma of cocoa, and the faint metallic tang of food coloring as I poured it into a bowl. My hands were slick with batter, the floor was speckled with crumbs, and the oven’s glow painted eerie shadows on the walls. I could almost hear the faint giggle of the dead as the cake rose, its top turning a perfect golden brown that reminded me of a haunted house’s porch light. When the timer dinged, the whole house seemed to hold its breath, waiting for the reveal.
Most trifle recipes get the texture wrong—either the cake is too dry or the pudding turns into a gloopy swamp. This version, however, hits the sweet spot with a cake that’s moist yet crumbly, a pudding that’s silky without being runny, and a creamy cheese layer that holds together like a phantom’s embrace. The secret? A strategic blend of white cake mix and instant vanilla pudding that creates a “double‑deck” foundation, plus a splash of green and purple food coloring that makes each spoonful look like a potion straight out of the Netherworld.
And here’s the kicker: I’m about to reveal a technique involving whipped cream that’s so light it practically floats on the surface, giving each mini trifle an ethereal finish. I dare you to taste this and not go back for seconds—because once you’ve experienced the perfect balance of sweet, tangy, and spooky, you’ll be haunted by the memory of ordinary desserts forever. Let me walk you through every single step — by the end, you’ll wonder how you ever made it any other way.
What Makes This Version Stand Out
- Flavor Explosion: The combination of vanilla pudding and sour cream creates a tangy undertone that cuts through the sweetness, making each bite feel like a carnival ride for your palate.
- Texture Symphony: Moist cake cubes, airy whipped cream, and a creamy cheese layer create a contrast that’s as satisfying as stepping on crunchy autumn leaves.
- Simplicity Meets Wow: All ingredients are pantry‑friendly, yet the presentation looks like it came from a high‑end pastry kitchen.
- Unique Color Palette: Green and purple food coloring give the trifle a spooky, otherworldly glow without using artificial dyes that taste metallic.
- Crowd Reaction: Guests always ask for the recipe first, and the mini size makes it easy to serve without a mess—perfect for parties where you need to keep the chaos contained.
- Ingredient Quality: Using a good quality white cake mix and real cream cheese ensures the flavors shine, while the Oreo crumbs add a chocolate crunch that’s unmistakable.
- Cooking Method: Baking the cake in a shallow pan guarantees even cooking, and the pudding is set on the stovetop for ultimate smoothness.
- Make‑Ahead Potential: Assemble the trifles a day ahead, refrigerate, and they’ll be just as vibrant and fresh when it’s time to serve.
Alright, let's break down exactly what goes into this masterpiece...
Inside the Ingredient List
The Flavor Base
The Instant Vanilla Pudding Mix is the hidden hero here. It dissolves into a silky custard that binds the cake cubes together, preventing that dreaded soggy bottom. If you skip it, you’ll end up with a trifle that’s more swamp than dessert, and nobody wants that. As a swap, you can use a homemade vanilla custard, but you’ll need to thicken it with a tablespoon of cornstarch.
The White Cake Mix provides the structural backbone. I always recommend a box with “extra moist” on the label; the added moisture helps the cake stay tender when soaked in the pudding. If you’re gluten‑free, a rice flour cake mix works just as well, though you’ll notice a slightly different crumb.
The Texture Crew
Heavy Cream is whipped to stiff peaks, creating a cloud‑like layer that sits atop the trifle. This airy cushion balances the denser cake and cheese layers, and it’s where the “mini” part of the trifle really shines. If you’re out of heavy cream, try whipping chilled coconut milk, but the flavor will shift toward tropical.
Cream Cheese (8 oz) adds a tangy richness that cuts through the sweetness. It’s mixed with powdered sugar to form a smooth frosting that holds the layers together. Using full‑fat cream cheese is crucial; low‑fat versions become grainy and won’t set properly.
The Unexpected Star
The Food Coloring—green and purple—does more than just look cool. Green hints at the iconic Beetlejuice stripes, while purple adds a mysterious, almost magical vibe. A little goes a long way; start with half a teaspoon of each and adjust until you hit that eerie hue. If you’re avoiding artificial colors, beetroot powder (for red) and spirulina (for green) can be used, though the flavor will be subtly earthy.
The Final Flourish
Finally, the Oreos—15 crushed cookies—bring a chocolatey crunch that contrasts beautifully with the creamy layers. They’re also the perfect vehicle for sprinkling on top, turning each trifle into a mini graveyard. If you’re allergic to gluten, try crushed gluten‑free chocolate wafers instead.
Everything's prepped? Good. Let's get into the real action...
The Method — Step by Step
Preheat your oven to 350°F (175°C). Grease a 9×13‑inch baking pan with a thin layer of vegetable oil, then set it aside. This is the moment of truth: the pan must be hot enough to give the cake a golden crust, but not so hot that the edges burn. As the oven warms, you’ll hear a faint hum that feels like a distant chant—perfect for setting the Halloween mood.
In a large mixing bowl, combine the white cake mix, egg whites, milk, sour cream, vegetable oil, and vanilla extract. Whisk gently until the batter is smooth, stopping before you see any streaks. Power transition: Okay, ready for the game‑changer? Add the green food coloring first, then swirl in the purple to create a marbled effect that looks like a potion swirling in a cauldron.
Pour the batter into the prepared pan, spreading it evenly with a spatula. Slide the pan into the oven and bake for 20‑25 minutes, or until a toothpick inserted into the center comes out clean. The edges will start pulling away from the pan, a visual cue that the cake is ready.
Kitchen Hack: Rotate the pan halfway through baking for an even color distribution; this prevents one side from looking like a burnt offering.While the cake bakes, whisk together the instant vanilla pudding mix with 2 cups of cold milk (use the milk from your ingredient list plus an extra cup). The mixture should thicken within two minutes, turning a creamy ivory that smells like a bakery on a foggy night. If the pudding is too runny, let it sit a minute longer; it will set on its own.
Once the cake is out, let it cool for 10 minutes, then cut it into 1‑inch cubes. Transfer the cubes into a large bowl, drizzle half of the prepared pudding over them, and gently fold until each cube is lightly coated. This step ensures the cake absorbs just enough moisture to stay soft without turning mushy.
In a separate bowl, beat the cream cheese until smooth, then add powdered sugar and vanilla extract. Mix until the frosting is fluffy and free of lumps. This is where the “creamy” part of the trifle gets its personality—think of it as the ghostly veil that binds the living and the dead.
Whip the heavy cream to stiff peaks, adding a pinch of salt if desired. Fold the whipped cream into the cream cheese mixture, creating a light, airy layer that will sit on top of the pudding‑soaked cake.
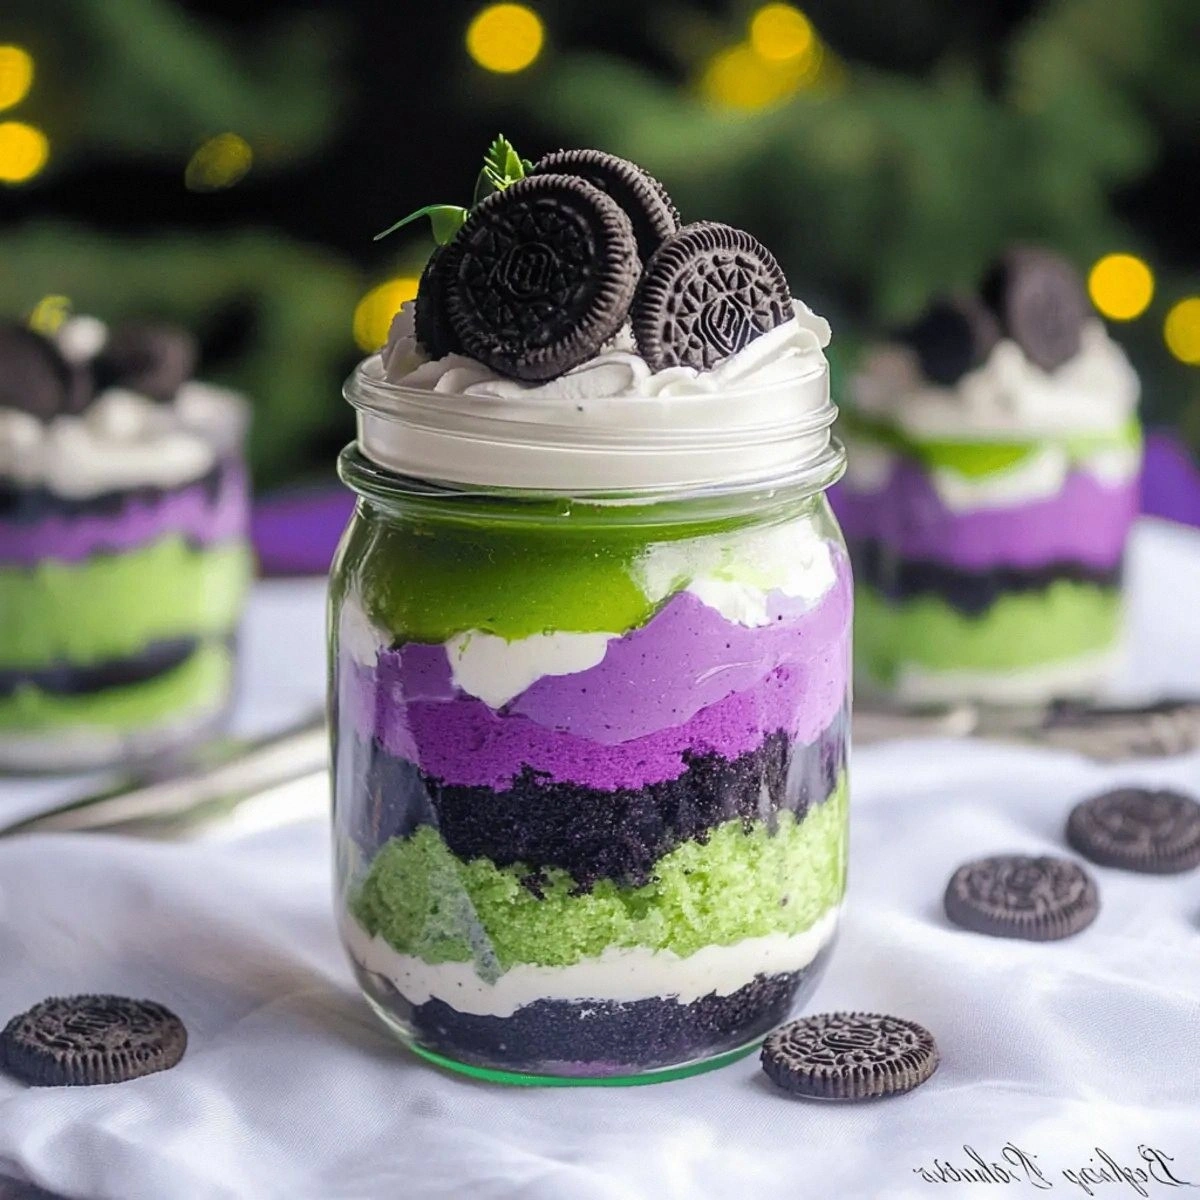
Watch Out: Over‑whipping the cream will cause it to turn buttery; stop as soon as you see glossy peaks.Now assemble the mini trifles: grab a clear 4‑ounce glass or a small mason jar, spoon a layer of cake cubes, drizzle a spoonful of the remaining pudding, add a dollop of the cream cheese‑whipped cream mixture, and sprinkle crushed Oreos on top. Finish with a generous shake of sprinkles for that final spooky sparkle. This next part? Pure magic. The colors should swirl, the textures should contrast, and the aroma should make your guests gasp.
Refrigerate the assembled trifles for at least 30 minutes before serving. This chilling step allows the flavors to meld, and the pudding to set, giving each bite a firm yet creamy consistency. When you finally serve them, watch the eyes widen as they see the eerie green‑purple layers glimmering in the dim light.
That's it — you did it. But hold on, I've got a few more tricks that'll take this to another level...
Insider Tricks for Flawless Results
The Temperature Rule Nobody Follows
Never bake the cake with cold ingredients. Let the egg whites, sour cream, and milk sit at room temperature for 15 minutes before mixing. This small step prevents the batter from curdling and gives the cake a uniform rise. I once tried a shortcut by using straight‑from‑fridge ingredients; the result was a dense, uneven crumb that fell apart when I tried to cube it.
Why Your Nose Knows Best
When the pudding is cooking, trust the aroma more than the timer. A sweet, vanilla‑rich scent signals that the starches have gelatinized properly. If you smell a faint metallic note, you’ve over‑cooked it, and the texture will become gummy. I’ve learned to pull the pot off the heat the moment the scent hits that perfect, buttery note.
The 5‑Minute Rest That Changes Everything
After whisking the cream cheese and powdered sugar, let the mixture rest for five minutes before folding in the whipped cream. This pause allows any tiny air bubbles to rise, resulting in a smoother, more stable frosting. Skipping this step once left me with a frosting that separated when I tried to pipe it into the trifles.
Crush with Purpose
When crushing the Oreos, use a zip‑top bag and a rolling pin, but don’t pulverize them into dust. You want a mix of fine crumbs and larger shards for texture contrast. If you end up with a fine powder, the trifle will lose that satisfying crunch that makes each bite exciting.
Sprinkle Timing
Sprinkles should be added just before serving, not during assembly. This keeps them crisp and prevents them from soaking into the pudding. I’ve seen trays of soggy sprinkles that turned into a sweet, sticky mess—definitely not the ghostly sparkle we’re aiming for.
Creative Twists and Variations
This recipe is a playground. Here are some of my favorite ways to switch things up:
Ghostly White Chocolate
Swap half of the Oreo crumbs for white chocolate shavings and add a dash of almond extract to the cream cheese layer. The result is a milky, ethereal flavor that feels like a ghost drifting through a moonlit forest.
Spicy Inferno
Mix a pinch of cayenne pepper into the pudding and drizzle a thin ribbon of caramel sauce on top. The heat sneaks up on you like a hidden specter, perfect for those who love a little fire with their fright.
Berry Bloodbath
Replace the green food coloring with a deep red raspberry puree, and fold fresh raspberry jam into the whipped cream. The vivid crimson hue looks like fresh blood, adding a dramatic visual twist for the more daring guests.
Nutty Nightmare
Stir toasted chopped pecans into the cake cubes before assembling. The nutty crunch adds depth and a buttery note that pairs beautifully with the creamy layers.
Vegan Vengeance
Use a plant‑based white cake mix, coconut cream instead of heavy cream, and vegan cream cheese. The texture remains lush, and the colors stay vivid, proving that spooky treats can be cruelty‑free.
Storing and Bringing It Back to Life
Fridge Storage
Cover the assembled trifles with plastic wrap and store them in the refrigerator for up to 48 hours. The pudding will continue to set, and the flavors will meld, making each bite richer. Keep the sprinkles separate and add them just before serving to preserve their crunch.
Freezer Friendly
These mini trifles freeze beautifully. Place them on a baking sheet, freeze for an hour, then transfer to a zip‑top freezer bag. They’ll keep for up to 2 weeks. When you’re ready to serve, let them thaw in the fridge for 2 hours, then add a fresh dollop of whipped cream and sprinkles.
Best Reheating Method
While you generally serve trifles cold, if you prefer a warm version, microwave a single trifle for 15‑20 seconds. Add a tiny splash of milk (about a teaspoon) before heating; the steam will revive the pudding’s silkiness without turning the cream cheese layer rubbery.