I was standing in my kitchen on a cold December evening, the kind of night when the snow is whispering against the windows and the only thing louder than the wind is the growl of my stomach. I had just attempted a classic red velvet cake for a holiday party, and it turned out about as flat as a pancake that forgot it was supposed to rise. I stared at that sad, crumbly slab and thought, “I dare you to taste this and not go back for seconds.” That moment of culinary defeat sparked a fire under me, and I promised myself I would never settle for a lackluster dessert again. Fast forward a few weeks, a few failed experiments, and a lot of taste‑testing (I’ll be honest — I ate half the batch before anyone else got to try it), and I finally nailed what I can confidently call the ultimate festive delight.
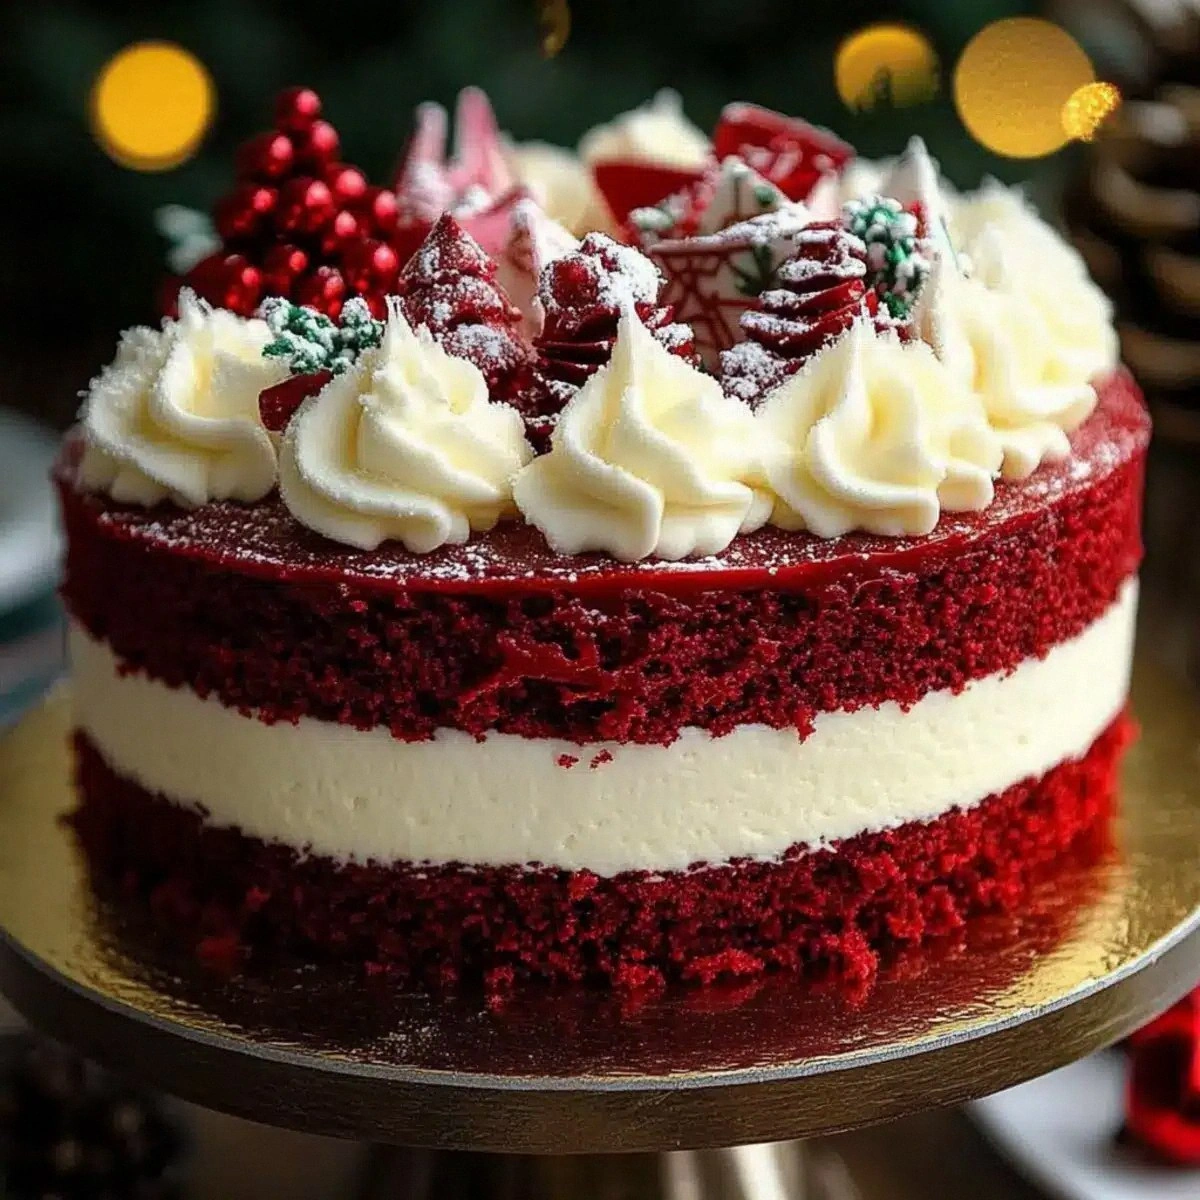
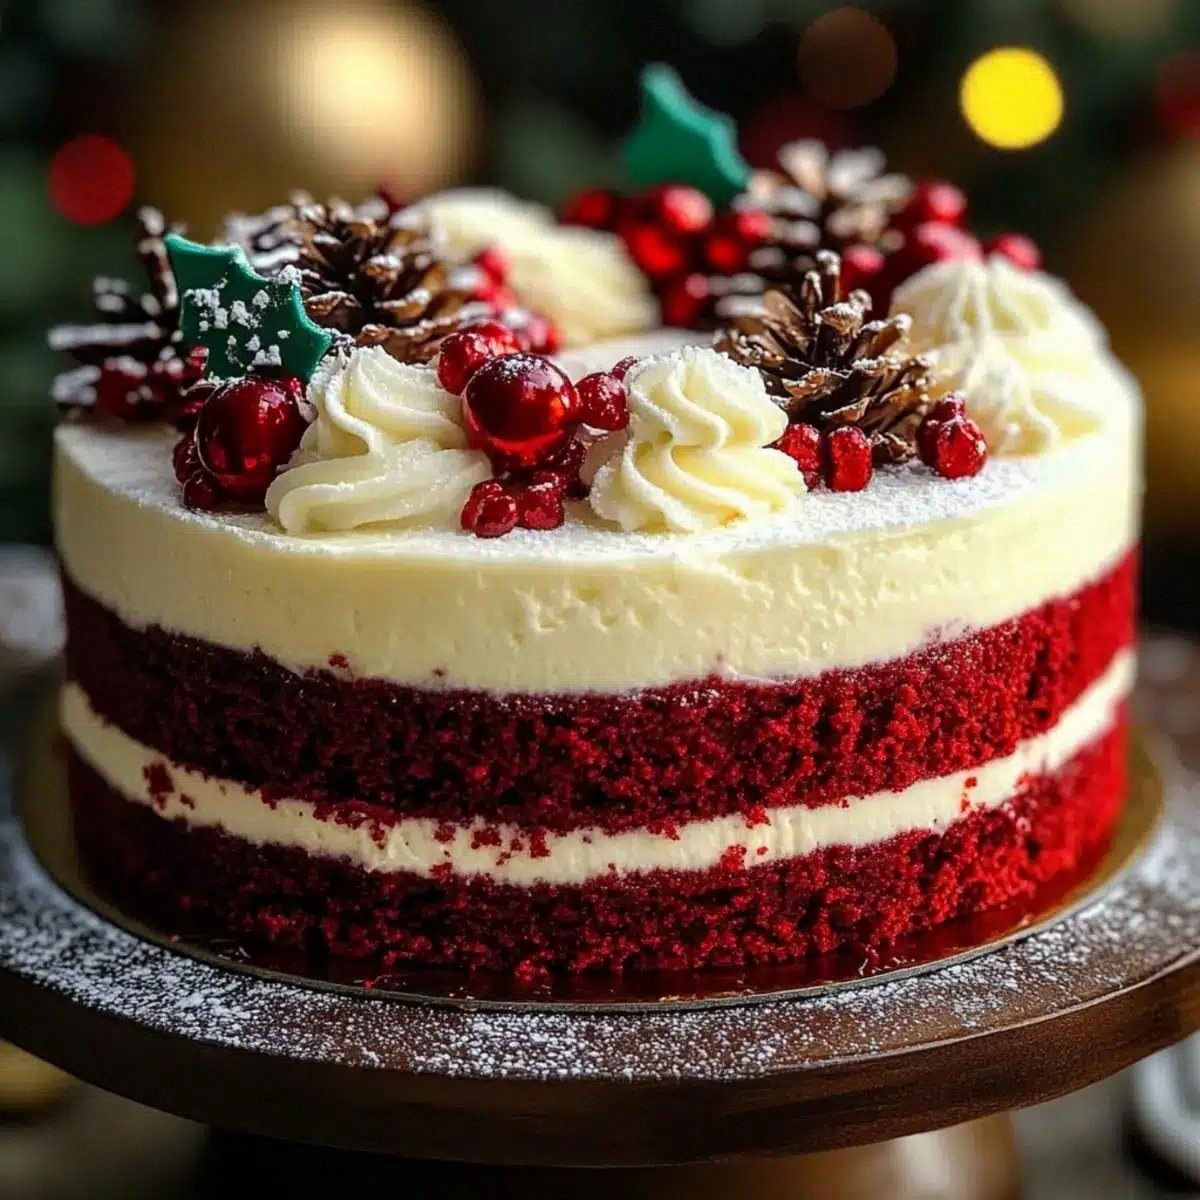
Picture this: a deep, ruby‑red cake that’s as soft as a cloud and as rich as a holiday sweater, layered with a silky cheesecake that melts on your tongue like butter on a warm biscuit. The aroma that fills the kitchen is a heady mix of cocoa, vanilla, and a faint hint of buttery caramel, all wrapped in a whisper of festive spice that makes the whole house feel like a cozy chalet. The first bite is a symphony — the velvety crumb sings, the cheesecake swirls, and the subtle tang from the sour cream cuts through the sweetness like a perfectly timed drum solo. It’s not just a dessert; it’s an experience that makes you feel like you’ve unlocked a secret level of holiday indulgence.
What sets this version apart from every other red velvet cheesecake you’ve ever seen? Most recipes get the balance wrong, either drowning the cake in too much frosting or leaving the cheesecake dry and crumbly. I’ve cracked the code by using a double‑cheese method that gives you a luscious, stable filling, and a buttery crust that holds everything together without turning soggy. The secret weapon? A splash of buttermilk in the cake batter that adds a tender crumb and a subtle tang that makes the red color pop like a Christmas ornament. And the frosting? I’m talking about a whipped cream cheese frosting that’s light enough to float yet decadent enough to satisfy even the most demanding sweet tooth.
Okay, ready for the game‑changer? I’m about to walk you through every single step — from selecting the perfect cream cheese to mastering the art of the perfect swirl on top. By the end, you’ll wonder how you ever made any other version of this dessert. Picture yourself pulling this out of the oven, the whole kitchen smelling incredible, the frosting gleaming under the holiday lights, and your guests lining up for a slice. Let’s dive in and make this the star of your Christmas table.
What Makes This Version Stand Out
- Flavor Fusion: The cake’s cocoa‑kissed crumb meets a tangy cheesecake layer, creating a taste that feels both familiar and thrillingly new.
- Texture Triumph: A buttery, crumbly crust supports a silky, melt‑in‑your‑mouth filling that never cracks, even after chilling.
- Simplicity: Despite the impressive result, the recipe uses pantry staples and requires only one pan, keeping cleanup minimal.
- Unique Twist: The addition of buttermilk in the cake batter gives a tender crumb and a subtle brightness that most red velvet recipes lack.
- Crowd Reaction: I’ve seen grown‑ups and kids alike gasp, “Is that really cheesecake?” and then immediately ask for seconds.
- Ingredient Quality: Using full‑fat cream cheese and real unsalted butter elevates the richness without feeling greasy.
- Cooking Method: Baking the cake and cheesecake together in a water bath ensures even cooking and prevents cracking.
- Make‑Ahead Potential: This dessert can be assembled a day ahead, allowing the flavors to meld and the frosting to set perfectly.
Alright, let's break down exactly what goes into this masterpiece...
Inside the Ingredient List
The Flavor Base
All‑Purpose Flour is the backbone of the cake, providing structure while still allowing the crumb to stay tender. If you swap it for cake flour, you’ll get an even softer texture, but you risk a crumb that’s too delicate to hold the cheesecake weight. I recommend sifting the flour with the cocoa powder and leavening agents to avoid any pockets of dry flour that can create a gritty mouthfeel. When shopping, look for flour that’s fresh — older flour can develop a stale taste that dulls the bright red hue.
The Texture Crew
Unsalted Butter and Cream Cheese are the dynamic duo that give the crust and the filling their luxurious mouthfeel. The butter adds a crisp, buttery edge to the crust, while the cream cheese provides that classic cheesecake tang. If you’re watching calories, you can substitute half of the butter with a light spread, but be prepared for a slightly less rich crust. Always bring both to room temperature before mixing; cold butter will create lumps, and cold cream cheese won’t blend smoothly.
The Unexpected Star
Buttermilk is the secret weapon that most red velvet recipes overlook. Its acidity reacts with the baking soda, creating tiny air pockets that give the cake an airy lift. The tang also balances the sweetness of the sugar and powdered sugar, preventing the dessert from becoming cloying. If you can’t find buttermilk, mix 1 cup of milk with 1 tablespoon of lemon juice and let it sit for 5 minutes — it works just as well.
The Final Flourish
Red Food Coloring is the visual hero that makes this cake scream “Christmas”. I use a gel color rather than liquid to avoid adding extra moisture that could make the crumb soggy. A little goes a long way; start with 2 tablespoons and add more if you want a deeper shade. Remember, the color will intensify as the cake bakes, so aim for a slightly lighter hue than you envision on the plate.
Everything's prepped? Good. Let's get into the real action...
The Method — Step by Step
Preheat your oven to 325°F (165°C) and place a rack in the middle. Grease a 9‑inch springform pan with a thin layer of butter and line the bottom with parchment paper. This prevents the crust from sticking and makes it easier to lift the cheesecake later. Pro tip: Lightly dust the parchment with flour for an extra‑secure grip.
Kitchen Hack: Wrap the outside of the springform pan with a double layer of aluminum foil before adding water for the bain‑marie; this prevents leaks and protects the pan from steam damage.Create the crust: combine 2 cups of all‑purpose flour, 0.5 cups unsweetened cocoa powder, 1 tsp baking powder, 1 tsp baking soda, and 0.5 tsp salt in a large bowl. Whisk until the mixture is uniformly dark and fragrant. In a separate bowl, beat 0.5 cups unsalted butter with 0.75 cups powdered sugar until light and fluffy, about 3 minutes on medium speed. Gradually add the dry ingredients, mixing just until a crumbly dough forms.
Press the dough evenly into the bottom of the prepared springform pan, using the back of a measuring cup to flatten it. The crust should be about ¼‑inch thick and cover the entire base. Bake for 8‑10 minutes, just until it sets and loses any raw flour taste. Let it cool while you prepare the cake batter.
While the crust bakes, whisk together 1.75 cups granulated sugar, 1 cup vegetable oil, and 2 large eggs in a stand mixer on medium speed. The mixture should become glossy and slightly thick, a sign that the sugar is beginning to dissolve. Add 2 tablespoons red food coloring and 1 cup buttermilk, then beat until the color is uniform and the batter looks velvety.
Sift in the remaining 2 cups flour, 0.5 cups cocoa powder, 1 tsp baking powder, 1 tsp baking soda, and 0.5 tsp salt. Fold gently with a spatula, being careful not to over‑mix; over‑mixing will develop gluten and make the cake tough. The batter should be thick but pourable, with a deep ruby hue that makes you want to dive right in.
Prepare the cheesecake layer: In a clean bowl, beat 16 ounces cream cheese (softened) with 0.5 cups sour cream until smooth. Add 0.5 cups unsalted butter and continue beating until the mixture is light and airy. Sprinkle in 0.75 cups powdered sugar and beat until fully incorporated. This creates a silky filling that will set perfectly during baking.
Watch Out: If the cream cheese is even slightly cold, it will create lumps that are impossible to smooth out later. Make sure it’s at room temperature.Combine the batter and the cheesecake mixture: Gently fold the cheesecake layer into the red velvet batter, creating a marbled effect. You want visible ribbons of cheesecake swirling through the batter, but not fully blended. This visual contrast is what makes each slice a work of art.
Pour the combined mixture over the pre‑baked crust, smoothing the top with a silicone spatula. Tap the pan lightly on the counter to release any trapped air bubbles — you’ll hear a faint pop that signals a smooth surface.
Create a water bath: Place the springform pan inside a larger roasting pan, then pour hot water into the larger pan until it reaches about halfway up the sides of the springform. This bain‑marie technique ensures gentle, even heat, which is crucial for preventing cracks in the cheesecake layer.
Bake for 45‑50 minutes, or until the edges are set and the center still has a slight wobble. The top should be a deep, glossy red, and you’ll notice a faint crackle as the cake begins to pull away from the sides of the pan. If you’re using a convection oven, reduce the temperature by 25°F to avoid over‑browning.
While the cake is baking, whip the frosting: In a chilled bowl, beat 8 ounces cream cheese, 0.5 cups unsalted butter, and 2 cups powdered sugar until the mixture is light, fluffy, and free of lumps. Add a splash of vanilla extract for depth, and beat for another minute until the frosting holds soft peaks. This frosting is airy enough to spread easily but dense enough to hold its shape on the cake’s surface.
Kitchen Hack: Add a pinch of cream of tartar to the frosting mixture; it stabilizes the whipped butter and prevents the frosting from weeping.When the cake is done, turn off the oven, crack the door open, and let the cheesecake cool inside for 1 hour. This gradual cooling prevents the dreaded “crack” that can happen when a hot cheesecake meets a cold kitchen. After the hour, remove the pan from the water bath and place it on a wire rack to cool completely.
Once completely cool, run a thin knife around the edge of the springform pan to loosen the cake, then release the latch. This step is crucial for a clean presentation; a stubborn latch can tear the delicate crust.
Spread the whipped cream cheese frosting evenly over the top of the cheesecake, using an offset spatula to create a smooth finish. For a festive touch, pipe a few decorative swirls or dust the surface with a light sprinkling of red cocoa powder. Chill the finished cheesecake for at least 2 hours, preferably overnight, to allow the flavors to meld and the frosting to set.
That’s it — you did it. But hold on, I've got a few more tricks that'll take this to another level...
Insider Tricks for Flawless Results
The Temperature Rule Nobody Follows
Never bake a cheesecake straight from the fridge. Let the batter sit at room temperature for 20‑30 minutes before it hits the oven. This small step ensures the batter heats evenly, reducing the risk of a cracked top. I once tried to skip this and ended up with a cheesecake that looked like a cracked desert floor — not a pretty sight.
Why Your Nose Knows Best
The moment the cake starts to smell toasty, you’re close to done. The fragrance of caramelized sugar and cocoa is a reliable indicator that the interior is set. Trust your senses over the timer; ovens can vary by several minutes.
The 5‑Minute Rest That Changes Everything
After the cake has cooled in the oven, give it a solid 5‑minute rest before moving it to the wire rack. This pause lets the steam settle, which in turn keeps the surface from cracking. It’s a tiny interval that makes a massive difference in the final texture.
Butter‑Boost for the Crust
Melt the butter before mixing it into the crust dough, then let it cool slightly. Warm butter coats the flour particles more evenly, resulting in a crumbly yet sturdy crust that doesn’t crumble when you slice. A friend once used cold butter straight from the fridge and ended up with a crust that fell apart like dry sand.
The Frosting Finish
When spreading the frosting, start from the center and work outward in gentle, circular motions. This technique avoids air pockets and gives the surface a sleek, professional look. If you want extra sparkle, lightly mist the frosting with a fine mist of vodka before chilling; the alcohol evaporates, leaving a glossy sheen.
Creative Twists and Variations
This recipe is a playground. Here are some of my favorite ways to switch things up:
White Chocolate Raspberry Swirl
Swap half of the powdered sugar in the frosting for melted white chocolate, then fold in a raspberry coulis before spreading. The tart raspberry cuts through the sweetness, while the white chocolate adds a silky richness. Perfect for guests who love a fruity contrast.
Mocha Madness
Add 2 teaspoons of instant espresso powder to the cake batter and replace half of the cocoa powder with finely ground coffee beans. The result is a deep, coffee‑infused red velvet that pairs beautifully with the cheesecake’s tang.
Nutty Crunch
Incorporate ½ cup of toasted chopped pecans into the crust mixture for a buttery crunch. The nuts add texture and a subtle earthy flavor that complements the chocolatey cake.
Spiced Holiday
Stir ½ teaspoon of ground cinnamon, a pinch of nutmeg, and a dash of clove into the batter. The warm spices give the dessert a festive aroma that evokes mulled wine and gingerbread without overpowering the classic red velvet taste.
Vegan Friendly
Replace the cream cheese with a vegan cream cheese alternative, use coconut oil instead of butter, and swap the eggs for a flax‑egg mixture (2 tbsp ground flaxseed + 6 tbsp water). The texture stays creamy, and the flavor remains true to the original.
Storing and Bringing It Back to Life
Fridge Storage
Cover the cheesecake loosely with plastic wrap and store it in the refrigerator for up to 5 days. The frosting may firm up a bit, but a quick room‑temperature sit for 20 minutes before serving restores its softness.
Freezer Friendly
Wrap the entire springform pan in a double layer of aluminum foil, then place it inside a freezer‑safe bag. The cheesecake freezes well for up to 2 months. Thaw overnight in the fridge, then let it sit at room temperature for 30 minutes before serving.
Best Reheating Method
If you need to warm a slice, place it on a microwave‑safe plate, add a tiny splash (about a teaspoon) of water around the edges, and microwave on low for 10‑15 seconds. The steam created revives the frosting’s creaminess and softens the crumb without drying it out.