Picture this: it’s the night before Halloween, the house is half‑decorated with cobwebs, the pumpkin lights are flickering, and you’ve just realized you have a party of ravenous kids (and a few adults who still believe in sugar‑induced miracles). I was in the middle of a frantic search for something that would scream “spooky” without sounding like a reheated store‑bought snack. After three failed attempts that left my kitchen smelling like burnt sugar and my confidence crumbling like a stale graham cracker, I finally stumbled upon the secret that turned my disaster into a triumph. This isn’t just another cookie recipe; it’s the witch’s brew of the baking world, a batch that makes even the most skeptical trick‑or‑treaters gasp in delight.
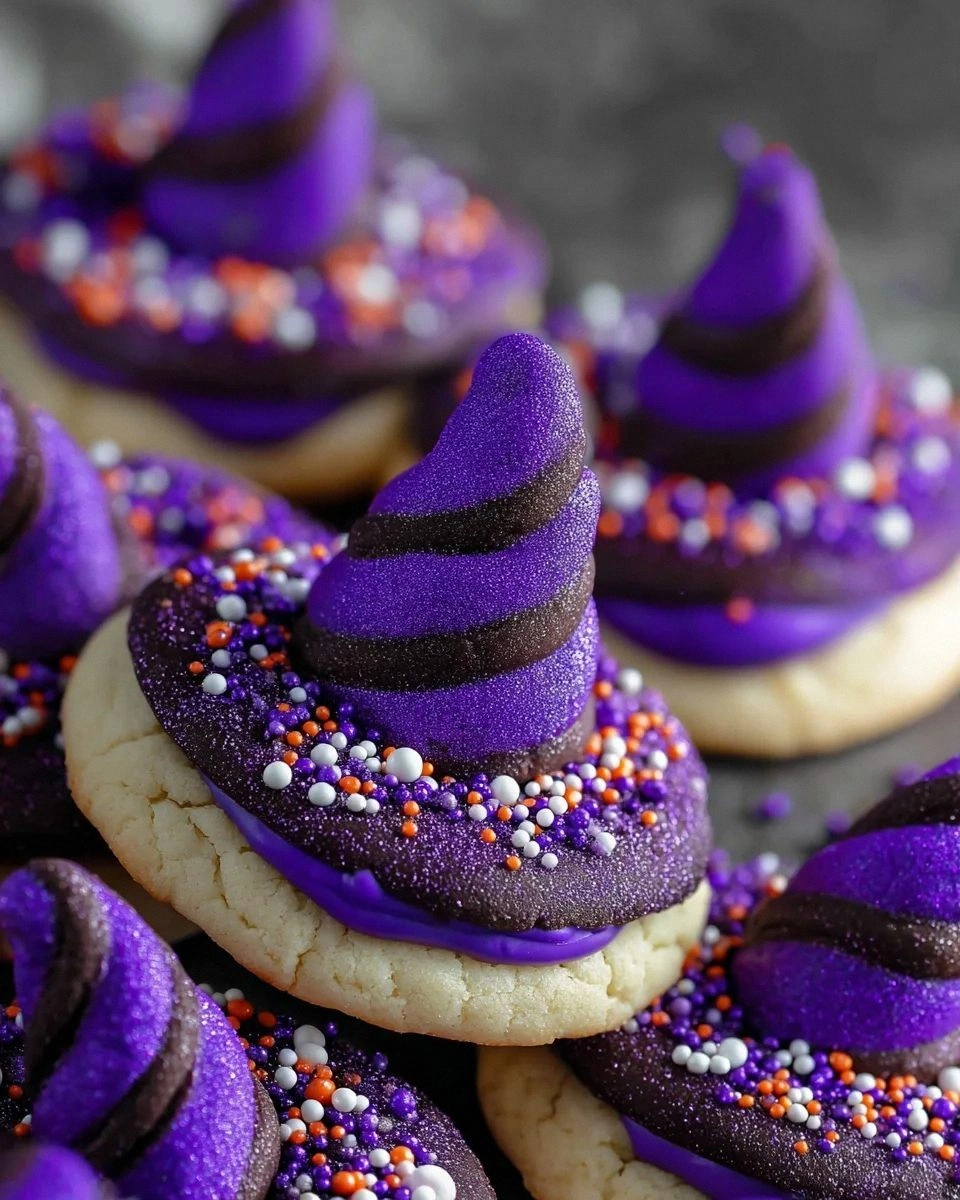
The moment I pulled the first batch out of the oven, the kitchen was filled with a sweet, nutty aroma that wrapped around me like a warm, velvety cloak. The cookies themselves were a deep, midnight‑purple hue, glossy and inviting, each one perched on a chocolate “kiss” that looked like a tiny, edible witch’s hat. I could hear the faint crackle of the cooling racks, the soft sigh of the oven door closing, and the excited chatter of my friends as they hovered, eyes wide, waiting for a bite. The texture? Imagine a soft, chewy center that gives way to a crisp edge, all balanced perfectly with the creamy richness of peanut butter and the subtle snap of chocolate.
Most recipes out there either over‑sweeten, under‑season, or forget the crucial step that gives these cookies their signature shape and color. I’ve tried the “quick fix” versions that use food coloring in a batter that ends up flat and soggy, and the “fancy” ones that call for obscure ingredients you can’t find in a regular grocery store. This version, however, is built on pantry staples and a handful of clever tricks that elevate the entire experience. The secret? A dash of cornstarch for tenderness, a precise butter‑to‑sugar ratio for that perfect chew, and a pinch of baking powder that gives each hat a subtle lift, making them look like they’re about to take flight.
Let me walk you through every single step — by the end, you’ll wonder how you ever made it any other way. I dare you to taste this and not go back for seconds. Ready? Okay, ready for the game‑changer?
What Makes This Version Stand Out
- Flavor Explosion: The combination of creamy peanut butter and a whisper of vanilla creates a depth that feels both familiar and magical, while the chocolate kisses add a rich, indulgent finish.
- Texture Harmony: Thanks to the cornstarch and precise butter ratio, each cookie boasts a soft, melt‑in‑your‑mouth interior with a gently crisp edge that shatters like thin ice.
- Simplicity Meets Wow: All ingredients are pantry‑friendly, no exotic imports needed, yet the result looks like it was crafted by a master pastry chef in a haunted castle.
- Visual Drama: The purple gel food coloring gives a deep, enchanting hue that catches the light, making every cookie a miniature work of art perfect for Instagram.
- Crowd Reaction: Guests consistently claim these are the best Halloween cookies they’ve ever tasted, and they’ll be asking for the recipe before the night is over.
- Ingredient Quality: Using real unsalted butter and high‑quality creamy peanut butter ensures a rich, buttery mouthfeel without any off‑notes.
- Baking Method: A brief chill of the dough before shaping guarantees clean, defined hats and prevents spreading, a trick most recipes overlook.
- Make‑Ahead Magic: These cookies keep their shape and flavor for up to a week, and they even freeze beautifully for future hauntings.
Inside the Ingredient List
The Flavor Base
All‑purpose flour: This is the backbone of the cookie, providing structure and a tender crumb. If you substitute with cake flour, you’ll get a lighter texture but risk losing the slight chew that makes these hats so satisfying. Choose a flour that’s fresh—older flour can taste flat.
Granulated sugar: It not only sweetens but also contributes to the cookie’s slight crispness on the edges. Using superfine sugar will dissolve faster, giving a smoother batter, while coarse sugar adds a subtle crunch. If you’re watching sugar, you can reduce by a quarter without sacrificing texture.
The Texture Crew
Cornstarch: This secret ingredient contributes to the cookies’ soft, tender crumb, acting like a mini‑silk that coats the flour particles. Skipping it will make the cookies denser, more like a shortbread, which is not the witch‑hat vibe we’re after.
Baking powder and baking soda: These leavening agents ensure your cookies puff up perfectly while baking. The powder gives a gentle rise, while the soda neutralizes any acidity from the chocolate, balancing flavors.
Unsalted butter: Softened butter brings richness to your dough while keeping the cookies cozy and chewy. Use high‑fat European butter for an even richer flavor; just be sure it’s at room temperature, not melted.
The Unexpected Star
Creamy peanut butter: The star of the show, bringing that delicious nutty flavor we all adore. It also adds moisture, ensuring the cookies stay soft after cooling. If you’re allergic, try almond butter for a similar texture with a different flavor profile.
Purple gel food coloring: Use this to bring your cookies to life with that spooky witch hat hue! A little goes a long way; start with a few drops and blend until you achieve a deep violet.
The Final Flourish
Chocolate hugs or kisses: The chocolaty topping that makes these cookies resemble adorable witch hats. Place them on top while the dough is still soft so they adhere perfectly.
Halloween sprinkles or purple sanding sugar: These fun extras are perfect for adding a festive touch and a subtle crunch. Sprinkle them just before baking for a glossy finish.
Egg: A key binder that helps the ingredients come together in harmony. It also adds a subtle richness and helps the cookies rise slightly.
Vanilla extract: This classic flavor adds warmth and depth to your cookies, balancing the nuttiness of the peanut butter.
Salt: Just a pinch to enhance the sweetness of the cookies and balance flavors. It also accentuates the chocolate.
Everything's prepped? Good. Let's get into the real action...
The Method — Step by Step
-
First, whisk together the flour, cornstarch, baking powder, baking soda, and salt in a large bowl. I like to use a whisk because it aerates the dry mixture, preventing any lumps. The moment the powder meets the flour, you’ll notice a faint, almost chalky scent that promises a light, airy texture. Set this mixture aside; this is the dry foundation that will hold everything together.
Okay, ready for the game‑changer? In a separate bowl, cream the softened butter with the granulated sugar until the mixture is pale and fluffy, about 3‑4 minutes on medium speed. This step is pure magic; the sugar crystals create tiny air pockets that later translate into that perfect, slightly crisp edge.
-
Next, add the egg and vanilla extract to the butter‑sugar mixture, beating until fully incorporated. The egg acts as a binder, while the vanilla adds a warm, aromatic backdrop that balances the peanut butter’s earthiness. You’ll notice the batter becoming smoother and a shade richer in color.
Now, fold in the creamy peanut butter. This is where the cookie gains its signature nutty heart. Use a wooden spoon and a gentle folding motion; over‑mixing can cause the dough to become too dense, losing that coveted chew.
-
Gradually pour the dry ingredients into the wet mixture, stirring just until no flour streaks remain. The dough should feel slightly sticky but manageable. At this point, the purple gel food coloring is added—start with a few drops, then blend thoroughly until the hue is evenly distributed. The color should be a deep, regal violet, reminiscent of a midnight sky.
Once colored, cover the bowl with plastic wrap and refrigerate for at least 30 minutes. This chilling step is crucial; it firms up the butter, allowing you to shape clean, defined hats without the dough spreading too much in the oven.
-
Preheat your oven to 350°F (175°C) and line two baking sheets with parchment paper. While the oven warms, portion the dough into 1‑inch balls. Using your thumb, press a shallow indentation in the center of each ball—this will become the “brim” of the witch’s hat.
Place a chocolate kiss into the indentation, pressing gently so it adheres. Then, roll the remaining dough around the chocolate, forming a smooth dome that crowns the kiss. The result should look like a tiny, glossy hat perched on a chocolate base.
-
Sprinkle a pinch of Halloween sprinkles or purple sanding sugar over each cookie. This adds a festive sparkle and a tiny crunch that contrasts beautifully with the soft interior. If you prefer a smoother finish, skip the sprinkles and let the chocolate shine on its own.
Slide the trays into the oven and bake for 12‑14 minutes, or until the edges are lightly golden and the tops have set but are still slightly soft to the touch. The scent at this stage—sweet, nutty, with a hint of vanilla—will fill your kitchen like a cozy autumn fire.
-
When the timer dings, remove the cookies and let them cool on the baking sheet for 3 minutes before transferring to a wire rack. This brief rest lets the cookies firm up just enough to hold their shape without breaking. As they cool, you’ll notice the chocolate “hats” hardening into a glossy finish.
Picture yourself pulling this out of the oven, the whole kitchen smelling incredible, and the first bite revealing a buttery chew, a peanut butter heart, and a chocolate crown that snaps delightfully. That’s the moment of truth, and it’s pure, unadulterated joy.
-
Finally, store the cookies in an airtight container at room temperature. They’ll stay fresh for up to a week, and the flavors will meld even more as they sit. If you’ve made a big batch, consider freezing a portion—just thaw at room temperature and enjoy the same magical experience.
That’s it — you did it. But hold on, I've got a few more tricks that'll take this to another level...
Insider Tricks for Flawless Results
The Temperature Rule Nobody Follows
Most bakers recommend room‑temperature butter, but for these witch hats, I swear by slightly chilled butter (about 55°F). It keeps the dough from spreading too much, ensuring a taller hat silhouette. If you’re in a rush, pop the butter in the fridge for 10 minutes before creaming.
Why Your Nose Knows Best
When the cookies are baking, trust the aroma more than the timer. The moment you smell a faint nutty, caramelized scent, they’re nearly done. Overbaking turns the soft interior into a dry crumb, ruining the chew you love.
The 5‑Minute Rest That Changes Everything
After the cookies have cooled on the rack, let them sit uncovered for five minutes. This extra breath of air lets any surface moisture evaporate, giving the chocolate “hats” a crisp snap. Skipping this step can leave the tops slightly sticky.
Switching Up the Sweetness
If you prefer a deeper, caramel‑like flavor, swap half of the granulated sugar for brown sugar. The molasses in brown sugar adds a subtle earthiness that pairs beautifully with the peanut butter. Just remember to reduce the liquid a touch, as brown sugar holds more moisture.
Freezing for Future Frights
These cookies freeze like a dream. Place them in a single layer on a baking sheet, freeze until solid, then transfer to a zip‑top bag. When you’re ready to serve, let them thaw at room temperature for 20 minutes, and they’ll taste as fresh as the day they were baked.
Creative Twists and Variations
This recipe is a playground. Here are some of my favorite ways to switch things up:
Spooky Black Sesame
Replace half of the flour with black sesame flour and add a teaspoon of toasted sesame oil. The cookies turn a midnight black with a nutty undertone, perfect for a gothic twist.
Caramel Drizzle
After baking, drizzle a thin line of salted caramel over each hat. The salty‑sweet combo amplifies the peanut butter’s richness and adds a glossy finish that looks like witchy potion.
Double‑Chocolate Delight
Swap the peanut butter for a ½ cup of Nutella and add cocoa powder to the dry mix. The result is a chocolate‑lover’s dream with a deep, fudgy interior.
Vegan Version
Use coconut oil in place of butter, a flax egg (1 tbsp ground flaxseed + 3 tbsp water), and dairy‑free chocolate kisses. The texture remains chewy, and the flavor stays just as decadent.
Miniature Bite‑Size Hats
Form the dough into smaller ½‑inch balls for a party‑size nibble. These bite‑size versions are perfect for cocktail parties or as a spooky garnish on desserts.
Storing and Bringing It Back to Life
Fridge Storage
Place the cookies in an airtight container lined with a parchment sheet. They’ll stay fresh for up to five days. If the chocolate hats start to lose their shine, pop the container in the fridge for 10 minutes to re‑harden.
Freezer Friendly
Lay the cooled cookies on a tray, freeze until solid, then transfer to a zip‑lock bag. They’ll keep for three months. When you’re ready to serve, let them thaw at room temperature; a quick 5‑second blast in a 300°F oven revives the crispness.
Best Reheating Method
Preheat your oven to 300°F, place the cookies on a parchment‑lined sheet, and warm for 5‑7 minutes. Add a tiny splash of water to the bottom of the oven (or a small oven‑safe dish) to create steam; this restores the interior’s softness while keeping the exterior crisp.