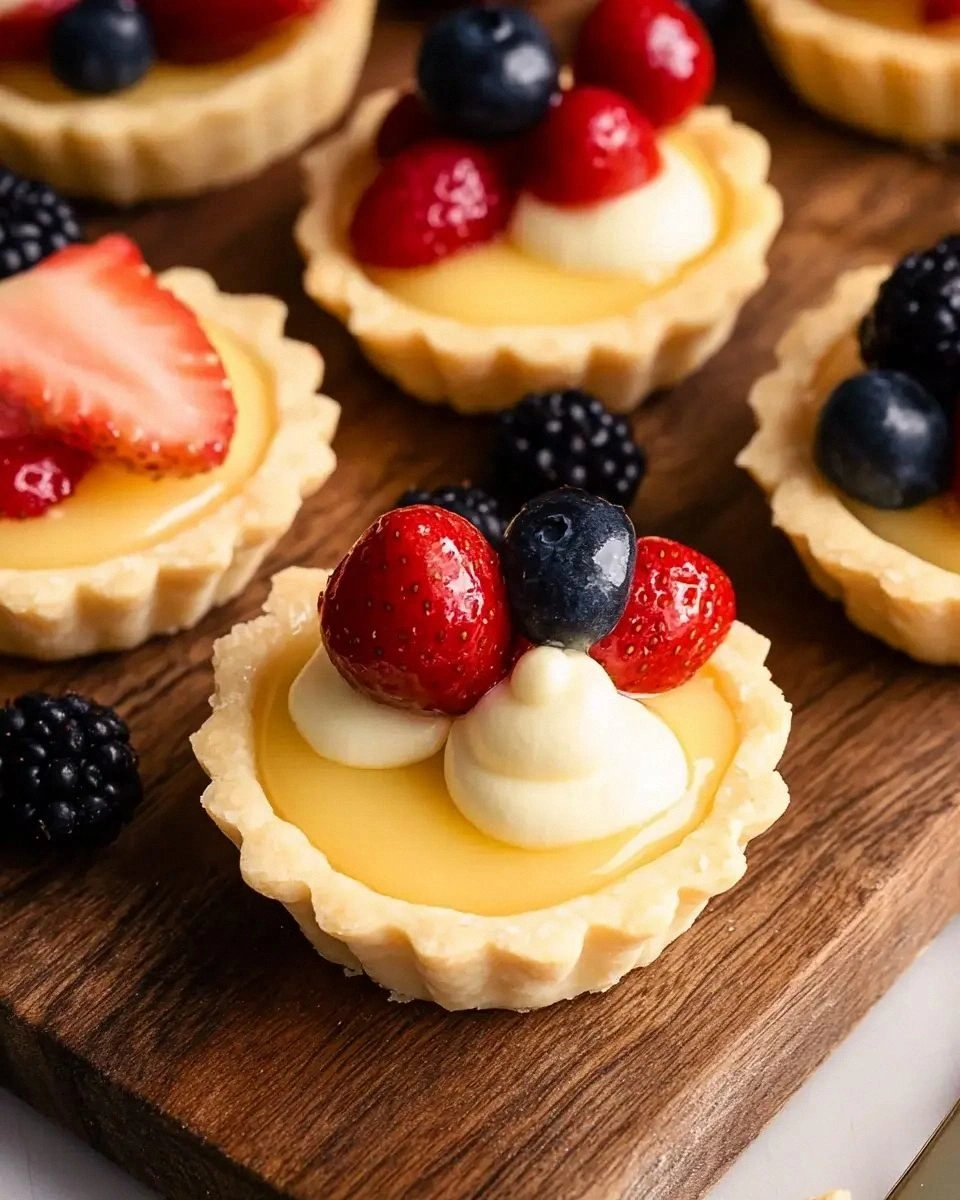
I was standing in my kitchen, staring at a half‑baked batch of ordinary store‑bought tarts that had somehow managed to taste like cardboard, when my roommate dared me to create something that would make even the most skeptical sweet‑tooth swoon. The challenge was simple: make mini fruit tarts that are so fresh, so buttery, and so visually stunning that they could pass for a bakery masterpiece, yet are so easy that even a sleep‑deprived college student could pull them off. I could already hear the crunch of the crust, the whisper of whipped cream, and the burst of juicy berries before I even mixed the first ingredient. The kitchen filled with the scent of melted butter and toasted flour, a perfume that promised indulgence and a hint of nostalgia for summer picnics. This version stands out because it flips the script on typical tart recipes—no fancy pastry bag, no temperamental dough, just a few pantry staples and a secret technique that turns the crust into a buttery cloud that holds its shape like a tiny fortress.
Picture yourself pulling these golden‑brown beauties out of the oven, the whole kitchen smelling like a buttery dream, while the colorful fruit crowns glisten like tiny jewels under the kitchen light. The first bite is a symphony: the crust shatters with a crisp that echoes the sound of fresh snow underfoot, the creamy filling spreads silkily across your tongue, and the fruit explodes with a brightness that feels like a sunrise in a bite‑size cup. I dare you to taste this and not go back for seconds; the combination of textures and flavors is engineered to keep you reaching for more. Most recipes get this completely wrong—either the crust is soggy, the filling too sweet, or the fruit wilts before it even gets a chance to shine. Here’s what actually works: a simple cream cheese‑based filling that stabilizes the tart, a butter‑laden crust that stays crisp, and a topping of fresh fruit added at the perfect moment.
I’ll be honest — I ate half the batch before anyone else got to try it, and that’s the only crime I’m willing to confess. The secret? A quick chill of the crust dough before baking, which locks in that buttery flakiness, and a gentle fold‑in of powdered sugar that keeps the crust light without sacrificing structure. This isn’t just a recipe; it’s a confidence boost for anyone who’s ever felt intimidated by pastry. If you’ve ever struggled with crumbly bases or soggy tops, you’re not alone — and I’ve got the fix. Okay, ready for the game‑changer? Let me walk you through every single step — by the end, you’ll wonder how you ever made it any other way.
What Makes This Version Stand Out
- Flavor Harmony: The subtle tang of cream cheese balances the sweet powdered sugar, creating a backdrop that lets the fresh fruit truly shine without being overwhelmed.
- Texture Contrast: A crisp, buttery crust meets a velvety, light filling, topped with juicy fruit that adds a burst of moisture—each bite is a multi‑layered experience.
- Simplicity: No special equipment required; a simple muffin tin and a whisk are all you need to achieve bakery‑level results.
- Unique Twist: The crust includes a splash of powdered sugar that gives it a delicate sweetness and a pale ivory hue, setting it apart from traditional golden tarts.
- Crowd Reaction: These mini tarts have a habit of disappearing within minutes at parties, earning you the title of “Dessert Hero” among friends.
- Ingredient Quality: Using real butter and fresh mixed fruit elevates the flavor profile, making each component sing in harmony.
- Cooking Method: The chill‑then‑bake technique ensures the crust stays flaky, while the quick bake preserves the fruit’s bright color and texture.
- Make‑Ahead Potential: Assemble the crusts a day ahead, store them airtight, and add the fresh fruit just before serving for ultimate convenience.
Alright, let's break down exactly what goes into this masterpiece...
Inside the Ingredient List
The Flavor Base
All‑purpose flour is the backbone of the crust, providing structure while allowing the butter to coat each particle like a delicate veil. If you substitute cake flour, the crust becomes overly tender and may crumble, while whole‑wheat flour adds a nutty note but can make the texture too dense. For the best results, sift the flour with the powdered sugar to aerate it, ensuring a light, airy crumb. I always recommend a brand that’s unbleached and protein‑balanced, as it yields the most consistent bite.
The Sweet Whisper
Powdered sugar appears twice in this recipe—once in the crust and once in the cream cheese filling—acting like a sweet whisper that never overwhelms. The fine texture dissolves instantly, preventing any gritty feel. If you’re out of powdered sugar, you can blitz granulated sugar in a blender for a few seconds; just be sure to sift it to avoid clumps. This dual‑use of powdered sugar is what gives the crust its pale, elegant hue and the filling its silkiness.
The Texture Crew
Unsalted butter is the star of the crust, delivering that melt‑in‑your‑mouth richness. Using unsalted butter lets you control the salt level precisely, preventing the crust from becoming overly salty. If you’re looking for a dairy‑free alternative, try a high‑fat coconut oil, but expect a subtle coconut aroma that will change the flavor profile. The 1/2 cup amount is crucial; too little and the crust will be dry, too much and it will spread excessively.
The Unexpected Star
Cream cheese in the filling adds a tang that cuts through the sweetness, giving the tarts a sophisticated edge. Skipping it would leave the filling one‑dimensional and overly sugary. For a lighter version, you can substitute part of the cream cheese with Greek yogurt, but keep the total volume the same to maintain the structure. The 1/4 cup amount is just enough to provide that silky texture without making the filling too heavy.
The Final Flourish
Mixed fresh fruit brings the final burst of color and natural sweetness. Choose seasonal berries, kiwi, mango, or even stone fruits—anything that’s ripe and vibrant. If you’re using frozen fruit, thaw and pat dry thoroughly; excess moisture will sog the crust. The 2‑cup quantity ensures each tart gets a generous crown, making the presentation as impressive as the taste.
Everything's prepped? Good. Let's get into the real action...
The Method — Step by Step
In a large mixing bowl, whisk together 1 cup of all‑purpose flour and 1/4 cup powdered sugar until they are fully combined. The mixture should look pale and slightly fluffy, a sign that the sugar is evenly distributed. Pro tip: Sifting at this stage adds air, which translates to a lighter crust. This is the moment of truth—if you feel a faint sweet aroma, you’re on the right track. Once mixed, set the bowl aside while you prep the butter.
Cut 1/2 cup unsalted butter into small cubes and add them to the flour‑sugar blend. Using a pastry cutter or two forks, work the butter into the dry ingredients until the mixture resembles coarse crumbs, with some pea‑sized pieces remaining. Kitchen Hack: If you have a food processor, pulse on low for 5‑7 seconds—just enough to coat, not to melt. The texture should feel dry but hold together when you press a handful between your fingers. This is the base that will become the buttery crust.
Add 1/4 teaspoon salt and a pinch of extra powdered sugar if you prefer a sweeter crust. Mix gently, then drizzle 1 tablespoon of cold water (or a splash of heavy cream) over the mixture and bring it together with your hands, just until a cohesive dough forms. Watch Out: Adding too much liquid will make the dough sticky and cause spreading during baking. The dough should be pliable but not wet. Form it into a disc, wrap in plastic, and refrigerate for at least 30 minutes.
While the dough chills, prepare the filling. In a medium bowl, beat 1/4 cup cream cheese until smooth, then gradually add 1/2 cup powdered sugar, whisking until fully incorporated. Add 1 teaspoon vanilla extract and continue mixing until the mixture is light and airy. Finally, fold in 1 cup whipped cream, being careful not to deflate it—this will give the filling a cloud‑like lift. The filling should be glossy and hold its shape when piped.
Preheat your oven to 350°F (175°C). Lightly grease a mini muffin tin or line it with silicone liners. Remove the dough from the fridge, unwrap, and on a lightly floured surface, roll it out to about 1/4‑inch thickness. Using a 3‑inch round cutter, press circles into the dough and gently fit each circle into a muffin cup, pressing lightly to form a shallow crust.
Bake the crusts for 12‑15 minutes, or until the edges turn a light golden brown and you can smell that buttery aroma. The tops should be set but not overly dark. Power transition: This is the part where the crust gains its signature crispness. Once done, let them cool in the tin for 5 minutes, then transfer to a wire rack to cool completely.
While the crusts cool, give the fruit a quick toss with a drizzle of honey or a sprinkle of extra powdered sugar if you like extra shine. This step adds a glossy finish and a subtle sweetness that balances the tang of the cream cheese. If you’re using berries, gently pat them dry to avoid excess moisture.
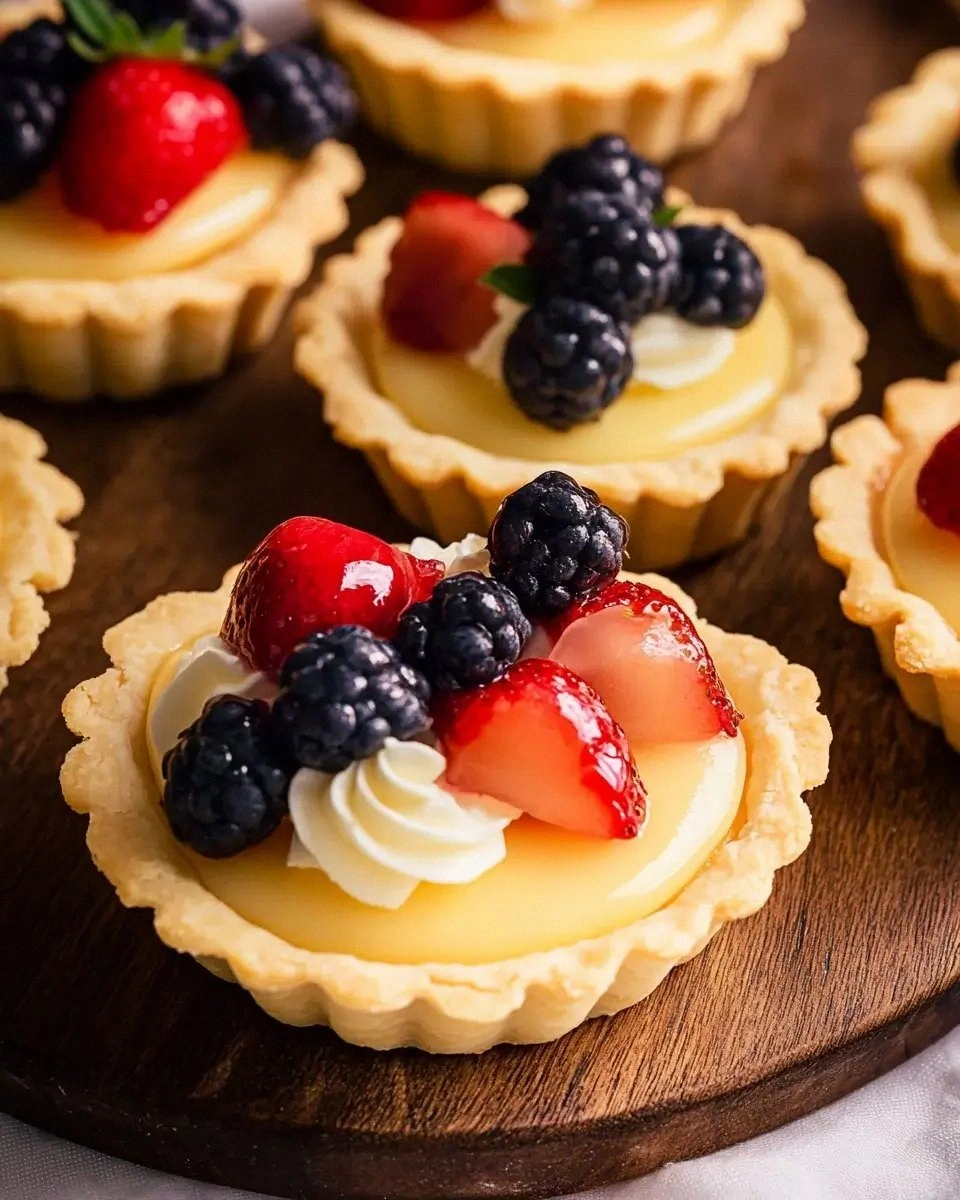
Once the crusts are completely cool, pipe or spoon a generous dollop of the cream cheese filling into each tart, smoothing the top with the back of a spoon. The filling should sit just below the rim, creating a shallow well for the fruit. Watch Out: Overfilling can cause the crust to crack when the fruit is added.
Arrange the mixed fresh fruit on top of each tart, creating a vibrant mosaic. Press lightly so the fruit adheres to the filling, but don’t squash the berries. The colors should pop, making each tart look like a miniature work of art. Finally, give the entire tray a brief chill in the fridge for 10 minutes to set everything together.
That's it — you did it. But hold on, I've got a few more tricks that'll take this to another level...
Insider Tricks for Flawless Results
The Temperature Rule Nobody Follows
Never bake a crust straight from the freezer; the sudden temperature shock can cause the butter to separate, leading to uneven browning. Instead, let the dough rest at room temperature for 5 minutes after chilling, just enough to make it pliable but still cold. This ensures the crust spreads evenly and develops those coveted buttery edges. A friend once skipped this step and ended up with a soggy base that fell apart the moment she added fruit. Trust the chill, then give it a brief warm‑up before baking.
Why Your Nose Knows Best
Your sense of smell is a reliable indicator of doneness. When the crust starts to emit a nutty, toasted butter aroma, you’re within a minute of perfect golden edges. If you rely solely on time, you might over‑bake and end up with a dry, bitter crust. I always hover over the oven, inhaling deeply; that sweet, buttery scent tells me to pull the tray out. This sensory shortcut saves you from guessing and guarantees consistent results.
The 5‑Minute Rest That Changes Everything
After baking, let the crusts rest on a wire rack for exactly five minutes before filling. This short pause allows the steam to escape, preventing the crust from becoming soggy when the moist filling hits it. Skipping this rest can trap steam, making the bottom soggy—a common pitfall for novice bakers. The five‑minute rule is a tiny habit that yields a dramatically crisper base.
Fruit Prep Precision
Cut fruit into uniform bite‑size pieces; this ensures even distribution of juice and prevents one tart from becoming a soggy mess while another stays dry. Toss the fruit lightly with a teaspoon of cornstarch if you’re using particularly juicy berries; this will absorb excess liquid without altering flavor. A friend once piled whole strawberries on top, and the tart turned into a mushy puddle within minutes. Precision in fruit size keeps the texture balanced.
The Cream Cheese Whisper
When beating the cream cheese, start on low speed and gradually increase; this prevents the mixture from becoming grainy. Adding a splash of heavy cream (about a tablespoon) can make the filling even silkier, but be careful not to make it runny. I once added too much cream and the filling leaked into the crust, ruining the crispness. The secret is a smooth, glossy texture that holds its shape.
Creative Twists and Variations
This recipe is a playground. Here are some of my favorite ways to switch things up:
Chocolate‑Infused Crust
Replace 2 tablespoons of the flour with cocoa powder and add a dash of espresso powder for depth. The resulting crust has a subtle mocha flavor that pairs beautifully with raspberries and a hint of orange zest.
Tropical Sunrise
Swap the mixed berries for diced mango, pineapple, and kiwi, and drizzle a light lime‑honey glaze over the top. The tangy lime cuts through the sweet cream cheese, delivering a beach‑vacation vibe in every bite.
Nutty Crunch
Fold finely chopped toasted almonds or pistachios into the crust dough before baking. The nuts add a delightful crunch and a buttery undertone that complements the fruit.
Spiced Autumn
Incorporate a pinch of cinnamon and nutmeg into the crust, and use sliced apples and pears tossed in caramel sauce as the topping. This variation is perfect for a cozy fall gathering.
Savory Sweet Fusion
Add a drizzle of balsamic reduction over strawberries and sprinkle crumbled goat cheese on the filling before topping with fruit. The salty‑sweet contrast turns the tarts into an elegant appetizer.
Storing and Bringing It Back to Life
Fridge Storage
Place the assembled tarts in an airtight container and refrigerate for up to 48 hours. The crust will retain its crispness thanks to the chilled environment, while the filling stays firm. If you notice a slight softening, pop the container in the fridge for an extra 15 minutes before serving.
Freezer Friendly
Freeze the baked crusts separately from the filling. Wrap each crust tightly in plastic wrap, then place them in a freezer‑safe bag for up to 2 months. When ready to serve, thaw at room temperature for 20 minutes, then add the fresh filling and fruit.
Best Reheating Method
To revive a slightly softened crust, preheat the oven to 300°F (150°C), place the tarts on a baking sheet, and warm for 5‑7 minutes. Add a tiny splash of water (about a teaspoon) to the tray before reheating; the steam will rejuvenate the crust without drying out the fruit. This trick brings the tarts back to that just‑baked perfection.