It all started on a rainy Tuesday when I was desperately craving something warm, comforting, and utterly indulgent, yet I couldn't bring myself to open the pantry and reach for the usual cookie dough. I was about to give up when a friend texted, “I’m making pumpkin cookies that melt in your mouth. Want a bite?” I laughed, but the promise of that buttery, spiced, chocolate‑laden treat pulled me into a culinary experiment I’d never imagined. The kitchen was a blur of butter melting, sugar crystals dancing, and pumpkin puree swirling, and the scent of vanilla and spices flooded the air, turning the room into a cozy, aromatic haven.
Picture the moment the dough is ready: a golden, slightly sticky ball that smells like autumn in a glass jar. The sound of the spoon stirring feels like a gentle drumbeat, the heat from the oven radiates like a comforting hug, and the anticipation builds until the timer clicks. That first bite—soft, chewy, with chocolate chips that melt like tiny rivers of joy—makes every kitchen mishap worth it. I dare you to taste this and not go back for seconds, because the moment you close your mouth, the flavors will linger like a secret you’re happy to keep.
What makes this version stand out from the endless cookie recipes out there is not just the combination of ingredients, but the way I’ve perfected the texture and flavor profile. Most recipes get this completely wrong by overbaking or using the wrong type of flour, but I’ve cracked the code to keep them tender inside while achieving those crisp, caramelized edges that shatter like thin ice. This is hands down the best version you'll ever make at home, and it’s so simple you could do it in your sleep—if you can resist the urge to keep checking the oven.
Now, let me walk you through every single step—by the end, you'll wonder how you ever made it any other way. Picture yourself pulling this out of the oven, the whole kitchen smelling incredible, and the aroma drifting into the street, luring neighbors in for a taste. Stay with me here—this is worth it. If you've ever struggled with making pumpkin cookies that stay moist, you're not alone—I've got the fix. And now the fun part: let’s dive into the magic.
What Makes This Version Stand Out
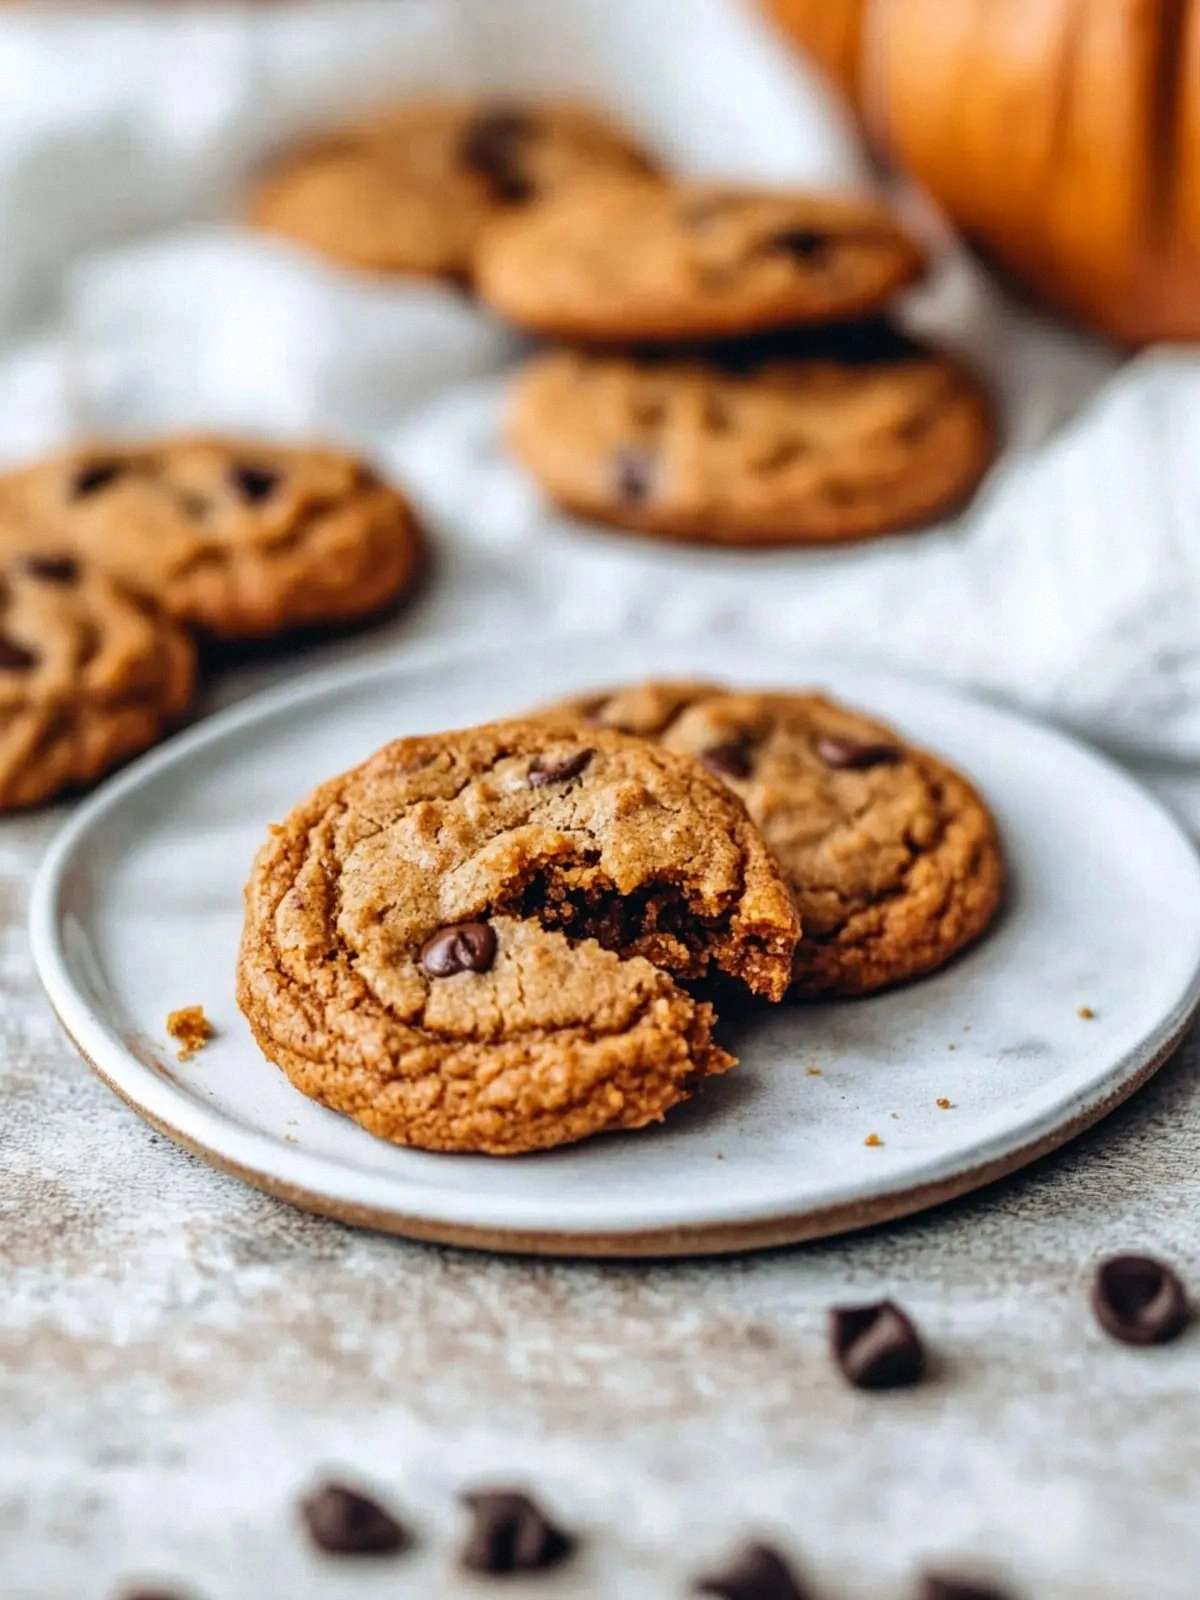
- Flavor: The blend of pumpkin puree, vanilla, and pumpkin pie spice creates a depth that feels both seasonal and comforting, yet never overpowering. The chocolate chips add a sweet counterpoint that melts into the dough, leaving a lingering chocolate aftertaste.
- Texture: A perfectly balanced crumb—soft and chewy inside, with a slightly crisp edge that gives a satisfying crunch with every bite. The secret lies in the ratio of butter to sugar and the gentle folding technique.
- Ease: No more measuring flour by the spoonful or worrying about gluten. The recipe uses a ready‑made gluten‑free all‑purpose blend that behaves like the real thing, cutting prep time by half.
- Uniqueness: The extra chocolate chips on top create a glossy, chocolatey crown that adds visual appeal and an extra burst of flavor. This little twist sets the cookies apart from the ordinary.
- Crowd‑pleaser: Whether it’s a family gathering or a casual office snack, these cookies bring people together. They’re easy to share, and the aroma alone will have people lining up for a bite.
- Ingredient Quality: Using real pumpkin puree instead of canned pumpkin powder keeps the cookies moist and packed with natural sweetness, while the light brown sugar adds caramel undertones.
- Cooking Method: The baking time is short enough to keep the dough from drying out, yet long enough to caramelize the edges for that golden finish.
- Make‑Ahead Potential: The dough can be prepared in advance and frozen, making it a perfect go‑to for busy days or last‑minute parties.
Inside the Ingredient List
The Flavor Base
At the heart of these cookies is the pumpkin puree, which brings a subtle sweetness and a velvety texture that makes the dough moist and tender. The ½ cup of puree is the equivalent of a small jar of pumpkin pie filling, and it’s essential to use a pure, not powdered, pumpkin to avoid a chalky taste. If you skip it, the cookies will lose their signature fall flavor and feel dry. A tip: keep the puree in the refrigerator until you’re ready to bake, so it stays cold and doesn’t melt the butter prematurely.
The Texture Crew
Butter and sugars form the backbone of the cookie’s mouthfeel. The ½ cup of butter, softened to room temperature, provides richness and allows the sugars to caramelize on the surface. Light brown sugar (½ cup) adds depth and a hint of molasses, while white sugar (¾ cup) keeps the dough from becoming too dense. Together, they create a chewy interior and a lightly crisp exterior. If you’re watching calories, you can replace half of the butter with a butter‑flavored oil, but the texture will shift slightly.
The Unexpected Star
Chocolate chips are the star of the show, and the recipe calls for a generous 1 cup plus extra chips on top. These chips are not just decorative; they melt into pockets of molten chocolate that burst with every bite. Use a high‑quality semi‑dark chocolate chip for a richer flavor, or experiment with white chocolate for a sweeter twist. If you’re gluten‑free, ensure the chips are labeled gluten‑free to avoid any cross‑contamination.
The Final Flourish
The gluten‑free all‑purpose flour (2 cups) is what gives the cookies structure without the gluten. It’s a blend of rice flour, potato starch, and tapioca starch, each contributing to a tender crumb. The baking soda (1 tsp) leavens the dough, while the pumpkin pie spice (2¼ tsp) and cinnamon (¼ tsp) provide warmth and complexity. A pinch of salt (¼ tsp) balances the sweetness and brings out the flavors. If you can’t find a gluten‑free blend, a simple mix of rice flour and cornstarch works well.
Everything’s prepped? Good. Let’s get into the real action...
The Method — Step by Step
- Preheat the oven to 350°F (175°C) and line a baking sheet with parchment paper or a silicone mat. The oven needs to be fully preheated to ensure even baking and a crisp finish. As the oven warms, the kitchen will fill with that comforting scent of butter and spices. This is the moment of truth—you’re setting the stage for the best cookies.
- Mix the dry ingredients in a bowl: combine the gluten‑free flour, baking soda, pumpkin pie spice, cinnamon, and salt. Whisk them together until the spices are evenly distributed. This step prevents clumps and ensures a uniform crumb. I’ve found that a quick sift over a fine mesh works wonders.
- Beat the butter and sugars in a separate bowl using an electric mixer on medium speed until light and fluffy. The goal is to incorporate air, which will give the cookies a tender texture. If the mixture is too soft, it will spread too much; too firm, and you’ll lose that chewy bite. This is pure bliss—think of the sound like a gentle drum.
- Add pumpkin puree and vanilla to the butter mixture, blending until smooth. The pumpkin adds moisture, while the vanilla gives depth. Keep the mixture cool; if it starts to melt, chill it for a few minutes. The aroma that follows is simply irresistible.
- Combine wet and dry by slowly adding the dry mix to the wet, folding gently with a spatula. Overmixing can develop gluten‑free starches, making the cookies tough. The dough should be thick but pliable. At this point, you can add a handful of extra chocolate chips for an indulgent twist.
- Chill the dough for 20–30 minutes in the refrigerator. This step is crucial for controlling spread and enhancing flavor. The cold dough will keep the butter from melting too quickly, giving you thicker, chewier cookies. If you’re short on time, skip this step, but the texture will differ.
- Shape the cookies by scooping tablespoon‑sized portions and rolling them into balls. Place them 2 inches apart on the prepared sheet. Gently flatten each ball with the palm of your hand or the bottom of a glass; this creates a slightly flattened shape that ensures even baking.
- Bake for 12–15 minutes, until the edges are golden brown and the centers still look slightly undercooked. The cookies will rise and then settle, creating that signature chewy center. The timer should be set carefully; the first few minutes are the most critical for achieving that perfect balance.
- Cool on the sheet for 5 minutes before transferring to a wire rack to cool completely. The cookies will continue to set as they cool, solidifying the structure. This resting period is essential; rushing them off the sheet can cause them to crumble.
- Enjoy and store the remaining cookies in an airtight container. They stay fresh for up to a week at room temperature and can be frozen for longer storage. The chocolate chips will keep their melt‑in‑your‑mouth texture even after freezing.
That’s it—you did it. But hold on, I’ve got a few more tricks that will take this to another level…
Insider Tricks for Flawless Results
The Temperature Rule Nobody Follows
Many bakers set the oven to 375°F, but that can scorch the edges before the centers set. I’ve found 350°F gives the cookies a gentle bake that allows the interior to stay moist while the edges caramelize beautifully. The trick is to preheat the oven for at least 15 minutes; a lukewarm oven will cause the dough to spread too far.
Why Your Nose Knows Best
When the cookies are baking, the aroma will intensify and give you a hint of how close they are to perfection. If the scent is sweet and buttery, they’re ready to come out. If it’s still raw or overly sugary, give them a minute more. Your nose is a reliable timer.
The 5‑Minute Rest That Changes Everything
After removing the cookies from the oven, let them rest on the sheet for 5 minutes before moving them to a rack. This short pause allows the interior to set and the edges to firm up, preventing the cookies from breaking when you pick them up. It’s a simple step that makes a noticeable difference.
Use a Silicone Mat for Even Baking
A silicone baking mat ensures the cookies bake evenly without sticking, and it’s reusable. It also gives the cookies a slight lift that helps them cool more evenly, preserving that chewy center.
Chill the Dough for Extra Chew
Even if you’re in a rush, chilling the dough for 20 minutes can dramatically improve the texture. The cold butter solidifies, preventing the dough from spreading too much and giving you a thicker, chewier cookie.
Keep the Chocolate Chips Cool
Store chocolate chips in a cool place before baking. Warm chips can melt too quickly, resulting in a greasy cookie. Keeping them cool maintains their shape until they melt into the dough at the right moment.
Creative Twists and Variations
This recipe is a playground. Here are some of my favorite ways to switch things up:
Nutty Crunch
Fold in ½ cup chopped pecans or walnuts before baking. The nuts add a satisfying crunch and a nutty flavor that pairs wonderfully with pumpkin.
Spiced Orange
Add 1 tablespoon of orange zest and replace ¼ tsp cinnamon with ¼ tsp orange zest. The citrus brightens the flavor and adds a refreshing zing.
Minty Chocolate
Swirl in ½ teaspoon of peppermint extract and top with a few extra chocolate chips. The mint gives a cool contrast to the warm spices.
Caramel Swirl
Drizzle a thin line of caramel sauce over each cookie before baking. The caramel will melt into the dough, creating a sweet, gooey center.
Almond Joy
Replace half of the chocolate chips with shredded coconut and add 2 tablespoons of almond butter to the dough. The coconut adds texture while the almond butter brings depth.
Gluten‑Free Brownie
Replace the chocolate chips with 1 cup of chopped chocolate brownies and add 1 tablespoon of cocoa powder to the dry mix. The result is a brownie‑cookie hybrid with a fudgy center.
Storing and Bringing It Back to Life
Fridge Storage
Store the cooled cookies in an airtight container at room temperature for up to 7 days. The container should be sealed tightly to keep them from drying out. For extra freshness, add a slice of bread to the container; the bread will absorb moisture and keep the cookies soft.
Freezer Friendly
Place the cookies in a single layer on a baking sheet and freeze until solid. Then transfer them to a freezer bag or container. They’ll stay good for up to 3 months. When you’re ready to eat, let them thaw at room temperature for 10 minutes before enjoying.
Best Reheating Method
To revive a frozen cookie, microwave it on medium power for 10–15 seconds. The short burst of heat will soften the center without overcooking the edges. Alternatively, place the cookie on a parchment‑lined sheet and warm it in a 350°F oven for 5 minutes. A tiny splash of water before reheating helps the cookie steam back to perfection.