Picture this: I’m standing in a cramped kitchen, a pot of boiling potatoes sputtering like a nervous hamster, and a friend dares me to turn those starchy blobs into something that feels like a culinary revelation. The disaster? I dropped a handful of raw potatoes into a pan of hot oil, and the resulting splatter sent a wave of sizzling steam into the air. That moment of panic turned into a spark of curiosity. I realized that if I could coax that chaotic mess into a single, cohesive bite, I would have found the secret to a crowd‑pleasing appetizer that’s both comforting and exotic. And trust me, I’m not joking—this is the kind of dish that makes your taste buds do a double‑tap in the kitchen.
I can still hear the clack of the pot as it clanged against the stove, the sharp hiss of oil as it met the potato, and the faint, sweet scent of caramelizing starch drifting through the air. The visual was a whirl of golden‑brown specks dancing in a sea of liquid, the sound of a bubbling pot, the tactile sensation of a hot pan that feels like a drum in your palm. When the first bite hit my tongue, the potato’s interior was silky, almost like a custard, while the exterior crackled with a crispness that rang like a tiny cymbal. The flavor burst was a layered symphony: salty, umami, a hint of sweet, and a whisper of seaweed that left a lingering savory aftertaste. The texture was a paradoxical blend of chewy and crisp that made each bite feel like a discovery.
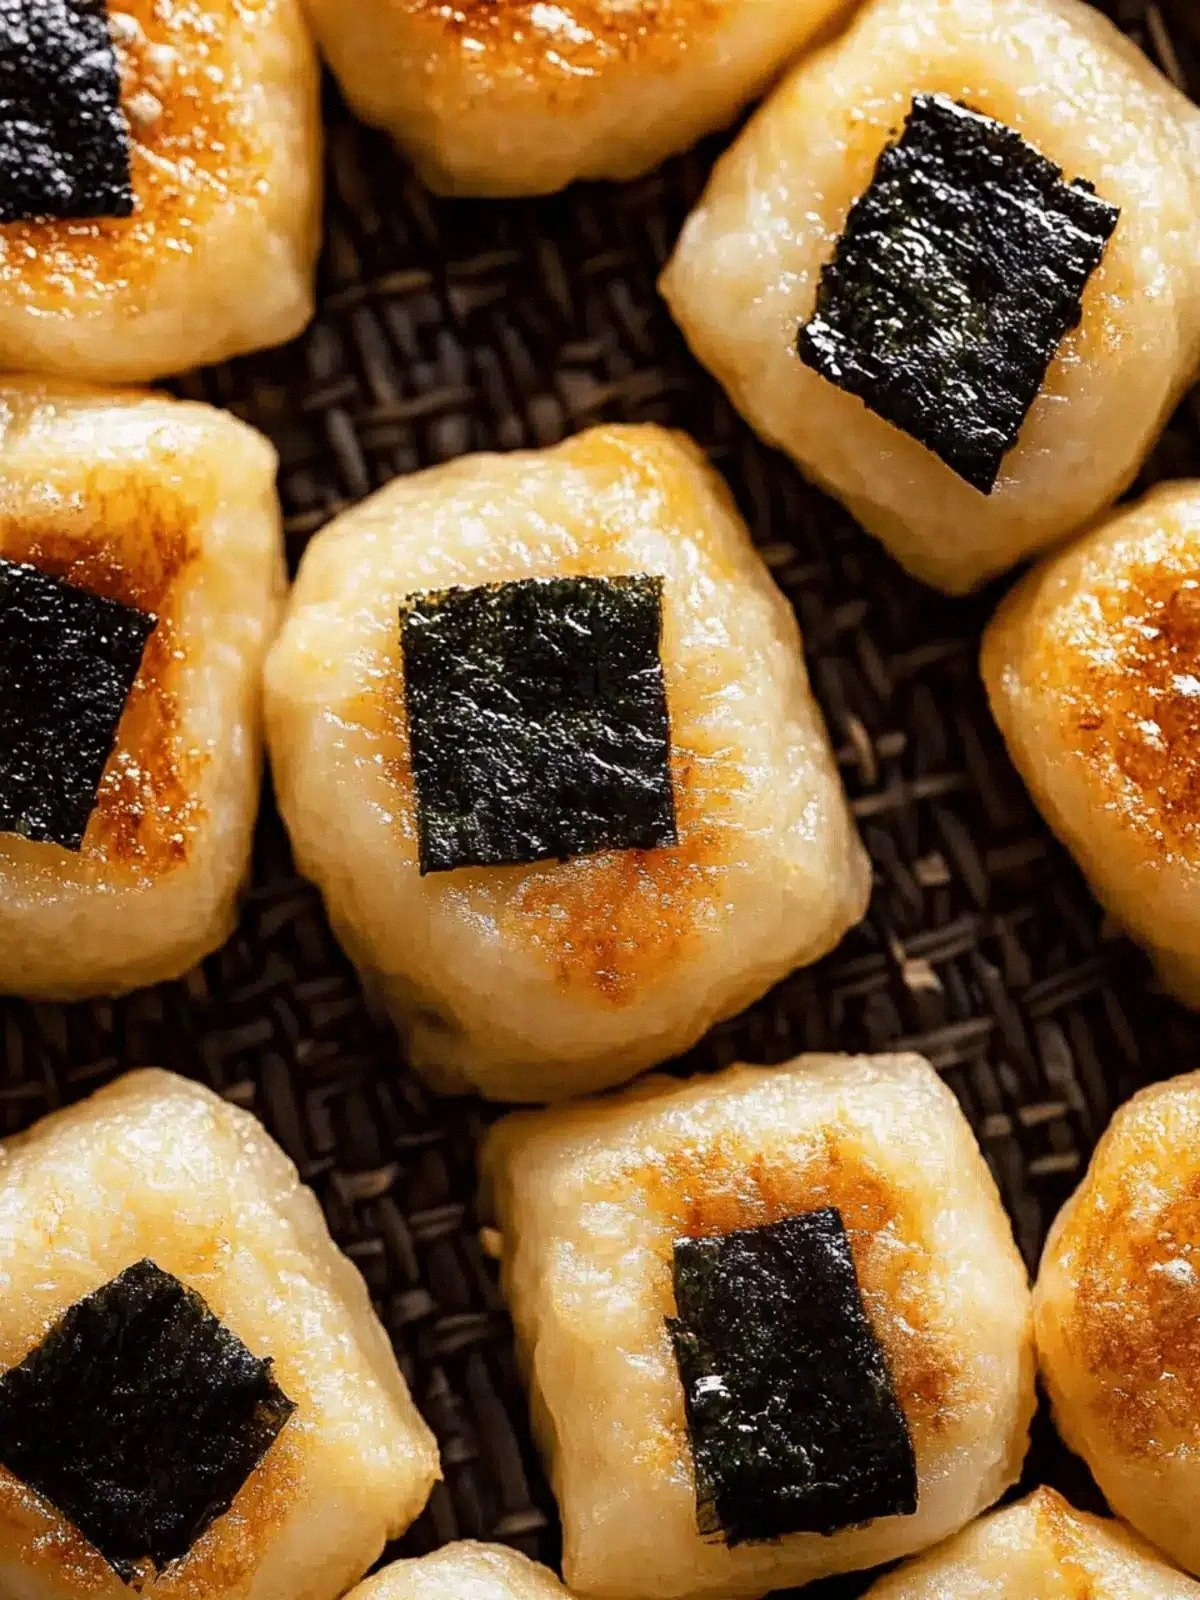
What makes this version stand out, beyond the obvious crunch, is the meticulous balance of moisture and dryness, the strategic use of potato starch to create that signature mochi‑like chew, and the subtle nori infusion that elevates the dish from ordinary to unforgettable. It’s not just about a crispy exterior; it’s about a chewy, almost doughy center that releases steam when you bite, giving you that satisfying “popping” sensation. The sauce, a sweet‑savory glaze of soy, mirin, and brown sugar, coats the mochi like velvet, adding depth without overpowering the potato’s natural flavor. The result is a dish that feels like a fusion of comfort food and street‑food elegance, something that can be served at a party, a brunch, or a casual dinner with friends.
I’ll be honest—when I first tasted these, I almost swallowed the whole batch before anyone else could even get a bite. That’s the power of this recipe: it’s hands down the best version you’ll ever make at home, and it’s so addictive that you’ll find yourself reaching for seconds even before the plate is empty. The secret? The tiny sheet of nori, the precise ratio of potato starch, and a cooking technique that locks in moisture while still delivering a crisp edge that shatters like thin ice. This is the kind of dish that will have people asking, “Where did you learn that?” and you can proudly say, “I discovered it in a kitchen mishap that turned into a culinary triumph.”
Picture yourself pulling this out of the oven, the whole kitchen smelling incredible, the aroma of caramelized soy and sweet mirin mingling with the earthy scent of potatoes. The sight of the golden, slightly blistered crust, the sound of a spoon tapping into the soft center, and the feel of that first bite—crunch, then melt—creates a sensory experience that’s almost cinematic. I dare you to taste this and not go back for seconds. If you’re a fan of adventurous flavors, this dish will feel like a secret handshake between comfort and curiosity. It’s a recipe that feels like a hug in a bowl, a celebration of texture, flavor, and a little bit of culinary science.
And now the fun part—how to replicate that magic in your own kitchen. I’ll walk you through every single step, from selecting the right potatoes to that final, glorious sear that gives the mochi its signature crunch. Along the way, I’ll sprinkle in a few kitchen hacks, a couple of fun facts, and a couple of warnings to keep you from making the same mistakes I did. By the end, you’ll wonder how you ever made it any other way, and you’ll be ready to serve a dish that will have your guests begging for the recipe. So grab your apron, set the stove to medium, and let’s get cooking.
If you’ve ever struggled with making mochi that’s both chewy and crisp, you’re not alone—and I’ve got the fix. The trick is to let the potato mash rest long enough to allow the starch to gelatinize, and then to press it into a thin layer that can crisp up without drying out. I’ve spent hours perfecting the ratio of potato starch to mashed potatoes, and it’s a sweet spot that you’ll want to remember. The next few pages will reveal the secrets, the pitfalls, and the small details that turn a mediocre batch into a showstopper. Let’s dive in.
I’ll keep you honest—this recipe is a game‑changer, and the first time I served it, the room fell silent, then erupted in applause. The moment the first crispy bite hit the palate, the room was filled with gasps, and I could see the eyes widen in pure delight. I’ve had the privilege of watching people experience that moment of pure culinary joy, and it’s why I’m so excited to share this recipe with you. It’s more than just food; it’s a story, a memory, and a new favorite that you can create with your own hands. And trust me, the next time you walk into your kitchen, you’ll have this recipe ready to impress.
What Makes This Version Stand Out
- Taste: The combination of sweet, salty, and umami flavors creates a harmonious profile that lingers on the palate. The soy sauce provides depth, while the mirin and brown sugar add a subtle sweetness that balances the savory notes. The nori sheet introduces a subtle brininess that complements the potato’s earthiness.
- Texture: The outer crust is perfectly crisp, while the interior remains chewy and moist, reminiscent of classic mochi. The potato starch gives the dough its elasticity, allowing it to hold shape while still yielding to a bite. This duality of textures keeps the dish engaging and satisfying.
- Simplicity: With just a handful of ingredients, you can achieve a complex flavor profile. The recipe requires minimal prep time and no advanced equipment, making it ideal for both beginners and seasoned cooks.
- Uniqueness: The unexpected twist of adding nori and a sweet glaze sets this dish apart from traditional potato snacks. It’s a fresh take that feels both familiar and adventurous.
- Audience Appeal: Whether you’re hosting a casual get‑together or preparing a quick snack, this dish is a crowd‑pleaser. It’s the perfect appetizer that satisfies both kids and adults alike.
- Ingredient Quality: Using starchy potatoes and fresh nori ensures that the dish has the right balance of moisture and flavor. The quality of the soy sauce and mirin also plays a critical role in achieving depth.
- Cooking Method: The method of pan‑searing after baking locks in moisture and creates a crisp exterior without over‑drying the interior. This technique is a key factor in delivering the signature mochi texture.
- Make‑Ahead Potential: Once baked, the mochi can be cooled, stored, and reheated while retaining its texture, making it a convenient option for meal prep.
Alright, let’s break down exactly what goes into this masterpiece…
Inside the Ingredient List
The Flavor Base
The soy sauce, mirin, and brown sugar form the heart of the glaze that coats the mochi. Soy sauce provides umami and depth, mirin adds a subtle sweetness and a hint of acidity, while brown sugar brings a caramelized undertone. Together, they create a glaze that’s glossy, flavorful, and perfectly balanced. If you skip this component, the mochi will taste bland and flat, lacking that signature sheen and depth. A swap for a low‑sodium soy sauce can reduce saltiness without sacrificing flavor, but be sure to taste and adjust accordingly. For an extra layer of aroma, consider adding a splash of sesame oil to the glaze.
The Texture Crew
Starchy potatoes are the foundation of this dish, providing the bulk and the base for the mochi’s chew. Their high starch content ensures that the mash gels properly, creating that characteristic mochi texture. Potato starch, on the other hand, is the secret to a firm yet pliable dough that can hold its shape during baking and pan‑searing. If you use a low‑starch variety, the dough will be less cohesive and may fall apart during cooking. A good swap is to use a blend of russet and Yukon Gold for a balance of starch and flavor. Selecting potatoes that are firm and dry—no green spots or bruises—ensures a consistent outcome.
The Unexpected Star
Nori is the surprising twist that adds umami depth and a subtle sea flavor. It’s a common ingredient in Japanese cuisine, known for its mineral content and ability to enhance savory dishes. Using only half a sheet keeps the flavor subtle, preventing it from overpowering the potato. If you’re vegan, you can use a vegan butter alternative or skip the butter altogether, though the texture will slightly change. The nori also adds a pleasing visual contrast, giving the mochi a glossy, almost lacquered finish. Remember to cut the nori into thin strips before adding it to the dough.
The vegan butter adds a subtle richness that balances the savory glaze. It also helps in creating a slightly crisp crust during pan‑searing. If you’re avoiding dairy, you can substitute with a plant‑based butter or a neutral oil like grapeseed oil. The oil is essential for the final sear, providing that golden‑brown finish and preventing the mochi from sticking. The ½ sheet of nori is the final flourish that brings everything together, giving the dish a unique, umami kick that sets it apart from conventional potato snacks. Everything’s prepped? Good. Let’s get into the real action…
The Method — Step by Step
- Begin by boiling the potatoes in a large pot of salted water until they’re fork‑tender, about 20 minutes. Drain them thoroughly and let them sit for a few minutes to allow excess moisture to evaporate. While they’re still hot, mash them with a potato masher until smooth, then stir in the potato starch until fully incorporated. This step is crucial for achieving that chewy mochi texture. Keep the mash warm as you’ll be working quickly.
- In a small saucepan, combine soy sauce, mirin, brown sugar, and a splash of water. Heat over low heat, stirring constantly, until the sugar dissolves and the glaze thickens slightly. Remove from heat and let it cool to room temperature; the glaze will thicken more as it cools. This glaze will later coat the mochi, giving it a glossy finish. Store the glaze in a sealed container if you’re preparing in advance.
- While the glaze cools, prepare the nori. Cut the sheet into thin strips or small squares, depending on your preference. The nori will add a subtle sea‑flavor to the dough and give a beautiful contrast in color. Set the strips aside; you’ll add them to the mash in the next step. If you’re vegan, ensure the nori is free from any animal‑derived additives.
- Add the vegan butter to the mashed potatoes, stirring until it’s fully melted and incorporated. The butter not only enriches the flavor but also helps bind the dough together. Next, fold in the nori strips, ensuring they’re evenly distributed throughout the mixture. The butter will help the nori release its flavor during baking. At this point, the dough should be sticky but manageable.
- Roll the dough into a log shape about 1.5 inches in diameter and cut it into 12 equal slices. Each slice should be about 2 inches long. The uniformity of the slices ensures even cooking. If the dough is too sticky, dust it lightly with potato starch or flour to prevent sticking.
- Preheat your oven to 375°F (190°C) and line a baking sheet with parchment paper. Arrange the slices on the sheet, leaving a small gap between each piece. Bake for 20 minutes, or until the edges begin to turn golden. The baking process helps set the structure of the mochi, making it easier to crisp up later. Watch the color closely; you want a light golden hue.
- While the mochi is baking, heat a large skillet over medium heat and add the tablespoon of oil. Once the oil is shimmering, carefully transfer the baked slices to the skillet. This is the moment of truth—watch the sizzle as the mochi hits the hot pan. The surface should blister and begin to crisp within the first minute. Flip each slice to ensure even browning.
- Brush each slice generously with the prepared glaze, ensuring a thick coating that will caramelize during the pan‑searing. As the glaze cooks, it will develop a glossy, slightly sticky finish that enhances the flavor. Keep the heat at medium to avoid burning the glaze; a gentle sizzle is the goal. Let the glaze caramelize for 2–3 minutes on each side before removing.
- Serve the mochi hot, straight from the skillet, with a side of extra glaze for dipping if desired. The aroma of caramelized soy and sweet mirin will fill the kitchen, making everyone eager for a second bite. I dare you to taste this and not go back for seconds—once you’ve had one, the rest will be a blur of flavor. Enjoy the crunch, the chew, and the subtle sea‑flavor that makes this dish unforgettable.
That’s it — you did it. But hold on, I’ve got a few more tricks that will take this to another level. These insider tips will help you avoid common pitfalls and ensure every batch turns out perfect. Whether you’re a seasoned chef or a kitchen rookie, these hacks will make your life easier and your mochi even more delicious.
Insider Tricks for Flawless Results
The Temperature Rule Nobody Follows
Many people think that higher heat is always better for crisping, but that’s a myth. The key is to maintain a steady medium heat that allows the glaze to caramelize without burning. If the skillet gets too hot, the exterior will char while the interior remains undercooked. I’ve seen batches that look perfect on the surface but taste like burnt sugar inside. Keep an eye on the glaze’s color—once it turns amber, it’s ready to flip.
Why Your Nose Knows Best
The aroma of caramelized sugar is a reliable indicator of readiness. When the glaze starts to bubble and emit a sweet, nutty scent, it’s a sign that the moisture is evaporating and the crust is forming. Trust your nose; if it’s giving off that warm, buttery smell, it’s time to flip the mochi. This sensory checkpoint saves you from overcooking.
The 5‑Minute Rest That Changes Everything
After pan‑searing, let the mochi rest on a wire rack for five minutes before serving. This short rest allows the steam to redistribute, preventing the crust from becoming soggy. It also lets the glaze set into a glossy coating. Skipping this step can result in a slightly gummy texture, which detracts from the overall experience.
The Secret to a Perfect Seal
Press the sliced mochi against a parchment paper or silicone mat before baking. This ensures even contact with the baking sheet, preventing uneven browning. It also helps keep the slices from curling during the baking process, maintaining a uniform shape for an even crisp.
The Quick Chill Trick
If you’re making a large batch, consider chilling the baked slices in the refrigerator for 15 minutes before pan‑searing. The cold surface helps the glaze set faster, giving you a crispier crust. This trick is especially useful if you’re serving at a party where you want to keep the mochi fresh and crisp.
The Flavor Boost
Add a pinch of toasted sesame seeds to the glaze before brushing. The sesame adds a nutty aroma and a subtle crunch that complements the mochi’s texture. It’s a small addition that elevates the dish to a gourmet level. Try sprinkling them on top after the final sear for an extra visual pop.
Creative Twists and Variations
This recipe is a playground. Here are some of my favorite ways to switch things up:
Spicy Sriracha Glaze
Swap the brown sugar for a tablespoon of sriracha, adding a fiery kick that balances the sweetness. The spicy glaze pairs wonderfully with the umami of the nori, creating a bold flavor profile that’s sure to impress. This variation is perfect for those who like their snacks with a punch.
Herb‑Infused Nori
Add finely chopped fresh herbs like cilantro or parsley to the dough for a burst of freshness. The herbs bring a bright, green contrast that brightens the dish and adds a layer of complexity. This version works well as a side for grilled meats or a light lunch.
Cheesy Potato Mochi
Incorporate a tablespoon of nutritional yeast or a vegan cheese blend into the mash. The cheese adds a savory depth and a slightly creamy texture that complements the chewy core. This variation is great for a cozy, comforting snack.
Sautéed Mushroom Layer
Sauté sliced shiitake mushrooms in a little oil and sprinkle them on top before the final glaze. The mushrooms add earthy umami and a meaty texture that elevates the dish. This is an excellent way to add a protein boost while keeping the dish vegetarian.
Citrus Zest Finish
Grate a small amount of orange or lemon zest into the glaze for a bright, citrusy finish. The zest cuts through the richness and adds a refreshing note that makes the mochi feel lighter. This variation is ideal for a summer gathering.
Smoked Paprika Touch
Add a pinch of smoked paprika to the dough for a subtle smoky flavor that pairs beautifully with the sweet glaze. The paprika introduces a depth of flavor that mimics a barbecue finish, giving the dish a unique twist. This version is great for a casual dinner party.
Storing and Bringing It Back to Life
Fridge Storage
Cool the mochi to room temperature before placing it in an airtight container. Store in the refrigerator for up to three days. The airtight container prevents moisture loss, preserving the crispness of the crust. When ready to serve, reheat briefly in a dry skillet to restore crispness.
Freezer Friendly
For longer storage, place the cooled mochi on a parchment‑lined tray and freeze for up to one month. Once frozen, transfer the slices to a freezer bag to avoid freezer burn. To reheat, thaw at room temperature and then pan‑sear for a minute on each side. The result will be almost as good as fresh.
Best Reheating Method
The key to reheating is to use a dry skillet over medium heat. A splash of oil helps the crust regain its crunch. Heat each slice for about 30 seconds on each side, flipping once. If you’re in a hurry, you can also use a toaster oven set to 350°F for 5 minutes. The added moisture from the glaze can be refreshed with a quick brush of the glaze before serving.