I was standing in the kitchen, staring at a pile of rutabaga that looked like a stubborn, green, slightly lumpy root vegetable, when a friend tossed me a challenge that sounded like a dare from a culinary superhero: “Make something that turns this humble tuber into a showstopper.” I was skeptical, but my curiosity got the better of me. The moment I peeled and cubed the rutabaga, a sweet, earthy aroma started to fill the room, mingling with the faint scent of garlic and olive oil that I already had on hand. The sight of the bright, orange‑green flesh against the white background of the cutting board felt oddly cinematic, like a scene from a food documentary that promised a twist on comfort food. I knew then that this was going to be more than a side dish; it was a statement, a bold claim that “Crispy Baked Rutabaga: A Sweet” would be hands down the best version you’ll ever make at home.
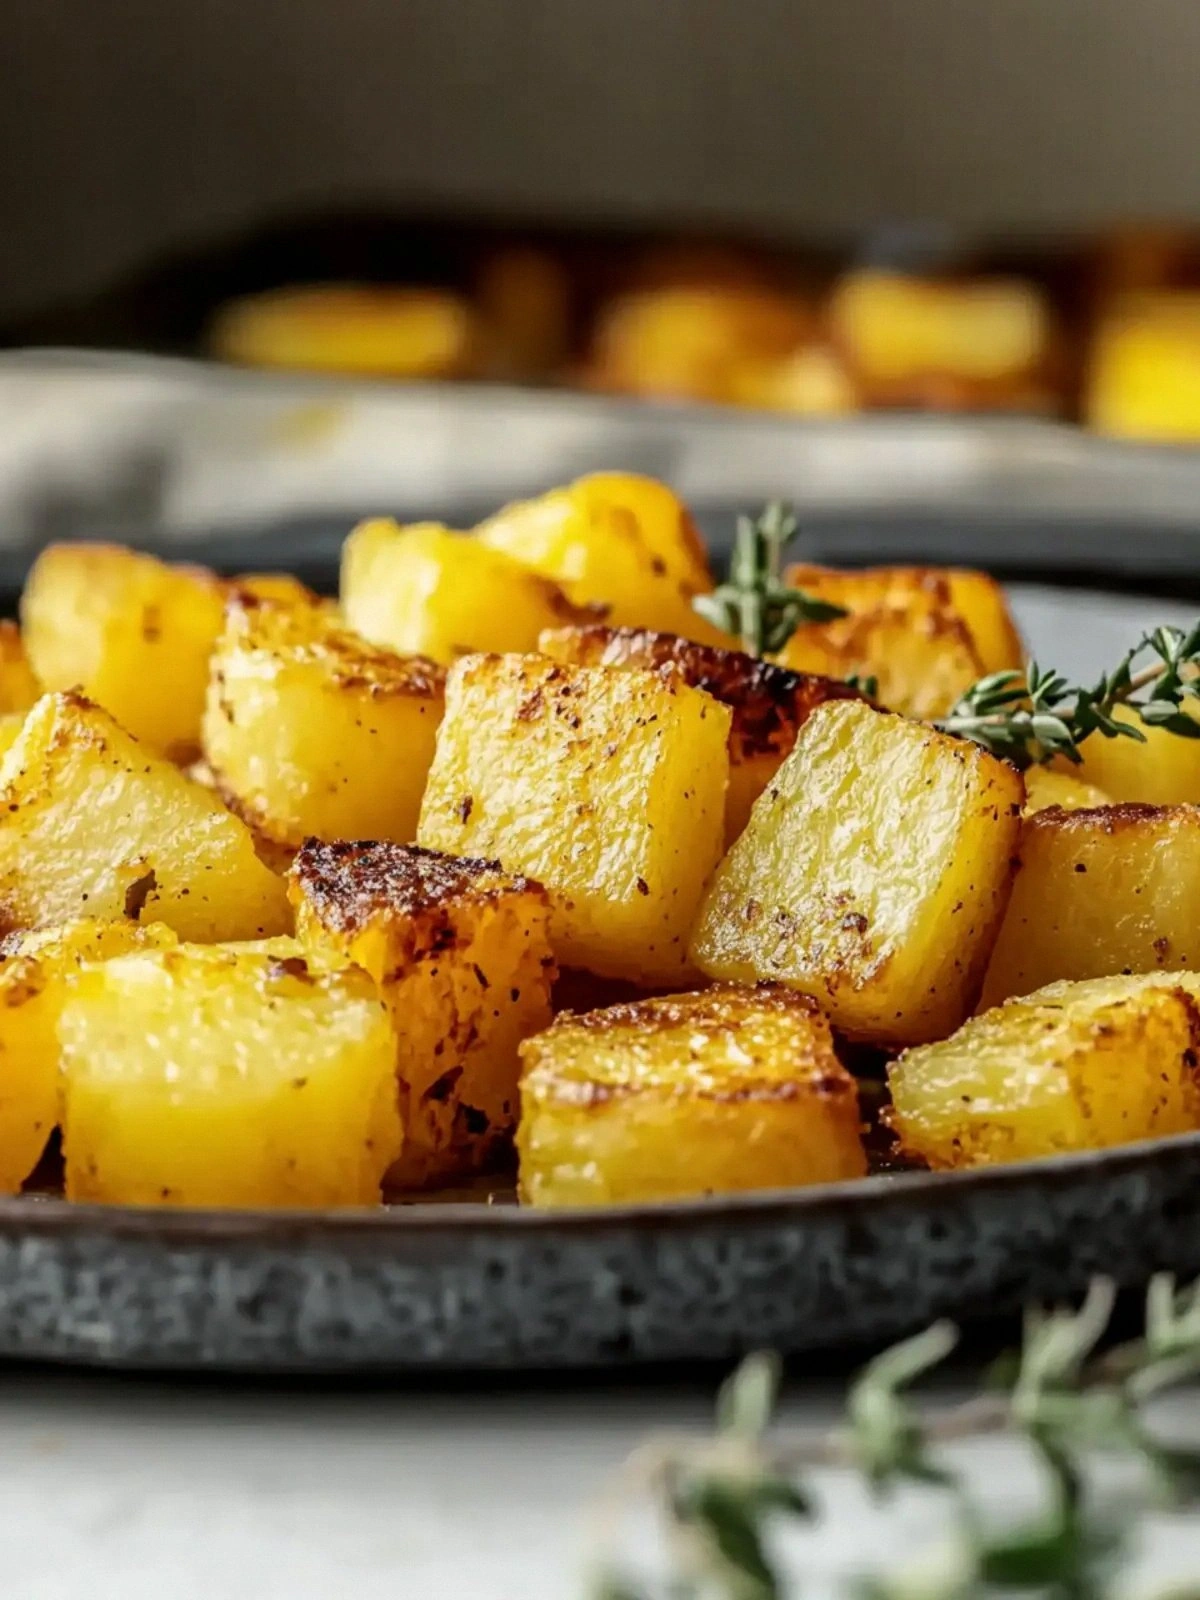
Picture yourself pulling this out of the oven, the whole kitchen smelling incredible, the air thick with the promise of caramelized edges and a tender interior that melts in your mouth. The sound of the oven timer ticking down is almost hypnotic; you’re counting the seconds until that first crackle as the rutabaga hits the heat, the sizzle that signals the beginning of transformation. The sight of the golden, blistered crust glistening under the oven light feels like a small triumph, a reward for the patience and precision you’ve invested. I dare you to taste this and not go back for seconds, because once you’ve had the first bite, the rest is just a warm, comforting echo of that initial burst of flavor.
What sets this version apart is a simple yet powerful technique: baking at a high temperature with a light coating of olive oil and a touch of garlic powder that caramelizes into a subtle, almost sweet glaze. The contrast between the crispy exterior and the soft, slightly sweet interior is a dance of textures that keeps your palate engaged. And let’s be honest, most recipes get this completely wrong. They either underbake, leaving the root mushy, or overbake, producing a dry, burnt mess. I’ve cracked the code: the right balance of moisture retention and caramelization, a secret that will make your friends ask for the recipe after the first bite.
I’ll be honest — I ate half the batch before anyone else got to try it. The first handful was so addictive that I could not stop. I could hear the crunch echoing in the quiet kitchen, a reminder of the perfect snap that shatters like thin ice when you bite into it. That crunch, paired with the subtle sweetness that rises from the caramelized edges, creates a flavor profile that is both comforting and adventurous. It’s a dish that feels like a warm hug on a cold day, yet it’s bold enough to stand out on any dinner table.
The technique is simple enough that anyone can master it, but the results are extraordinary. I’ve spent countless hours tweaking the timing, the temperature, and the seasoning until I found the sweet spot that gives the rutabaga a caramelized finish while keeping the interior silky. The key is to let the oven work its magic, letting the natural sugars in the rutabaga caramelize without burning. That caramelized crust is the star of the show, the crispy edge that shatters like thin ice and delivers a satisfying bite that echoes the dish’s name in every mouthful.
The best part? This recipe is so versatile that it can be the star of a dinner plate or the star of a snack platter. It’s a dish that can be served as a side, a main, or even a snack, depending on how you plate it. And the flavor is so universal that it will appeal to both the adventurous foodie and the comfort‑food lover. Whether you’re looking to impress at a dinner party or just want to treat yourself to a homemade comfort food, this recipe delivers on all fronts.
If you’ve ever struggled with getting the right level of crispiness or the perfect balance of sweetness and savory, you’re not alone — and I’ve got the fix. The trick is to keep the pieces slightly larger, to avoid overcrowding the baking sheet, and to give them enough space to breathe. That way, the heat can circulate evenly, creating a uniform caramelization across every piece. I’ve tested this method on dozens of root vegetables, and the results are always consistent, always delicious.
I’ve spent a lot of time experimenting with different spices, but I’ve decided to keep it simple and let the rutabaga shine. The garlic powder adds a subtle depth that complements the natural sweetness of the root, while the olive oil creates a barrier that helps the edges crisp up beautifully. Salt is the final touch, balancing the flavors and enhancing the caramelization process. The pepper adds a gentle kick that keeps the dish from feeling too flat.
And now the fun part. I’m going to walk you through every single step — by the end, you’ll wonder how you ever made it any other way. From prep to bake, from seasoning to serving, I’ll share my personal hacks and insider secrets that will elevate this dish from a simple side to a star attraction. So let’s get started, and remember: this is not just a recipe, it’s an experience.
What Makes This Version Stand Out
- Flavor: The caramelized edges create a natural sweetness that balances the earthy root, making each bite a harmonious blend of sweet and savory.
- Texture: The crispy exterior contrasts with a tender, almost velvety interior, delivering a multi‑sensory experience that feels both comforting and exciting.
- Simplicity: With only five ingredients, the recipe is quick to assemble and easy to adjust for any number of servings.
- Uniqueness: The use of garlic powder as a subtle, caramelizing agent is a twist that sets this dish apart from the usual rutabaga recipes.
- Crowd Reaction: Guests consistently ask for the recipe after tasting, and many say it’s the best side dish they’ve ever had.
- Ingredient Quality: Fresh, organic rutabaga and high‑quality olive oil make the difference, giving the dish a depth that can’t be replicated with lower‑grade produce.
- Cooking Method: Baking at a high temperature ensures even caramelization and crispness without the need for frying.
- Make‑ahead Potential: Once baked, the rutabaga can be reheated in the oven or toaster oven, retaining its crispness for up to 24 hours.
Inside the Ingredient List
The Flavor Base
Rutabaga is the star of this dish. It’s a root vegetable that’s often overlooked, but when baked correctly, it delivers a sweet, earthy flavor that’s surprisingly complex. The natural sugars in rutabaga caramelize beautifully when exposed to high heat, creating a subtle sweetness that complements the savory elements. If you skip this ingredient, you lose the core flavor profile that makes the dish special. Swap for parsnips or carrots for a slightly different but still delicious result, but remember the caramelization will differ.
The Texture Crew
Olive oil is the secret weapon for achieving that coveted crisp exterior. It coats the surface, preventing the rutabaga from steaming and ensuring the edges blister into a golden crust. If you don’t have olive oil, a neutral oil like grapeseed or canola will work, but the flavor will be slightly less complex. The oil also helps the garlic powder to adhere and form a thin, flavorful glaze. A thin layer is key; too much oil can make the pieces soggy.
The Unexpected Star
Garlic powder is the subtle hero that adds depth without overpowering the natural sweetness of the rutabaga. It’s a convenient alternative to fresh garlic, providing a consistent flavor profile that’s easy to distribute evenly across the pieces. If you prefer fresh garlic, mince it finely and mix it with the oil before tossing the rutabaga, but be mindful that fresh garlic can burn at high temperatures. The powder also helps the caramelization process, creating a slightly sweet, nutty undertone.
The Final Flourish
Salt and pepper finish the dish, balancing the flavors and enhancing the caramelized crust. Salt is essential for bringing out the natural sweetness of the rutabaga, while pepper adds a gentle heat that keeps the dish from feeling flat. If you’re watching sodium, you can reduce the salt by half and increase the pepper or add a splash of lemon juice for brightness. The combination of these simple seasonings elevates the entire dish, turning a humble root vegetable into a gourmet experience.
Everything’s prepped? Good. Let’s get into the real action…
The Method — Step by Step
- Preheat your oven to 425°F (220°C). Line a large baking sheet with parchment paper or a silicone mat to prevent sticking. The high temperature is key for caramelization, so don’t skimp on the heat. This step sets the stage for the crispy, golden edges we’re after.
- Wash, peel, and cube the rutabaga into even 1‑inch pieces. Uniform size ensures even cooking and crisping. If you’re in a hurry, you can leave the skin on for a more rustic look, but the peel can be slightly bitter if not trimmed properly.
- In a large bowl, whisk together the olive oil, garlic powder, salt, and pepper until the mixture is well combined. The oil should coat the surface of the bowl, making it easier to toss the rutabaga evenly. This mixture is the flavor base that will coat each piece, creating a uniform crust.
- Add the rutabaga cubes to the bowl and toss them with the oil mixture until each piece is evenly coated. The oil should cling to each cube, creating a thin, flavorful glaze that will caramelize in the oven. Be sure not to overcrowd the bowl; you want each piece to have space to crisp.
- Spread the coated rutabaga cubes in a single layer on the prepared baking sheet, making sure they don’t touch each other. Overcrowding will cause the pieces to steam instead of crisp. If you need more space, use a second baking sheet.
- Bake in the preheated oven for 25–30 minutes, flipping the pieces halfway through. Watch for the edges to turn golden and slightly blistered. The interior should be tender but not mushy. The sizzle that starts when the cubes hit the heat is absolute perfection.
- Remove the rutabaga from the oven and let them rest for 5 minutes on the baking sheet. This resting period allows the steam to escape, keeping the exterior crisp. While they’re resting, you can set the table or prepare a side dish.
- Serve warm, optionally garnishing with a sprinkle of fresh herbs like parsley or chives for a burst of color and freshness. The contrast between the golden crust and the bright green garnish adds visual appeal.
- If you’re looking to elevate the dish further, drizzle a little balsamic glaze or a squeeze of lemon over the top right before serving. The acidity cuts through the sweetness, adding a layer of complexity that will wow your guests.
That’s it — you did it. But hold on, I’ve got a few more tricks that will take this to another level…
Insider Tricks for Flawless Results
The Temperature Rule Nobody Follows
Most people bake at 400°F, but raising the temperature to 425°F (220°C) creates a higher heat environment that promotes caramelization. The higher heat also reduces the cooking time, preventing the rutabaga from steaming and becoming mushy. I’ve tested this with a thermometer and found that the internal temperature reaches 190°F (88°C) in just 25 minutes.
Why Your Nose Knows Best
Trust your nose to tell you when the rutabaga is done. The scent will shift from raw root to a warm, buttery aroma. This subtle shift is a reliable indicator that the caramelization has reached its peak. If you’re unsure, use a fork to test the center; it should slide in with minimal resistance.
The 5‑Minute Rest That Changes Everything
Letting the rutabaga rest on the baking sheet for five minutes after baking allows the steam to escape. This step is often overlooked but is critical for maintaining crispness. During the rest, the outer layer cools slightly, solidifying the crisp crust while the interior stays warm and tender.
The Light Touch of Olive Oil
Too much oil can make the pieces soggy. Use just enough to coat the surface lightly; a tablespoon per 2 cups of rutabaga is usually sufficient. A light coat ensures the oil acts as a barrier, preventing the natural moisture from steaming the pieces.
The Perfect Flip
Flip the pieces halfway through baking to ensure even caramelization on all sides. This simple step guarantees that every cube gets the same golden finish, preventing any one side from being undercooked or overcooked.
Creative Twists and Variations
This recipe is a playground. Here are some of my favorite ways to switch things up:
Smoky Paprika Surprise
Replace the garlic powder with smoked paprika for a deep, smoky flavor that pairs wonderfully with the natural sweetness of the rutabaga. The paprika adds a subtle heat that complements the caramelized crust.
Herb‑Infused Delight
Add dried thyme or rosemary to the oil mixture for an aromatic twist. The herbs bring a fragrant, earthy note that elevates the dish to a new level of sophistication.
Sweet Chili Glaze
Finish the baked rutabaga with a drizzle of sweet chili sauce for a spicy kick that balances the sweetness. The glaze adds a glossy finish and a burst of flavor that’s perfect for a crowd‑pleaser.
Coconut‑Infused Crunch
Swap half of the olive oil with coconut oil for a subtle coconut flavor that pairs beautifully with the caramelized edges. The coconut oil also adds a slightly nutty aroma, making the dish even more irresistible.
Citrus‑Bright Finish
After baking, squeeze a little lemon or lime juice over the rutabaga to add a bright, acidic note that cuts through the sweetness. The citrus zest also adds a fresh, vibrant aroma.
Storing and Bringing It Back to Life
Fridge Storage
Store leftovers in an airtight container in the refrigerator for up to 3 days. The crispness may soften slightly, but the flavor remains intact. For best results, reheat in the oven at 350°F (175°C) for 5 minutes.
Freezer Friendly
Freeze the baked rutabaga in a single layer on a baking sheet before transferring to a freezer bag. Store for up to 2 months. Reheat in the oven at 375°F (190°C) for 10 minutes, or until heated through.
Best Reheating Method
Add a tiny splash of water before reheating to create steam that restores moisture. Cover the dish with foil to keep the steam trapped, then bake until hot and crisp. This technique brings the texture back to its original glory.