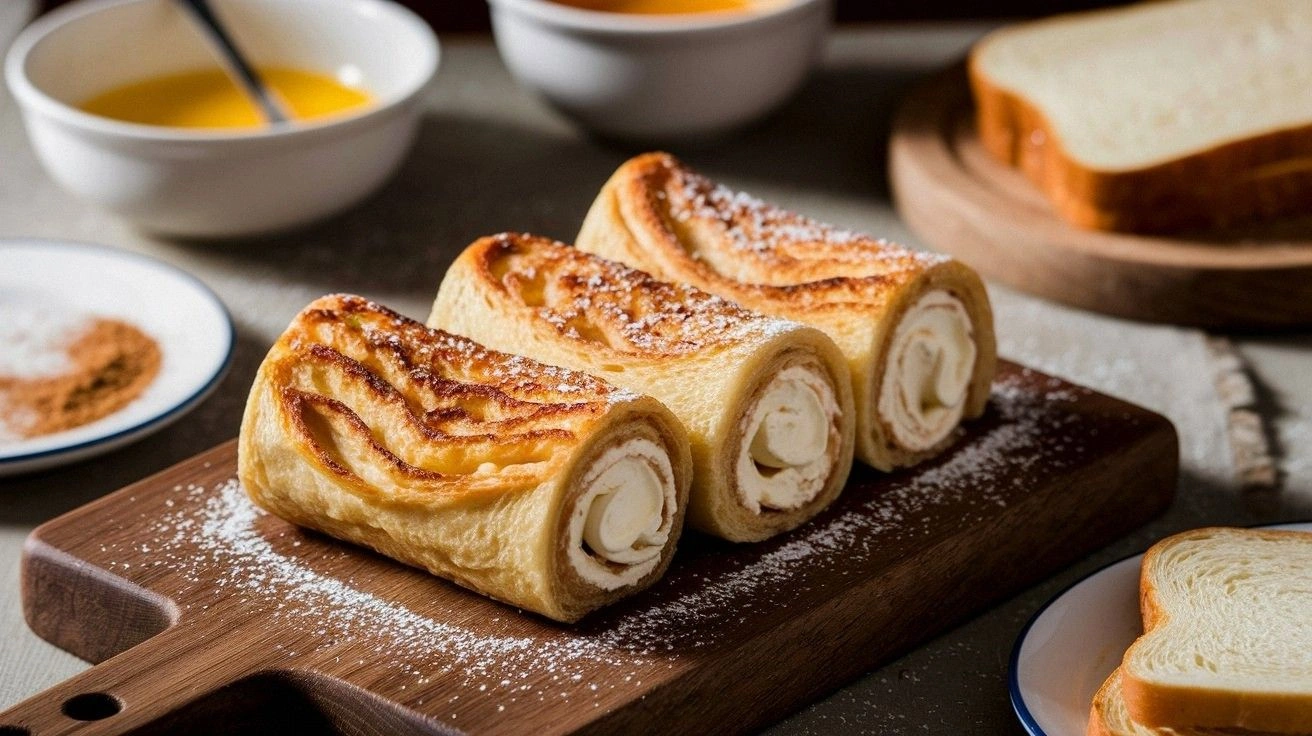
Picture this: you’re halfway through a Sunday brunch, the table is a mess of plates, the kitchen smells like burnt toast, and the clock is ticking toward a deadline. I was scrambling for a crowd‑pleaser that would turn my chaotic kitchen into a culinary stage. Then I remembered an old family trick—rolling up French toast with a creamy filling—and decided it was time to upgrade the classic. The result? A roll that’s as indulgent as a dessert and as comforting as a hug.
I swear, the first bite feels like a sunrise: the golden crust cracks, revealing a soft, custard‑like center that oozes with creamy cheese. The aroma is a sweet, buttery lullaby that drifts through the kitchen, making even the most skeptical taste buds dance. The texture is a masterstroke—crispy on the outside, pillowy on the inside, and the cream cheese gives a silky finish that lingers. And let’s not forget the maple drizzle that glistens like liquid gold, adding a touch of caramelized sweetness. If you’re craving a dish that feels both decadent and comforting, you’re in for a treat.
What sets this version apart is the secret layering technique that keeps the rolls from falling apart, the use of day‑old bread that soaks up the custard without becoming soggy, and a dash of cinnamon that whispers warmth into every bite. The filling isn’t just plain cream cheese; it’s blended with vanilla and a hint of sugar for a subtle sweetness that balances the savory. I dare you to taste this and not go back for seconds—because once you’ve had one, you’ll crave the next. I’ve perfected this recipe in a few attempts, learning from mishaps that taught me how to get the batter just right and how to roll the bread without tearing it.
Most recipes get this completely wrong, but here’s what actually works: a simple, predictable batter; a quick, efficient rolling technique; and a finishing touch that turns a breakfast into an indulgent dessert. Picture yourself pulling these out of the oven, the whole kitchen smelling incredible, and the table set for a feast that feels both familiar and adventurous. Let me walk you through every single step—by the end, you’ll wonder how you ever made it any other way.
What Makes This Version Stand Out
- Flavor: The subtle vanilla and cinnamon lift the classic French toast into a sweet‑savory symphony that satisfies both sweet and savory cravings.
- Texture: The double‑layered roll delivers a crispy crust that gives way to a custard‑like center, while the cream cheese adds a silky finish.
- Ease: The batter is a one‑mix, no‑fuss recipe that anyone can master, even if you’ve never rolled bread before.
- Visual Appeal: The golden rolls, dusted with powdered sugar and a drizzle of maple, look as good as they taste—perfect for Instagram or a brunch spread.
- Crowd‑Pleaser: Whether it’s a family breakfast, a weekend brunch, or a dessert for guests, the rolls win hearts instantly.
- Ingredient Quality: Using day‑old bread and fresh cream cheese ensures depth of flavor without compromising texture.
- Cooking Method: The pan‑frying technique locks in moisture and creates a caramelized exterior without burning.
- Make‑Ahead Potential: The rolls can be assembled ahead of time, refrigerated, and quickly finished when guests arrive.
Inside the Ingredient List
The Flavor Base
The foundation of this roll is the custard batter: eggs, milk, vanilla, and a splash of sugar. The eggs provide structure, while the milk adds moisture, creating a silky texture that clings to the bread. Vanilla is the secret whisper that turns a simple batter into a fragrant, comforting hug. Skipping any of these would leave the roll feeling flat, lacking that buttery richness you crave.
The Texture Crew
Day‑old bread is the hero here—it’s firm enough to hold the filling but soft enough to soak up the custard. The bread’s natural starches absorb the mixture, giving each bite a tender, almost custard‑like interior. If you use fresh bread, the rolls might fall apart or taste dry. A quick test: press a slice lightly; if it holds, you’re good to go.
The Unexpected Star
Cream cheese, softened, is the star that delivers a luscious, tangy contrast to the sweet batter. When blended with a pinch of cinnamon, it becomes a silky filling that melts in your mouth. Skipping the cream cheese would strip the roll of its signature richness, leaving a bland, dry result. If you’re vegan, a coconut‑based cream cheese works surprisingly well, though the flavor profile shifts slightly.
The Final Flourish
Maple syrup or honey drizzled on top adds a caramelized finish that ties everything together. Powdered sugar dusting provides a light sweetness and an elegant finish. Butter used for frying creates a golden crust and a subtle buttery aroma that makes the rolls irresistible. If you prefer a lower‑calorie version, a light brush of olive oil can replace butter, though the flavor will differ.
Everything’s prepped? Good. Let’s get into the real action.
The Method — Step by Step
- Prep the Bread: Lay out your day‑old slices on a clean surface. Lightly brush both sides with melted butter to guarantee a golden crust. If you’re short on time, you can skip the butter, but the rolls will be less crisp.
- Make the Batter: In a medium bowl, whisk together eggs, milk, vanilla, sugar, and a pinch of salt until fully blended. The batter should be smooth, with no lumps. This mixture will coat the bread evenly and give the rolls their signature custard flavor.
- Prepare the Filling: In a small bowl, beat the softened cream cheese with a fork until it’s creamy and smooth. Add a pinch of cinnamon for a warm, spicy note. If you prefer a sweeter filling, a teaspoon of honey can be folded in.
- Assemble the Rolls: Spread a generous layer of the cream cheese mixture onto one side of each buttered bread slice. Carefully roll the slice tightly, ensuring the filling stays inside. Use a toothpick if necessary to keep the roll sealed. Kitchen Hack: For a tighter roll, wrap the bread in parchment paper before rolling to keep it from unraveling during cooking.
- Dip in Batter: Gently dip each roll into the custard batter, turning to coat all sides. Let excess drip back into the bowl. This step ensures every bite has that sweet, custard coating.
- Heat the Pan: Preheat a non‑stick skillet over medium heat and add a tablespoon of butter. The butter should foam but not brown. This creates a flavorful base for the rolls.
- Cook the Rolls: Place the rolls seam‑side down in the skillet. Cook for 3–4 minutes until the bottom is golden brown. Flip carefully and cook the other side for another 3–4 minutes. Watch Out: If the butter burns, reduce the heat immediately; burnt butter will give the rolls a bitter taste.
- Finish with Powdered Sugar: Once cooked, remove the rolls and dust them lightly with powdered sugar. This adds a subtle sweetness and a decorative finish.
- Serve Immediately: Drizzle maple syrup or honey over the rolls while they’re still warm. Serve with fresh berries or a side of whipped cream for an extra indulgent touch.
That's it—you did it. But hold on, I've got a few more tricks that'll take this to another level.
Insider Tricks for Flawless Results
The Temperature Rule Nobody Follows
Many people cook these rolls at high heat, which can burn the exterior before the inside cooks. The trick is to keep the pan at medium, allowing the custard to set slowly. This ensures a golden crust and a moist interior. I once cooked them on high and ended up with a burnt outside and a raw center—lesson learned.
Why Your Nose Knows Best
As the rolls cook, the aroma will change from buttery to caramelized. When the scent shifts to a sweet, toasted note, it’s a sign the crust is ready to flip. Trust your nose; it’s a reliable indicator of doneness.
The 5‑Minute Rest That Changes Everything
Letting the rolls rest on a wire rack for five minutes after cooking allows steam to escape, keeping the exterior crisp. During this brief pause, the custard inside sets, preventing the rolls from becoming soggy when served. I used to serve them immediately and noticed a slight mushiness; the rest step fixes that.
The Butter‑Brushing Trick
Before dipping the rolls in batter, brush the exterior lightly with melted butter. This creates a barrier that prevents the bread from soaking too much, maintaining a crisp crust. It also adds a buttery flavor that complements the cream cheese filling.
The Quick Cooling Trick
If you’re making a large batch, cool the cooked rolls on a wire rack for a few minutes, then cover loosely with foil. This keeps them warm while preventing condensation from softening the crust. It’s a simple step that keeps the rolls looking fresh when you’re ready to serve.
Creative Twists and Variations
This recipe is a playground. Here are some of my favorite ways to switch things up:
Spiced Apple Roll
Add diced apples and a pinch of nutmeg to the batter for a fall‑inspired flavor. The apples caramelize slightly in the pan, adding a sweet crunch. This version is perfect for a cozy autumn brunch.
Chocolate‑Infused Roll
Stir in a tablespoon of cocoa powder into the batter and swap the cream cheese for a chocolate cream cheese. The result is a decadent chocolate roll that’s great for dessert. Pair it with a dusting of cocoa powder for a finishing touch.
Savory Herb Roll
Replace the vanilla and sugar in the batter with chopped fresh herbs like thyme or rosemary. Add a sprinkle of grated Parmesan to the filling. This savory version is ideal for brunches that need a savory bite.
Vegan Delight
Use a plant‑based milk and a dairy‑free cream cheese alternative. Substitute the butter with coconut oil for frying. The texture remains creamy, and the flavor profile is just as satisfying.
Mini Rolllets
Cut the bread into smaller 2‑inch squares and roll them individually. These mini rolls are great for parties or as a snack. They cook faster and are easier to handle.
Storing and Bringing It Back to Life
Fridge Storage
Store the cooked rolls in an airtight container for up to 3 days. Keep them at room temperature if you plan to serve them within the same day. The rolls stay moist but crisp if wrapped loosely in parchment paper.
Freezer Friendly
Wrap each roll individually in foil and place them in a freezer bag. They can be frozen for up to 2 weeks. When ready to serve, thaw overnight in the fridge or microwave for a few seconds before reheating.
Best Reheating Method
Preheat a skillet over medium heat and lightly brush with butter. Warm the rolls for 2–3 minutes on each side, or use an oven at 350°F for 10 minutes. Add a splash of water before reheating to create steam; this restores the interior’s softness without drying out the crust.