Okay, picture this: I was in the middle of a frantic midnight snack raid when my roommate shouted, “You’ve got to try my new peanut butter cookie!” I grabbed the nearest bag of M&Ms, a half‑empty jar of chocolate chips, and a tub of peanut butter, only to end up with a cookie disaster that tasted like a soggy, salty pancake. The next morning, I woke up with a craving that refused to be ignored, and I promised myself I would crack the code on the ultimate soft‑and‑chewy peanut butter cookie. I tried three different recipes, burned two batches, and almost gave up when I realized the secret was hiding in plain sight: the right balance of butter, sugar, and that magical swirl of mini M&Ms that melt into pockets of color.
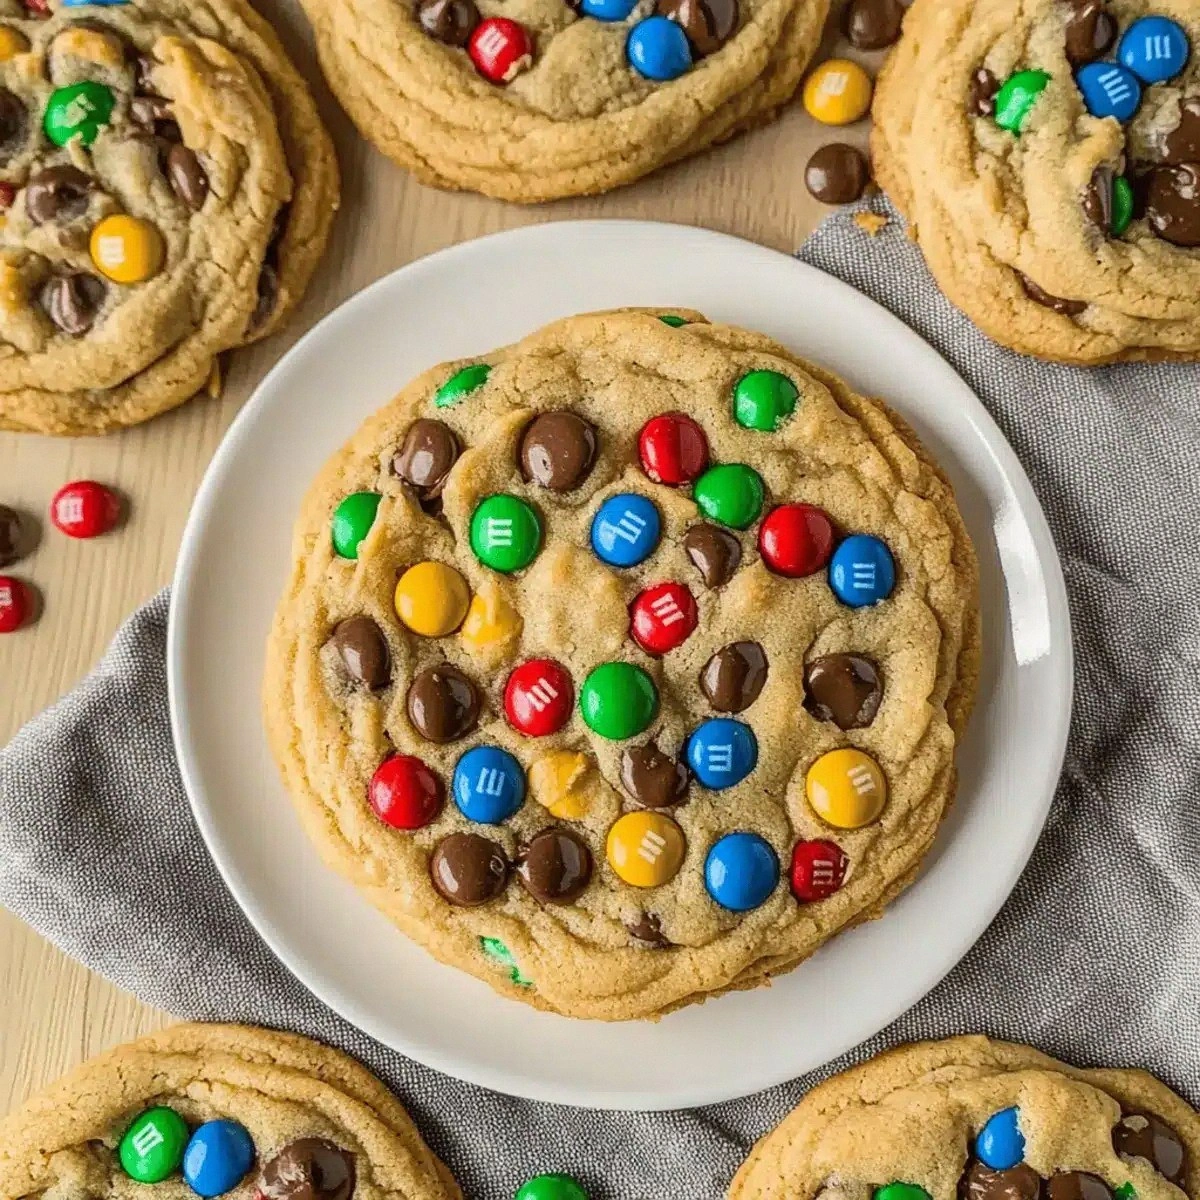
When you finally pull these cookies out of the oven, the kitchen fills with a buttery, nutty aroma that hugs the air like a warm blanket. The scent of toasted peanuts mingles with the faint caramel notes of brown sugar, while the chocolate bits glisten like tiny constellations against a golden sky. You can hear the faint crackle of the edges as they begin to set, and you feel the dough’s soft give under the spatula, promising a texture that’s both tender and resilient. The first bite is an orchestra: the buttery base sings, the peanut butter adds depth, the M&Ms burst with a sweet snap, and the chocolate chips melt into silky ribbons that linger on the palate.
What makes this version stand out is the meticulous choreography of every ingredient. I’m not just tossing things together; I’m layering flavors the way a DJ layers beats—each one distinct, yet perfectly synced. The use of salted butter amplifies the peanut butter’s richness, while the combination of granulated and brown sugar creates a caramelized crust that’s crisp enough to give a satisfying snap, yet soft enough to melt in your mouth. The mini Peanut Butter M&Ms are the game‑changer: they bring a burst of salty‑sweet peanut butter that mirrors the dough, creating a harmonious echo that you’ll swear is impossible.
And here’s the kicker: the whole batch comes together in under thirty minutes, from start to finish. That’s right—no overnight chilling, no complicated tempering, just a handful of tools, a sprinkle of patience, and a dash of daring. I dare you to taste this and not go back for seconds. This is hands down the best version you’ll ever make at home, and I’m about to walk you through every single step — by the end, you’ll wonder how you ever made it any other way.
What Makes This Version Stand Out
- Flavor Explosion: The marriage of creamy peanut butter with salted butter creates a buttery depth that feels like a hug for your taste buds.
- Texture Harmony: A soft, chewy interior meets slightly crisp edges, delivering that perfect bite‑contrast you crave.
- Simplicity: Only thirteen ingredients, all pantry‑friendly, and a 30‑minute timeline keep this from feeling like a chore.
- Unique Visuals: Mini Peanut Butter M&Ms speckle the cookie with color, making each bite a surprise party.
- Crowd‑Pleaser: Kids love the chocolate chips, adults love the peanut butter depth—perfect for any gathering.
- Ingredient Quality: Using high‑quality, salted butter and real creamy peanut butter elevates the flavor profile dramatically.
- Cooking Method: The dough is chilled just enough to keep shape, but not so long that it loses that melt‑in‑your‑mouth feel.
- Make‑Ahead Potential: Freeze the dough balls for up to a month, then bake fresh whenever the craving hits.
Inside the Ingredient List
The Flavor Base
The foundation of any great cookie starts with butter, and in this recipe we use 1 cup of salted butter. Salted butter adds a subtle brine that amplifies the peanut butter’s richness and cuts through the sweetness, preventing the cookie from feeling cloying. If you only have unsalted butter on hand, simply add a pinch of sea salt to replicate the same effect. Next up is 1 cup of creamy peanut butter. The creamy texture ensures that the dough stays soft, while the natural oils contribute to that melt‑in‑your‑mouth sensation. For a deeper, roasted flavor, opt for a natural peanut butter that lists just peanuts and a touch of salt.
The Texture Crew
Sugar is the architect of texture. 1 cup of granulated sugar provides structure and a light crispness on the edges, whereas ½ cup of brown sugar adds moisture and a caramel undertone that keeps the interior chewy. Skipping the brown sugar will make the cookies too crisp, while omitting granulated sugar will result in a flat, overly soft cookie that spreads too much. The 2 large eggs act as binders, adding lift and helping to trap air, which translates to a tender crumb. Finally, 1 teaspoon of vanilla extract rounds out the flavor, giving a warm, aromatic backdrop that ties the peanut butter and chocolate together.
The Unexpected Star
Now for the show‑stoppers: 1 cup of mini Peanut Butter M&Ms and 1 cup of mini chocolate chips. The mini M&Ms deliver a burst of salty‑sweet peanut butter that mirrors the dough, creating an echo of flavor that feels intentional, not accidental. The chocolate chips melt into glossy ribbons that coat the interior, ensuring each bite has a chocolatey finish. If you’re allergic to peanuts, swap the M&Ms for mini pretzel pieces and keep the chocolate chips for that indulgent touch.
The Final Flourish
2 cups of all‑purpose flour give the cookie its structure. Using too much flour will make the cookie dry; too little and it will spread uncontrollably. The balance is key, and we whisk the flour with 1 teaspoon of baking soda and 1 teaspoon of baking powder to create a gentle lift that keeps the cookie thick and pillowy. The 1 cup of chocolate for dipping is optional but adds a luxurious coating that turns a simple cookie into a decadent treat. Finally, the ¼ cup of sprinkles adds a pop of color that makes the cookies look as good as they taste, and the 3 tablespoons of bite‑sized cookie scoops ensure uniform sizing for even baking.
Everything's prepped? Good. Let’s get into the real action…
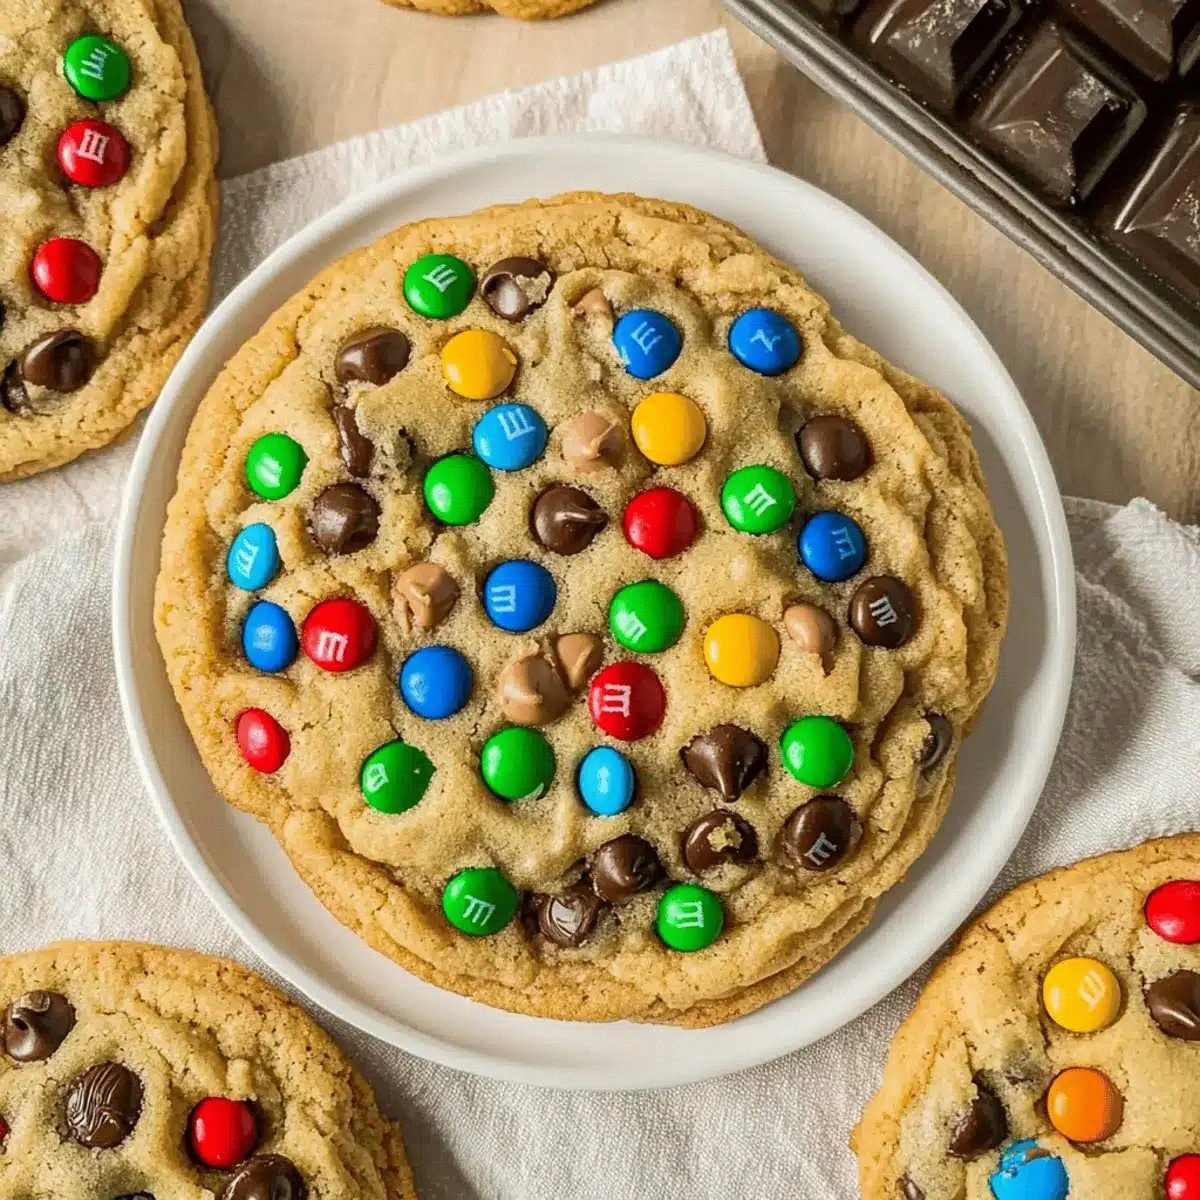
The Method — Step by Step
Preheat your oven to 350°F (175°C) and line two baking sheets with parchment paper. While the oven heats, set a large mixing bowl on the counter and let the salted butter soften for about five minutes. You’ll know it’s ready when a finger pressed into the butter leaves a slight indentation but doesn’t melt completely. This is the moment where the butter’s temperature is just right for creating a creamy emulsion with the sugars.
Kitchen Hack: Use a rubber spatula to scrape the sides of the bowl after each addition; this ensures every grain of sugar gets fully incorporated, preventing grainy pockets.Add 1 cup of granulated sugar and ½ cup of brown sugar to the softened butter. Beat on medium speed until the mixture turns a pale, fluffy color—think “cloud‑kissed” rather than “shiny”. This should take about two minutes. The mixture should smell sweet and slightly buttery; if it still looks glossy, keep beating a few more seconds. This aeration is crucial for a light crumb.
Crack in the 2 large eggs, one at a time, allowing each to fully incorporate before adding the next. Follow with 1 teaspoon of vanilla extract. The dough should become glossy and smooth, resembling a thick batter that clings to the spatula. If the dough looks too thin, that’s okay—it will thicken once the dry ingredients are folded in.
In a separate bowl, whisk together 2 cups of all‑purpose flour, 1 teaspoon of baking soda, and 1 teaspoon of baking powder. This step ensures the leavening agents are evenly distributed, preventing any bitter pockets. Once whisked, gently fold the dry mixture into the wet mixture using a rubber spatula. The dough will look slightly shaggy at first, then become cohesive after a few folds.
Watch Out: Over‑mixing at this stage can develop gluten, resulting in a tougher cookie. Stop mixing as soon as the flour is just incorporated.Stir in 1 cup of creamy peanut butter until fully blended. The dough will become richer and a little stickier—this is exactly what we want. The peanut butter not only adds flavor but also contributes to the cookie’s soft chew. If the dough feels too wet, sprinkle in a tablespoon of flour; if it feels too dry, add a teaspoon of milk.
Fold in 1 cup of mini Peanut Butter M&Ms and 1 cup of mini chocolate chips. Use a gentle folding motion to keep the colorful M&Ms from breaking apart. You’ll see the dough speckled with pink, brown, and chocolate flecks—each one a promise of a burst of flavor. This is the part where the cookie transforms from “just a cookie” to “a celebration in a bite”.
Using the 3 tablespoons of bite‑sized cookie scoops, portion out the dough onto the prepared baking sheets, spacing them about 2 inches apart. The scoops give you perfectly uniform balls, which bake evenly and look professional. If you don’t have a scoop, a tablespoon works fine—just try to keep the size consistent.
Bake for 10‑12 minutes, or until the edges are lightly golden and the tops have set but still look slightly soft. The centers will continue to cook as the cookies cool, so pull them out just before they look fully done. As they bake, you’ll hear a faint “crackle” as the sugars caramelize—a sound that signals perfection.
Remove the cookies from the oven and let them rest on the sheet for 2 minutes before transferring to a wire rack. While they’re still warm, dip the flat side of each cookie into the 1 cup of chocolate for dipping, then immediately sprinkle with ¼ cup of sprinkles. The chocolate will set quickly, creating a glossy finish that locks in moisture and adds a crunchy contrast.
Allow the dipped cookies to set completely—about 5 minutes at room temperature, or 2 minutes in the fridge if you’re impatient. Once set, store them in an airtight container. That first bite? It’s a symphony of buttery chew, peanut butter depth, and chocolate melt. And now the fun part—watch your friends devour them in seconds.
That's it — you did it. But hold on, I've got a few more tricks that'll take this to another level...
Insider Tricks for Flawless Results
The Temperature Rule Nobody Follows
Never bake cookies straight from the fridge unless you’re aiming for a thicker, puffier cookie. Let the dough sit at room temperature for about five minutes after scooping. This small pause lets the butter soften just enough to spread evenly, giving you that coveted edge‑to‑center contrast. A friend once tried baking chilled dough and ended up with a hard, pancake‑like cookie—let’s just say we’re not repeating that experiment.
Why Your Nose Knows Best
Your sense of smell is the ultimate timer. When the cookies start to release a nutty, toasted aroma, you’re within two minutes of perfection. Trust that scent; it’s more reliable than a clock. If you hear a faint sizzle as the cookies hit the pan, that’s the sugar caramelizing—a sign you’re on the right track.
The 5‑Minute Rest That Changes Everything
After the cookies have cooled on the wire rack, give them a five‑minute rest before dipping in chocolate. This short pause lets the interior set, so the chocolate coating adheres without sliding off. The result is a glossy finish that doesn’t crack when you bite into it.
The Scoop Size Secret
Using a 3‑tablespoon cookie scoop yields cookies that are about 2.5 inches in diameter—big enough to showcase the M&Ms, but small enough to stay soft. If you love extra‑chewy cookies, go for a 2‑tablespoon scoop; if you prefer a crispier edge, use a 4‑tablespoon scoop.
Chocolate Dipping Precision
When dipping, hold the cookie by the edge and dip only halfway. This technique ensures the chocolate forms a thin, even layer that sets quickly and doesn’t overwhelm the peanut butter flavor. If you dip too deep, the chocolate will dominate, and you’ll lose that balanced taste.
Creative Twists and Variations
This recipe is a playground. Here are some of my favorite ways to switch things up:
Salted Caramel Swirl
Replace half of the brown sugar with a generous drizzle of homemade salted caramel. The caramel adds a buttery, gooey ribbon that pairs beautifully with the peanut butter and chocolate.
Double Chocolate Delight
Swap the mini chocolate chips for dark chocolate chunks and add ¼ cup of cocoa powder to the dry ingredients. This creates an intensely chocolatey cookie that still retains the chewy peanut butter core.
Nutty Crunch
Add ½ cup of chopped toasted peanuts to the dough for an extra crunch. The toasted nuts introduce a smoky note that complements the sweet M&Ms.
Vegan Version
Use plant‑based butter, a flax‑egg substitute (1 tbsp ground flaxseed + 3 tbsp water per egg), and dairy‑free chocolate for dipping. The flavor profile stays remarkably similar, and the texture remains just as soft.
Holiday Spice
Incorporate ½ teaspoon of ground cinnamon and a pinch of nutmeg into the dry mix. The warm spices give the cookies a festive twist perfect for winter gatherings.
Storing and Bringing It Back to Life
Fridge Storage
Place the cookies in an airtight container with a slice of fresh bread on top. The bread will keep the cookies moist for up to five days, preserving that soft chew.
Freezer Friendly
Freeze the unbaked dough balls on a parchment‑lined tray for 15 minutes, then transfer to a zip‑top bag. When you’re ready, bake them straight from the freezer—add an extra minute to the bake time. The cookies will stay fresh for up to three months.
Best Reheating Method
To revive day‑old cookies, place them on a microwave‑safe plate, sprinkle a tiny splash of water (about a teaspoon) nearby, and microwave for 10‑12 seconds. The steam restores softness without making them soggy.