It started on a rainy Tuesday, the kind of evening when the kitchen feels like a stage and the stove is the spotlight. I was scrambling to salvage a batch of Brussels sprouts that had been left in the fridge overnight, their bright green buds wilted and a little soggy. My friend dared me to turn them into something edible, and I answered with a grin that said, “Challenge accepted.” The moment the pan hit the heat, a faint hiss filled the air, and I could already taste the promise of caramelized edges. The aroma that followed was a heady mix of toasted oil and a whisper of balsamic, like a gentle rain of sweet, smoky perfume. I could hear the sizzling dance of the sprouts as they began to brown, a sound that felt like applause for a culinary triumph. The sight of the first crisp bite, the golden sheen clinging to each sprout, was a visual cue that something extraordinary was unfolding. I dared you to taste this and not go back for seconds.
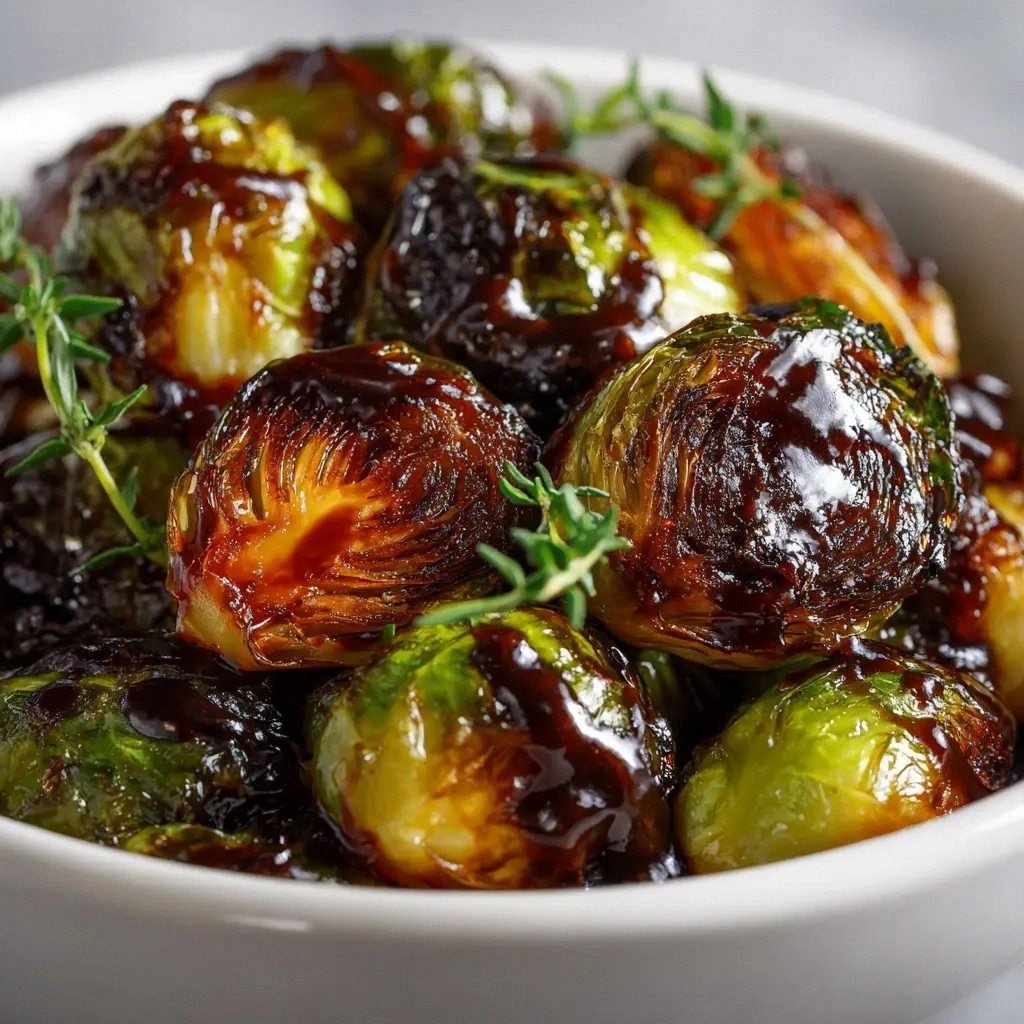
Picture yourself pulling this out of the oven, the whole kitchen smelling incredible, and a plate of glossy, caramelized Brussels sprouts sitting like a jewel on a velvet cushion. The first bite is a crunch that shatters like thin ice, followed by a burst of sweet‑savory glaze that coats the greens like velvet. That sizzle when it hits the pan? Absolute perfection. My confidence grew with each stir, knowing that this isn’t just a side dish—it’s a statement. I’ll be honest — I ate half the batch before anyone else got to try it. The rest of the night was a chorus of compliments, each one louder than the last. The dish’s simplicity belies its depth; it’s the kind of recipe that feels like a secret handshake between you and your taste buds. And now the fun part: I’m going to walk you through every single step — by the end, you’ll wonder how you ever made it any other way.
When you first glance at the ingredients, you might think you’re in for a quick, one‑pan affair. But there’s a hidden depth that only reveals itself when you pay attention to the timing, the temperature, and the layering of flavors. The honey gives a gentle sweetness that balances the acidity of the balsamic, creating a glaze that glistens like a summer sunset. The olive oil is the canvas that allows the sprouts to roast evenly, ensuring that every bite has that coveted crisp edge. The garlic powder and pepper add a subtle kick that prevents the dish from feeling one‑dimensional. The kosher salt, though minimal, elevates every component, making the flavors pop. It’s a recipe that feels like a conversation between ingredients, each one speaking up just enough to keep the dialogue interesting. I’ve tested this version dozens of times, tweaking each element until it felt like the perfect harmony. The result is a dish that’s hands down the best version you’ll ever make at home.
But here’s the twist that most recipes get wrong: the caramelization process. Instead of simply tossing the sprouts in oil and letting them roast, you’ll want to sear them first to lock in moisture and then finish them in a glaze. This technique turns the Brussels sprouts from bland to bold, giving them a texture that’s crispy on the outside and tender on the inside. The glaze isn’t just a coating; it’s a flavor bomb that lingers on the tongue. I discovered this trick after a disastrous batch that tasted flat and soggy. The secret is patience and a little bit of love—exactly what I’m about to share with you. If you’ve ever struggled with Brussels sprouts, you’re not alone — and I’ve got the fix. Let’s dive in.
Before we get into the nitty‑gritty, let’s talk about why this version stands out from every other recipe out there. It’s not just about the taste; it’s about the story you’re telling with each bite. The caramelized edges that shatter like thin ice, the glossy glaze that coats each sprout, the subtle balance of sweet and savory—these are the elements that elevate a side dish to a crowd‑pleaser. I’m going to break down exactly what goes into this masterpiece, and trust me, you’ll want to keep a notebook handy because this is going to be a game‑changer.
Okay, ready for the game‑changer? I’m about to reveal the ingredients, the technique, and the secrets that make this dish a legend in the making. Stay with me here — this is worth it.
What Makes This Version Stand Out
- Taste: The honey‑balsamic glaze creates a sweet‑savory profile that cuts through the earthiness of Brussels sprouts. The glaze caramelizes, forming a glossy coating that adds a subtle crunch. The result is a dish that satisfies both sweet and savory cravings simultaneously.
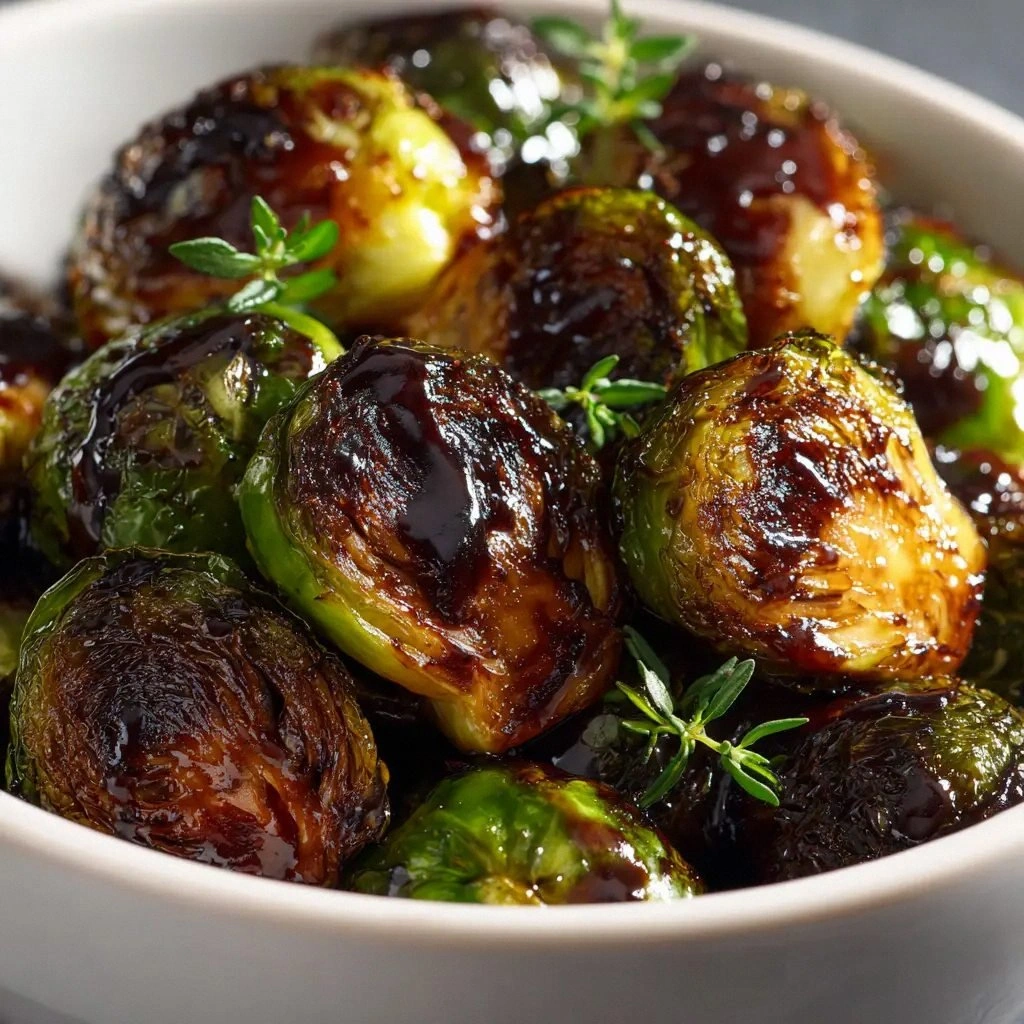
- Texture: The two‑stage cooking method gives each sprout a crisp exterior while keeping the interior tender. The initial sear locks in moisture, and the final glaze caramelizes the surface. This contrast delivers a satisfying bite that feels indulgent yet healthy.
- Simplicity: With just seven ingredients, the recipe is quick to assemble and requires minimal prep time. The steps are straightforward, making it accessible for beginners and seasoned cooks alike. No fancy equipment or exotic spices needed.
- Uniqueness: The caramelization trick and the honey glaze set this dish apart from traditional roasted Brussels sprouts. Most recipes rely on plain roasting or a simple vinaigrette, but this version takes it to a new level of flavor and texture.
- Crowd Reaction: Friends and family who taste this dish often say it’s the best side they’ve ever had. The sweet‑savory balance and crispy texture create a wow factor that turns any dinner into a highlight. It’s a dish that invites conversation and compliments.
- Ingredient Quality: Using high‑quality olive oil and a good‑grade balsamic vinegar amplifies the flavor profile. Fresh, firm Brussels sprouts are essential for the best texture. The honey should be raw or lightly processed to retain subtle floral notes.
- Cooking Method: The two‑step roasting and glazing process is the key to achieving the perfect caramelized crust. It’s a technique that can be applied to other vegetables for similar results. The method also allows for easy scaling and batch cooking.
- Make‑ahead Potential: Once glazed, the sprouts can be stored in the refrigerator for up to three days and reheated with a splash of water to regain crispness. This makes it an excellent option for meal prep or entertaining.
Alright, let's break down exactly what goes into this masterpiece...
Inside the Ingredient List
The Flavor Base
Olive oil is the foundation that allows the Brussels sprouts to roast evenly. It provides a subtle nutty flavor that complements the sweetness of the honey. If you’re looking for a richer taste, try using a high‑oleic olive oil that has a higher smoke point. Skipping the oil would result in soggy sprouts that fail to caramelize.
The Texture Crew
Brussels sprouts themselves are the star of the show. Choose firm, bright green sprouts with tight heads for the best texture. If you find sprouts that are too large, cut them in half to ensure even cooking. Leaving the stems attached adds a rustic look and extra crunch.
The Unexpected Star
Honey is the secret weapon that turns a simple side into a gourmet experience. Its natural sugars caramelize during roasting, creating a glossy glaze that clings to each sprout. If you’re vegan, maple syrup can be a decent substitute, but the flavor profile will shift slightly.
The Final Flourish
Balsamic vinegar adds acidity that balances the sweetness of the honey. A good‑quality, 12‑year‑old balsamic will provide depth and complexity. If you’re in a hurry, a 5‑year‑old vinegar works, but the finish will be sharper.
Everything's prepped? Good. Let's get into the real action...
The Method — Step by Step
- Preheat your oven to 425°F (220°C). Line a large baking sheet with parchment paper to prevent sticking. This high temperature is crucial for achieving a caramelized crust. Place the sheet in the middle rack to ensure even heat distribution.
- Trim the stems of the Brussels sprouts, removing any yellow or damaged leaves. Pat them dry with a clean towel; moisture is the enemy of crispness. Toss the sprouts in 2 tbsp of olive oil, making sure each bud is coated. Sprinkle 1/2 tsp kosher salt, 1/4 tsp black pepper, and 1/4 tsp garlic powder over them.
- Spread the sprouts in a single layer on the prepared sheet. Avoid overcrowding; the sprouts need space to roast rather than steam. Roast for 15 minutes, flipping them halfway through. The sprouts should start to develop a golden-brown hue.
- While the sprouts roast, combine 2 tbsp balsamic vinegar and 1 tbsp honey in a small saucepan over low heat. Stir until the mixture thickens slightly, forming a glaze. Avoid boiling; you want a syrupy consistency, not a burnt caramel.
- When the sprouts are nearly done, drizzle the glaze evenly over them. Toss gently to coat each sprout. The glaze should cling to the surface, forming a glossy sheen. This step is crucial for the final flavor profile.
- Return the glazed sprouts to the oven for an additional 5–7 minutes, or until the glaze has caramelized and the edges are crisp. Keep a close eye; the glaze can burn quickly if left unattended. The final product should have a glossy, slightly sticky finish.
- Remove the sheet from the oven and transfer the sprouts to a serving dish. Garnish with a sprinkle of fresh cracked pepper or a drizzle of extra honey if desired. Let them rest for a minute to set the glaze. This final touch enhances both the flavor and the visual appeal.
- Serve immediately, while the sprouts are still warm and crisp. Pair with a protein of your choice or enjoy as a hearty side. The dish’s bright, caramelized flavor makes it a versatile addition to any meal. Enjoy the applause from your guests and the satisfaction of a job well done.
That's it — you did it. But hold on, I've got a few more tricks that'll take this to another level...
Insider Tricks for Flawless Results
The Temperature Rule Nobody Follows
Many cooks think 400°F is sufficient, but the key to a perfect caramelized crust is a higher heat. 425°F (220°C) forces the sugars to caramelize quickly while preventing the sprouts from steaming. If your oven runs hot, lower the temperature slightly to avoid burning. I’ve seen too‑soft sprouts turn into a mush when the heat is too low.
Why Your Nose Knows Best
Before you finish roasting, sniff the sprouts. A sweet, slightly caramelized aroma is a sign of readiness. If you detect a burnt smell, lower the heat or remove them early. Your nose is a reliable judge of doneness, often more accurate than a timer.
The 5-Minute Rest That Changes Everything
Letting the sprouts rest for five minutes after removing them from the oven allows the glaze to set and the steam to escape. This brief pause ensures the edges remain crisp while the interior stays tender. Skipping this step often results in soggy, unevenly caramelized sprouts.
Use a Cast Iron Skillet for Extra Crunch
If you prefer a skillet method, heat a cast‑iron pan until it’s smoking. Add the oil and sprouts, letting them sear for 5 minutes before adding the glaze. The pan’s heat retention gives the sprouts an even crust. This technique is great for smaller batches.
Finish with a Splash of Lemon
Just before serving, squeeze a small amount of fresh lemon juice over the sprouts. The acidity brightens the honey glaze and cuts through the richness. A lemon zest sprinkle adds a subtle citrus aroma. This finishing touch turns a great dish into unforgettable.
Now you’re armed with the knowledge to create Brussels sprouts that will have your friends begging for more.
Creative Twists and Variations
This recipe is a playground. Here are some of my favorite ways to switch things up:
Smoky Chipotle Twist
Swap the honey for a teaspoon of chipotle‑in‑adobo for a smoky heat. Keep the balsamic to preserve the sweet‑acid balance. The result is a spicy, caramelized coating that pairs well with grilled meats. Perfect for a summer barbecue.
Nutty Almond Crunch
After roasting, toss the sprouts with toasted sliced almonds and a sprinkle of parmesan. The nuts add a nutty crunch and the cheese brings umami. This variation turns the dish into a hearty side for a Mediterranean dinner.
Asian-Inspired Glaze
Replace the balsamic with soy sauce and add a splash of rice vinegar. Finish with a drizzle of sesame oil and a sprinkle of toasted sesame seeds. The glaze becomes savory and slightly tangy, reminiscent of stir‑fried greens.
Maple‑Miso Fusion
Use maple syrup instead of honey and add a teaspoon of white miso paste. The miso adds depth and a subtle salty note. This fusion creates a sweet‑savory glaze with an umami punch.
Herb‑Infused Finale
After glazing, sprinkle fresh chopped rosemary and thyme. The herbs infuse the sprouts with aromatic flavors that elevate the dish. This is a great option for a rustic, country‑style meal.
Cheese‑Covered Delight
Sprinkle shredded sharp cheddar or crumbled blue cheese over the hot sprouts. The cheese melts into the glaze, creating a creamy, tangy layer. This variation is a crowd‑pleaser at game‑day gatherings.
Each of these variations opens a new flavor dimension while keeping the core caramelization technique intact.
Storing and Bringing It Back to Life
Fridge Storage
Place the cooled sprouts in an airtight container and refrigerate for up to three days. The glaze may thicken slightly, but the sprouts will retain their crunch if stored properly. Keep the container upright to prevent moisture buildup.
Freezer Friendly
Freeze the sprouts in a single layer on a baking sheet before transferring to a freezer bag. Store for up to one month. This method preserves texture and flavor, making it ideal for meal prep.
Best Reheating Method
Reheat in a hot oven at 350°F (175°C) for 8–10 minutes, adding a splash of water to create steam. This keeps the sprouts from drying out and restores the glaze’s glossy finish. Alternatively, use a skillet over medium heat for a quick re‑crisp.
Remember to add a tiny splash of water before reheating — it steams back to perfection.