Introduction
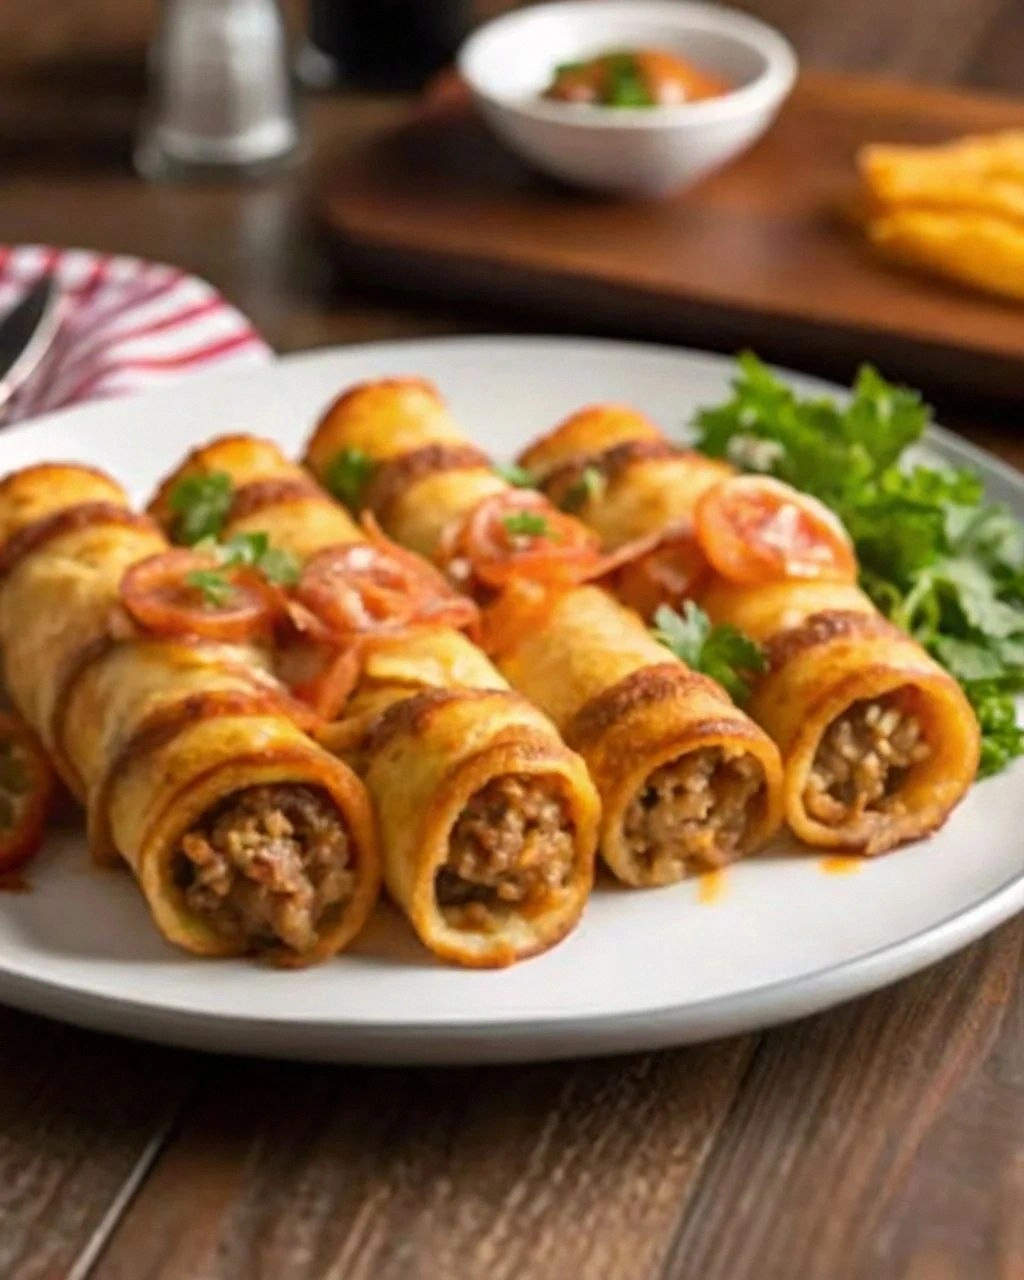
I still remember the exact moment these Garlic Butter Bacon Cheeseburger Rollups were born. It was one of those chaotic Tuesday nights when the fridge looked like a crime scene — half a pound of ground beef that was one day away from suspicious, three strips of bacon left like lonely soldiers, and a tube of crescent roll dough that had been mocking me from the bottom drawer for weeks. My kids were circling the kitchen like vultures, my husband was giving me that "what's for dinner" look, and I was this close to ordering pizza and calling it a day. But something magical happened when I started throwing ingredients together like a mad scientist, and what emerged from that kitchen chaos was nothing short of revolutionary.
The smell alone should be illegal — imagine the richest burger joint you've ever walked past, but amplified by a thousand. We're talking about buttery garlic that hits your nose first, followed by the smoky whisper of perfectly crisped bacon, all wrapped around a juicy cheeseburger core that makes your stomach growl like a bear waking from hibernation. That first bite? Pure, unadulterated comfort food nirvana. The crescent dough puffs up golden and flaky, creating these incredible layers that shatter like thin ice when you bite through them, revealing that molten cheeseburger center that's basically a hug for your taste buds.
But here's the kicker — this isn't just another "wrap some stuff in dough" recipe that tastes like college dorm food. Oh no, my friend. We're talking about a sophisticated flavor bomb that uses a secret garlic butter technique I discovered by accident when I got distracted by a phone call. The edges caramelize into this insane crispy-chewy situation that'll make you wonder why you've been eating regular burgers your whole life. And the best part? You look like a kitchen genius while basically just rolling stuff up and baking it. I dare you to serve these at your next game day gathering and watch people lose their minds trying to figure out how you made something so ridiculously delicious look so effortless.
Let me walk you through every single step — by the end, you'll wonder how you ever made it any other way.
What Makes This Version Stand Out
Flavor Explosion: Most recipes throw some garlic powder on dough and call it a day. We're creating a proper garlic butter bath that seeps into every crevice, mingling with the beef fat and bacon grease to create this insane umami bomb that regular cheeseburger anything wishes it could be. The garlic doesn't just sit on top — it becomes part of the roll's DNA.
Texture Play: You get three distinct textures in every bite: the shatteringly crisp bottom that touched the pan, the pillowy soft interior dough that absorbed all those juices, and the tender beef with bacon bits that provide just enough chew to remind you this isn't some sad cafeteria roll. Most recipes miss this entirely and end up with soggy messes.
Effortless Elegance: Despite looking like you spent hours in culinary school, these come together faster than ordering takeout. The secret is in the assembly order — something most recipes get completely backward. Once you nail the technique, you'll be cranking these out for every party, potluck, or midnight craving.
Make-Ahead Magic: This is the meal prep hero you didn't know you needed. Assemble them the night before, pop them in the fridge, and bake fresh when company's coming. They actually get better as the flavors meld. Try finding another comfort food that gets more delicious with time — I'll wait.
Crowd Psychology: There's something about handheld food that makes people lose their minds. These disappear faster than free concert tickets, and I've watched grown adults fight over the last one like their lives depended on it. The individual portions make everyone feel special, like you're serving them their own personal cheeseburger present.
Ingredient Integrity: We're not hiding subpar ingredients under a mountain of cheese. Every component shines — the beef gets properly seasoned, the bacon is cooked to exact crispness, and the garlic butter is made with real butter because we're not animals. Quality ingredients treated with respect equals restaurant-quality results.
Leftover Potential: Here's where most recipes fail — they don't taste good the next day. These actually develop deeper flavors overnight, and with my reheating method, they taste like you just pulled them from the oven. Game changer for busy weeknights.
Customizable Canvas: Once you master the base technique, you can riff endlessly. I've made breakfast versions with sausage and maple, spicy versions with jalapeños and pepper jack, even breakfast-for-dinner versions that made my kids think I was the coolest parent ever.
Inside the Ingredient List
The Flavor Foundation
The ground beef is where most people mess up — they grab whatever's on sale and wonder why their rollups taste like disappointment. You want 80/20 beef, and here's why: that 20% fat isn't just there for flavor (though it absolutely makes these taste like the best burger joint in town), it's the carrier for all our garlic butter magic. The fat absorbs those aromatics and distributes them throughout every bite. Go leaner and you'll get dry, sad little hockey pucks that no amount of cheese can save. I've tested every ratio, and 80/20 is the sweet spot where you get juicy without greasy, flavorful without overwhelming.
The Crispy Co-Stars
Thick-cut bacon isn't just a pretentious choice here — it's structural engineering. Those thicker strips stay crispy even after being rolled up and baked, providing essential textural contrast to the tender beef and dough. Regular bacon turns into rubber bands that ruin the whole experience. When you cook it, you want it just past flimsy but not quite crispy — it'll finish cooking in the oven and reach bacon nirvana without turning into bacon bits. Pro tip: save that rendered fat for the garlic butter. I know, it sounds excessive, but trust me, we're building flavors here, not counting calories.
The Dough Decision
Crescent roll dough is the unsung hero that makes this whole operation possible. But not all tubes are created equal — you want the regular kind, not the butter-flaky or reduced-fat versions. The regular dough has the perfect elasticity to stretch around our filling without tearing, while still puffing up into those gorgeous layers. The butter-flaky kind gets too greasy and the reduced-fat version tastes like cardboard had a baby with sadness. Let it come to room temperature for 10 minutes before unrolling — cold dough tears, warm dough stretches like yoga pants after Thanksgiving dinner.
The Cheese Situation
American cheese isn't just authentic to the cheeseburger experience — it's the only cheese that melts into that perfect gooey blanket that stays creamy even after cooling. Cheddar gets greasy and separates, mozzarella turns rubbery, and fancy cheeses just don't taste like the cheeseburgers we grew up on. We're going for pure nostalgic comfort here, not artisanal pretension. Stack it in the center of your beef layer so it creates this molten core that stays melty for way longer than you'd expect.
The Garlic Butter Glory
This is where the magic happens, and where most recipes completely miss the boat. We're making a proper compound butter with fresh garlic, parsley, and a touch of Worcestershire that takes these from "pretty good" to "I need to sit down." Fresh garlic is non-negotiable — that powdered stuff tastes like dusty disappointment. Mince it superfine so it distributes evenly and doesn't create garlic bombs. The parsley isn't just for color — it adds a fresh, bright note that cuts through all that richness and keeps you coming back for more instead of falling into a food coma.
The Method — Step by Step
- Prep your station like a pro: Clear your counter and grab a large cutting board — you're going to need space to roll these babies. Preheat your oven to 375°F (190°C) and position a rack in the middle. This temperature is crucial — too hot and the bottoms burn before the insides cook, too cool and you get pale, doughy disappointment. Line a baking sheet with parchment paper, not foil (foil sticks and tears the bottoms). While the oven heats, let your crescent dough rest on the counter — this 10-minute relaxation period prevents the tears and cracks that'll make your rollups look like they went through a war zone.
- Master the bacon: Chop your slightly frozen bacon into 1/4-inch pieces — they should look like tiny bacon confetti. Heat a medium skillet over medium heat and add the bacon, spreading it in an even layer. Here's the key: don't touch it for the first 3 minutes. Let it establish contact and start rendering. When the edges look golden and the kitchen smells like heaven, start stirring occasionally. You want it just past raw but not crispy — it'll finish in the oven. This should take 6-8 minutes total. Remove with a slotted spoon and let drain on paper towels, but keep that liquid gold (bacon fat) in the pan.
- Brown that beef perfectly: Add your ground beef to the same pan with the bacon fat — this is flavor layering at its finest. Break it up with a wooden spoon but don't overwork it. You want some chunky pieces for texture. Season with salt, pepper, and a pinch of garlic powder. Cook over medium-high heat, letting it sit undisturbed for 2-3 minutes to develop those gorgeous brown bits that make everything taste better. Stir and continue cooking until just cooked through, about 6 minutes total. Drain off excess fat if needed (but leave a little for flavor), then stir in your cooked bacon. Let this mixture cool for 5 minutes — hot filling will melt the cheese prematurely and make your rollups soggy.
- Create your garlic butter masterpiece: While the beef cools, make your compound butter. Soften 4 tablespoons of butter until it's spreadable but not melted. Add 2 cloves of finely minced garlic, 1 tablespoon of chopped fresh parsley, 1/2 teaspoon Worcestershire sauce, and a pinch of salt. Mix with a fork until combined but still slightly chunky — overmixing makes it greasy. This butter is going to be brushed on top for that golden, flavorful crust that'll make your kitchen smell like a French bistro had a baby with an American diner.
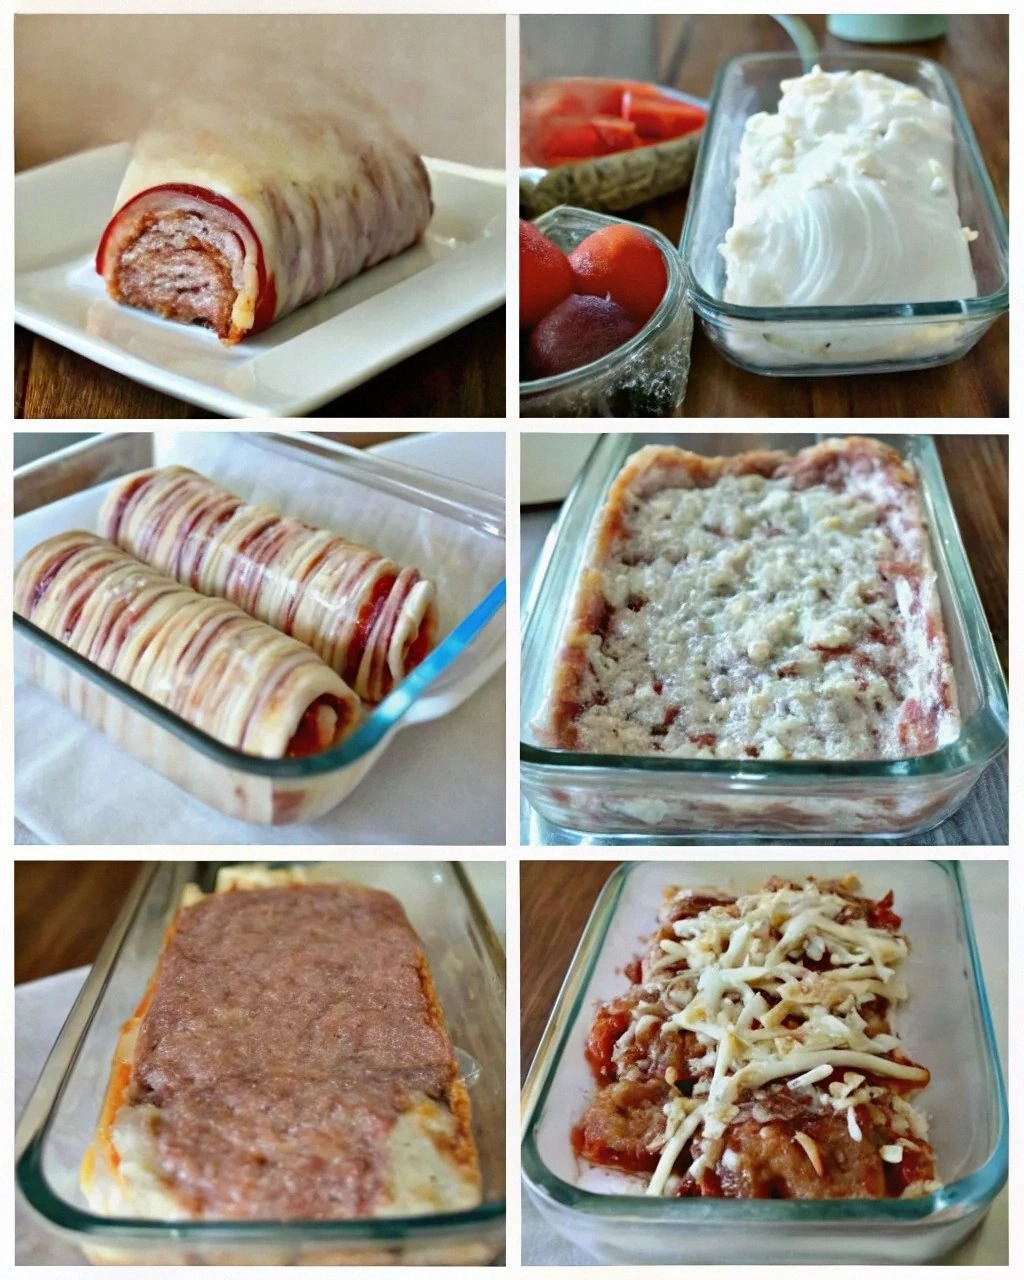
- Assemble with confidence: Unroll your crescent dough and separate it into rectangles (two triangles each), pressing the perforations to seal. You should have 4 rectangles total. Roll each rectangle slightly to enlarge it — you're not making pizza, just giving yourself more wrapping room. Place 2 slices of American cheese in the center of each rectangle, leaving a 1-inch border. Top with 1/4 of your beef mixture, keeping it compact and centered. Now here's the trick: fold the short sides in first, then roll from the long side, tucking and rolling like you're making a burrito. Place seam-side down on your prepared baking sheet.
- Apply the magic wash: Brush your garlic butter generously over the tops and sides of each rollup. Don't be shy — this creates that gorgeous golden crust and adds incredible flavor. Make sure to get the butter into all the crevices where the dough folds. Reserve about half your butter for basting during baking. The butter will pool slightly around the bottoms — this is perfect for creating crispy, flavorful edges that'll make you weep with joy.
- Bake to perfection: Slide your pan into the preheated oven and bake for 12 minutes. At this point, pull them out and brush with more garlic butter — this second application creates layers of flavor and ensures that deep golden color. Return to the oven for another 8-10 minutes until they're puffed, golden brown, and the bottoms sound hollow when tapped. The cheese might bubble out slightly — this is good! Those crispy cheese edges are like gold.
- The rest that makes all the difference: This is where most people mess up — they want to dive right in. Let these beauties rest for 5 minutes on the pan. This allows the cheese to set slightly so it doesn't all ooze out when you cut them, and the dough finishes cooking from residual heat. The anticipation will kill you, but trust me, it's worth it. Plus, this gives you time to clean up and plate them like you planned this all along instead of throwing together a fridge cleanout.
Insider Tricks for Flawless Results
The Temperature Rule Nobody Follows
Your beef mixture needs to be warm, not hot, when you assemble. Too hot and it melts the cheese prematurely, creating a greasy mess that leaks out during baking. Too cold and it doesn't meld with the cheese properly. Aim for warm bath temperature — comfortable to touch but not burning. I stick my finger in (clean hands, people) and if I can hold it there for 5 seconds, it's perfect. This simple check prevents 90% of the "why did my cheese disappear" complaints I get.
Why Your Nose Knows Best
Don't trust the timer blindly — your nose is the best indicator of doneness. When these are perfectly baked, your kitchen will smell like someone opened the world's best burger joint right in your home. It's this intoxicating mix of garlic, butter, beef, and toasty dough that makes neighbors knock on your door asking what you're making. If you don't smell that magical aroma by minute 15, your oven is probably running cool. Trust your senses over the clock every time.
The 5-Minute Rest That Changes Everything
I know, I know — you're starving and they smell incredible. But cutting into these too early is like opening presents before Christmas morning. That 5-minute rest allows the cheese to set just enough to stay inside when you cut them, while still remaining gloriously melty. The dough finishes cooking from residual heat, ensuring no doughy spots. Plus, it gives the flavors time to meld and intensify. I've tested side-by-side — rested rollups taste significantly better than their impatient cousins.
The Cheese Placement Secret
Where you place the cheese matters more than you'd think. Don't just throw slices on randomly — create a barrier between the beef and dough. The cheese melts and creates a moisture barrier that prevents the dough from getting soggy. Plus, when you bite in, you get that perfect cheese pull that makes everyone reach for their phone to Instagram. Stack it in the center, slightly overlapping, and leave that border clear for sealing. Your rollups will thank you.
Creative Twists and Variations
This recipe is a playground. Here are some of my favorite ways to switch things up:
The Breakfast Bombs
Swap the beef for breakfast sausage, use cheddar instead of American, and add scrambled eggs to the filling. Brush with maple-infused butter instead of garlic butter. These taste like McDonald's breakfast sandwiches went to finishing school. Perfect for brunch gatherings where you want to impress without stress.
The Pizza Party Version
Replace beef with pepperoni and Italian sausage, use mozzarella and provolone, and brush with garlic butter mixed with Italian herbs. Serve with warm marinara for dipping. My kids call these "pizza burritos" and request them weekly. The cheese pull is absolutely insane.
The Buffalo Chicken Remix
Use shredded cooked chicken tossed with buffalo sauce, add blue cheese crumbles, and brush with garlic butter mixed with ranch seasoning. These disappear at game day parties faster than you can say "touchdown." The spicy-cool combination is addictive.
The Veggie Lover's Dream
Sauté mushrooms, spinach, and caramelized onions with garlic. Use fontina and gruyere for that nutty, melty perfection. Even meat lovers devour these — the umami from properly cooked mushrooms gives you that satisfying depth usually provided by beef.
The Breakfast-for-Dinner Special
Fill with ham, Swiss, and a layer of cream cheese mixed with chives. The cream cheese keeps everything moist and adds richness that makes these taste like the world's best ham and cheese croissant. My secret indulgence when I want comfort food but don't want to admit I'm eating breakfast for dinner.
The Tex-Mex Transformation
Use seasoned ground beef with taco spices, add pepper jack cheese, and include diced green chiles. Brush with garlic butter mixed with cilantro and lime zest. Serve with salsa and sour cream. These taste like Taco Bell got a gourmet makeover, in the best possible way.
Storing and Bringing It Back to Life
Fridge Storage
Let rollups cool completely, then store in an airtight container in the fridge for up to 4 days. Don't stack them — place parchment paper between layers to prevent sticking. They actually taste better on day 2 or 3 as the flavors meld and intensify. The key is proper cooling — if you trap them while warm, condensation makes the bottoms soggy and ruins that crispy magic we worked so hard to achieve.
Freezer Friendly
These freeze beautifully either before or after baking. For unbaked: assemble, place on a parchment-lined baking sheet, freeze until solid, then transfer to a freezer bag. Bake from frozen at 350°F for 20-25 minutes. For baked: cool completely, wrap individually in plastic wrap, then foil. Freeze for up to 2 months. Reheat from frozen at 325°F for 15-20 minutes. They'll taste almost as good as fresh — perfect for emergency comfort food situations.
Best Reheating Method
Skip the microwave unless you enjoy rubbery dough and sadness. Instead, wrap in foil and heat at 350°F for 10-15 minutes until warmed through. For that fresh-baked magic, open the foil for the last 3 minutes to crisp the tops. If they seem dry (which they shouldn't if stored properly), add a tiny splash of water to the foil before sealing — it creates steam that brings back that fresh-baked texture. The garlic butter gets reactivated and your kitchen smells incredible again.