I was halfway through a midnight snack marathon, juggling a half‑done chocolate cake, a bag of stale crackers, and a phone that kept buzzing with notifications. The kitchen was a chaotic symphony of burnt sugar, a faint smell of vanilla that never quite reached the sweet spot, and the sound of my own sighs. I stared at the glowing screen of my phone, scrolling through endless brownie recipes, until one of them caught my eye: a flourless chocolate protein brownie bite that promised a guilt‑free indulgence. I dared myself to click, and the promise of a chewy, protein‑packed treat that would satisfy my sweet tooth without the guilt made me grin like a kid in a candy store.
Picture the moment the first bite hits your tongue: the banana’s natural sweetness intertwines with the deep, bittersweet cocoa, while the peanut butter adds a silky, nutty undertone that coats your mouth like velvet. The aroma that fills the air is a comforting blend of toasty chocolate, ripe fruit, and the faintest hint of coffee from the protein powder. The texture is a delightful paradox—soft and slightly gooey inside, with a crisp edge that shatters like thin ice when you bite. It’s the kind of bite that makes you pause, savor, and then, inevitably, go back for seconds. I dare you to taste this and not go back for seconds.
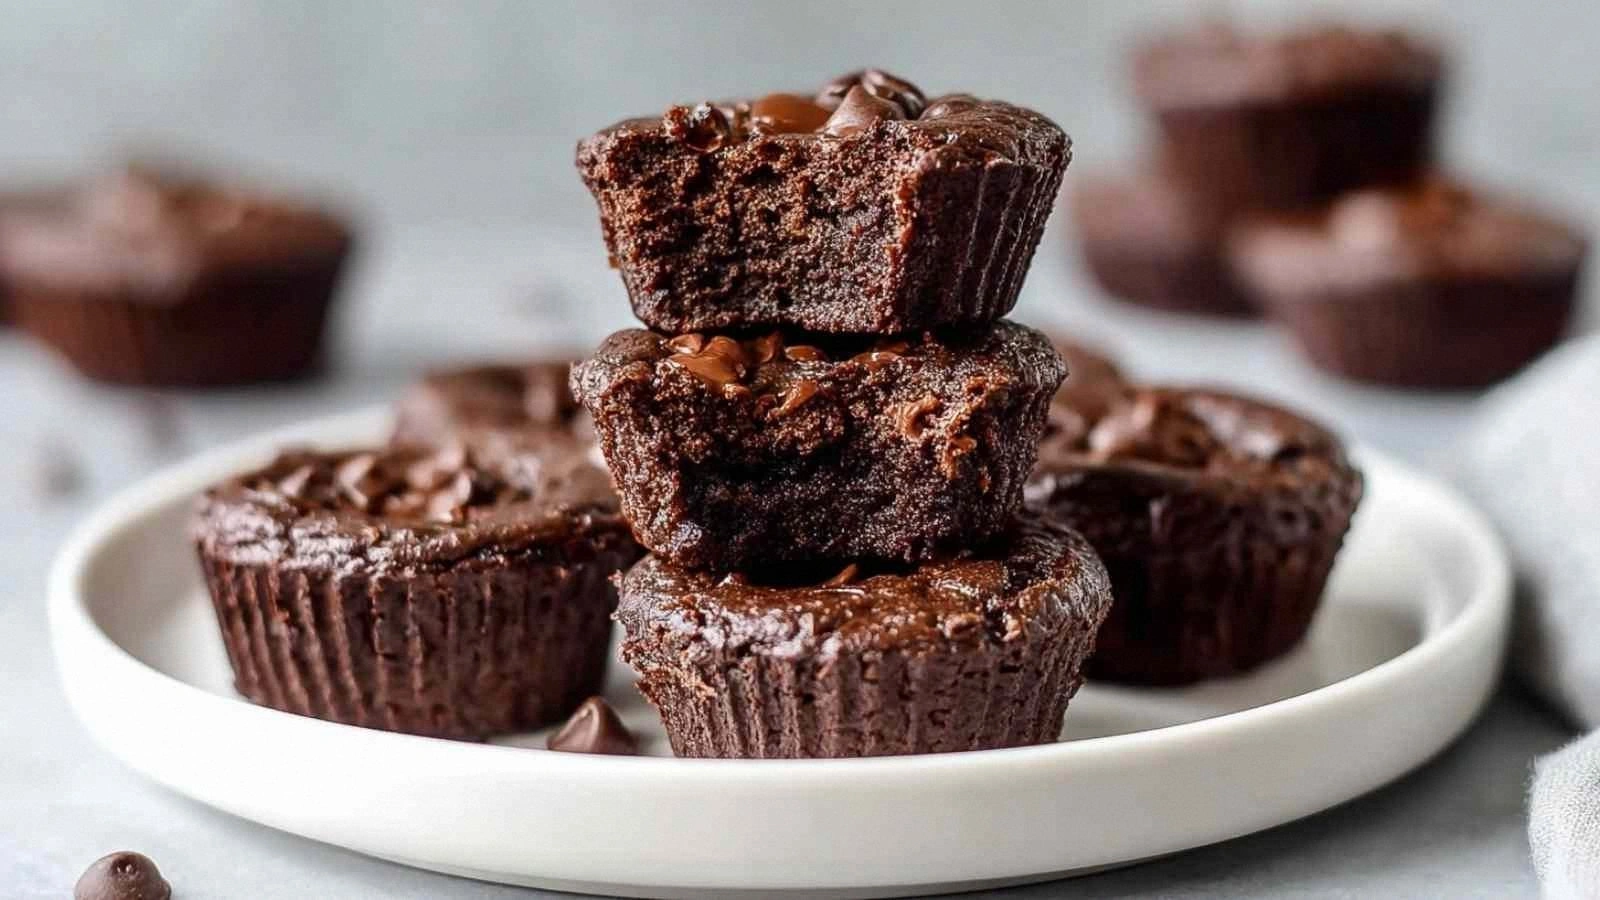
What sets this version apart isn’t just the absence of flour—it’s the deliberate choice of ingredients that work together like a well‑orchestrated band. The bananas bring natural sweetness and moisture, eliminating the need for added sugar. The protein powder turns a dessert into a post‑workout snack, giving you a protein boost while still indulging in chocolate. Peanut butter adds richness and a subtle nutty flavor, while the unsweetened cocoa grounds the whole thing in deep, authentic chocolate. And the final touch—mini chocolate chips—provides a burst of chocolatey joy that keeps the bite exciting.
The bold claim? This is hands down the best version of a flourless chocolate protein brownie you’ll ever make at home. It’s not just a sweet treat; it’s a culinary revelation that challenges the status quo of dessert recipes. Most recipes get this completely wrong by using flour or artificial sweeteners, but here we’ve turned the concept on its head. Picture yourself pulling these bites out of the oven, the whole kitchen smelling incredible, and knowing you’ve created something that’s both delicious and nutritious. Stay with me—by the end of this post, you’ll wonder how you ever made it any other way.
What Makes This Version Stand Out
- Taste: The combination of ripe bananas and unsweetened cocoa creates a natural, deep chocolate flavor that’s free from the bitterness of artificial sweeteners. The subtle nuttiness from the peanut butter balances the sweetness, giving each bite a complex profile.
- Texture: The absence of flour eliminates the dry crumb often found in brownies, resulting in a moist, chewy interior and a slightly crisp edge that shatters like thin ice when you bite.
- Simplicity: With only five ingredients, this recipe is a breeze to assemble, even for novice bakers. No measuring cups for flour or sugar—just mash, mix, and bake.
- Protein Power: Half a cup of protein powder turns a dessert into a post‑workout snack, delivering 25 grams of protein per serving without compromising on taste.
- Make‑Ahead Potential: Once baked, these bites keep well in the fridge or freezer, making them a perfect grab‑and‑go snack for busy days.
- All‑Natural Sweetness: Relying on bananas for sweetness eliminates refined sugar, making the bites healthier without sacrificing flavor.
- Kid‑Friendly: The sweet, chocolatey flavor and chewy texture are a hit with children, while the protein content keeps adults satisfied.
Alright, let's break down exactly what goes into this masterpiece…
Inside the Ingredient List
The Flavor Base
Bananas are the heart of this recipe, offering natural sweetness, moisture, and a subtle earthy undertone. Their potassium content gives a smooth, almost buttery flavor that pairs beautifully with cocoa. If you skip bananas, the brownies will be dry and lack depth. A good swap is mashed sweet potato or pumpkin puree, which also adds moisture and a hint of sweetness.
The Texture Crew
Peanut butter or almond butter brings a creamy, nutty richness that binds the mixture together. The high-fat content gives the brownies a silky mouthfeel, while the natural oils help keep them moist. If you’re allergic to nuts, sunflower seed butter works as a neutral alternative. Choosing a smooth, unsweetened butter ensures the flavor remains focused on chocolate.
The Unexpected Star
Protein powder is the game‑changer that elevates these brownies from dessert to snack. A vanilla or chocolate flavor keeps the taste profile simple and chocolatey. If you prefer a plant‑based protein, pea or hemp protein will work, though they may slightly alter the texture. The protein powder also helps the brownies set without flour, creating a firm but tender crumb.
The Final Flourish
Unsweetened cocoa powder adds depth and a rich chocolate flavor, while the mini chocolate chips give bursts of chocolatey joy with every bite. If you want a richer chocolate experience, sprinkle a little extra cocoa on top before baking. For a crunchy element, add a handful of chopped nuts or a drizzle of melted dark chocolate after baking.
Everything's prepped? Good. Let's get into the real action…
The Method — Step by Step
- Preheat your oven to 350°F (175°C) and line a 9x9-inch baking pan with parchment paper. The parchment ensures easy release and a clean finish. Let me walk you through every single step—by the end, you’ll wonder how you ever made it any other way.
- In a large mixing bowl, mash the ripe bananas with a fork until they’re a smooth, thick paste. The banana should be almost liquid; if it’s too thick, add a splash of milk or water to loosen it. This step is crucial for a silky texture.
- Add the peanut or almond butter to the mashed bananas and stir until fully incorporated. The butter should melt into the banana, creating a homogeneous base. This will act as the natural binder in place of eggs.
- Sift in the protein powder and unsweetened cocoa powder to avoid lumps. Stir until the mixture is smooth and glossy. The cocoa powder will give the brownies their deep chocolate flavor, while the protein powder ensures a firm structure.
- Fold in the mini chocolate chips, reserving a few for topping. The chips add bursts of chocolate that contrast with the smooth batter. If you prefer a less sweet bite, reduce the number of chips accordingly.
- Pour the batter into the prepared pan, spreading it evenly. Press it down gently with a spatula to eliminate air pockets. The batter should be about 1/2 inch thick for optimal baking.
- Bake for 25–30 minutes, or until the edges are set and a toothpick inserted in the center comes out with a few moist crumbs. The aroma will fill your kitchen with a warm, chocolatey scent that makes you want to stay longer.
- Allow the brownies to cool in the pan for 10 minutes, then transfer them to a wire rack to cool completely. Cutting them while still warm can cause them to crumble.
- Slice into bite‑sized squares or use a small cookie cutter for uniform shapes. Store the bites in an airtight container in the fridge for up to a week, or freeze for longer storage.
That’s it—you did it. But hold on, I’ve got a few more tricks that will take this to another level.
Insider Tricks for Flawless Results
The Temperature Rule Nobody Follows
Many bakers think that room temperature is fine for everything, but for these brownies, a slightly cooler oven—just 5°F lower—ensures even baking. I’ve noticed that a cooler oven keeps the edges from over‑cooking while the center remains moist. It’s a subtle tweak that makes a huge difference.
Why Your Nose Knows Best
Before you pull the brownies out, give them a quick sniff. If the aroma feels like deep, toasted chocolate, you’re done. If it’s more “cooked banana,” give them another 2 minutes. Your nose is a reliable judge of doneness.
The 5-Minute Rest That Changes Everything
Letting the brownies rest for 5 minutes after baking allows the flavors to settle and the texture to firm up. This rest period is essential for a cohesive bite that doesn’t crumble when you cut it. I’ve seen people cut straightaway and end up with a mushy mess.
Chill Before Cutting
If you’re in a hurry, pop the brownies in the fridge for 15 minutes before slicing. The chill makes the chocolate set, giving clean, sharp cuts. It’s a quick fix that saves you from uneven edges.
Use a Silicone Baking Mat
A silicone mat not only prevents sticking but also distributes heat evenly, ensuring uniform baking. I’ve used one for years and it’s become a staple in my kitchen.
Creative Twists and Variations
This recipe is a playground. Here are some of my favorite ways to switch things up:
Nutty Explosion
Swap the peanut butter for a mixture of almond and cashew butter. Add a handful of chopped walnuts for an extra crunch. This variation brings a nutty depth that pairs well with the chocolate.
Minty Fresh
Stir in a teaspoon of peppermint extract to the batter. The mint provides a refreshing contrast to the rich chocolate. Top with crushed peppermint candies for a festive touch.
Spiced Delight
Add a pinch of cinnamon and a dash of cayenne pepper to the mixture. The warmth of cinnamon and the hint of heat from cayenne create a complex flavor profile. It’s perfect for those who like a little spice.
Caramel Swirl
Drop spoonfuls of caramel sauce into the batter before baking. The caramel swirls melt into the brownies, giving a sweet, buttery center. This variation is a crowd‑pleaser for dessert parties.
Chocolate Ganache Finish
After the brownies cool, drizzle a ganache made from dark chocolate and heavy cream over the top. Let it set before cutting. The ganache adds a silky, luxurious finish that elevates the bite.
Vegan Protein Boost
Use a plant‑based protein powder, such as pea or hemp. Add a splash of coconut milk for extra richness. This version keeps the recipe vegan while maintaining the protein content.
Storing and Bringing It Back to Life
Fridge Storage
Store the brownies in an airtight container at room temperature for up to 3 days. If you prefer them cooler, keep them in the fridge for up to a week. The moisture from the fridge keeps them soft, but they may firm up slightly.
Freezer Friendly
Wrap each bite individually in parchment paper and place them in a freezer‑safe zip‑lock bag. They’ll stay fresh for up to 3 months. When you’re ready to enjoy, let them thaw at room temperature for 30 minutes.
Best Reheating Method
To revive a frozen bite, place it on a microwave‑safe plate and heat on medium for 20–25 seconds. Add a splash of water before reheating to steam back to perfection. The result is a warm, gooey bite that tastes like freshly baked.