I was halfway through a pot roast when the stove decided to throw a tantrum, splattering hot sauce across the counter like a rogue confetti cannon. The kitchen smelled like a burnt kitchen, and my confidence was as low as the simmering broth. In that moment, I thought, “Why not turn this disaster into a dessert?” I grabbed my Instant Pot, tossed in some apples, and the rest was pure alchemy. If you’ve ever felt the sting of a kitchen mishap, you’ll understand the relief that follows when a simple solution turns chaos into comfort.
The moment the apples hit the pot, their sweet perfume unfurled like a sunrise over a crisp orchard. The gentle hiss of steam curled around the air, announcing that something wholesome was about to happen. I could taste the subtle hint of sugar already blooming, and the texture of the apples felt like a promise of softness. The Instant Pot’s seal clinked, sealing in the aroma and creating a miniature greenhouse in my kitchen. The anticipation was almost tangible, and I could hear the future of my meal humming in the background.
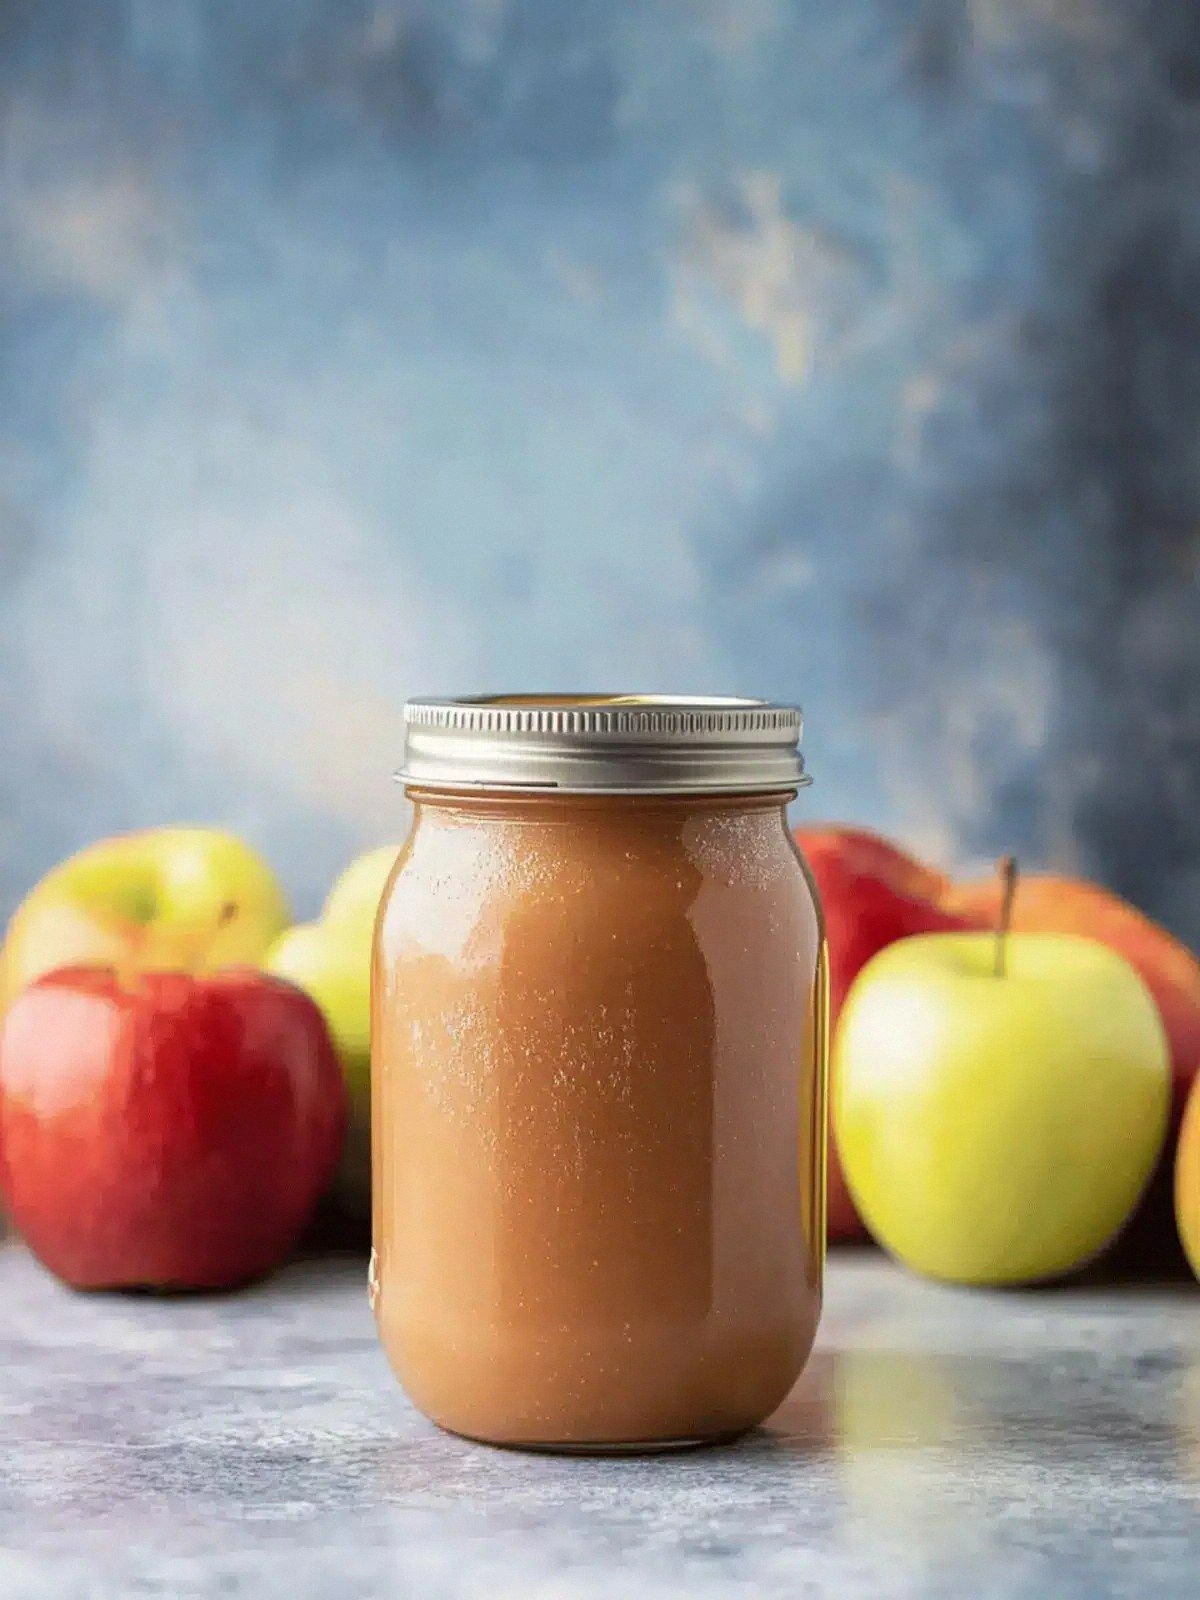
This version of applesauce isn’t just a side dish; it’s a revelation. By leveraging the pressure cooker’s ability to break down fibers quickly, I’ve achieved a silky consistency that would normally take hours. The addition of dates gives a natural caramel depth that replaces refined sugar without compromising the health quotient. Cinnamon is used sparingly, creating a warm undertone that feels like a cozy blanket. The result is a sauce that coats the tongue like velvet, yet remains light enough to pair with anything from pancakes to roasted pork.
There’s a secret ingredient that many overlook: a splash of filtered water. It may seem counterintuitive, but the water helps the apples release their juices and prevents the mixture from sticking to the bottom. I dare you to taste this and not go back for seconds. Picture yourself pulling this out of the pot, the whole kitchen smelling incredible, and your family begging for more. Let me walk you through every single step — by the end, you’ll wonder how you ever made it any other way.
What Makes This Version Stand Out
- Taste: The natural sweetness of apples is amplified by the caramelized dates, creating a flavor profile that feels both familiar and adventurous.
- Texture: The Instant Pot’s pressure cooking breaks down the apple fibers into a silky, almost custard-like consistency without the need for added thickeners.
- Speed: From prep to plating, this recipe takes less than 30 minutes—ideal for weeknight meals or last-minute dessert.
- Health: No butter, no refined sugar, and only natural fruit sugars keep the calorie count low while maximizing fiber.
- Versatility: Serve it warm with cinnamon or chill for a refreshing summer treat; it pairs seamlessly with pancakes, oatmeal, or even savory meats.
- Ingredient Quality: Fresh, firm apples and premium Medjool dates provide the depth that mass-produced sauces lack.
- Make‑Ahead Potential: The sauce keeps well in the refrigerator for up to a week, making it a perfect batch‑prep option.
- Minimal Cleanup: One pot, one set of utensils—your cleanup routine is as effortless as the cooking process.
Inside the Ingredient List
The Flavor Base
Fresh apples are the heart of this sauce. Choose firm varieties like Honeycrisp or Gala for their balanced sweet‑tart profile. When you bite into the sauce, you’ll feel the crispness that lingers even after the apples have softened. If you skip the apples, the sauce loses its backbone and becomes a thin, sugary syrup. For the best results, wash the apples thoroughly, core them, and cut them into uniform wedges.
The Sweetness Layer
Medjool dates are the unsung hero that brings natural caramel depth without the need for added sugar. They also add a subtle hint of tropical nuance that brightens the overall flavor. Removing the pits and chopping them finely ensures they blend seamlessly into the sauce. If you’re craving a lower sugar option, try using a single date and a splash of maple syrup instead.
The Texture Crew
The 0.25 cup of filtered water is the magic wand that keeps the apples from sticking and aids in the pressure‑cooking process. It also ensures that the sauce doesn’t become too thick or clumpy. A pinch of salt is optional but can enhance the natural sweetness of the apples. If you prefer a salt‑free version, simply omit this step and taste for balance.
The Final Flourish
Ground cinnamon is the finishing touch that adds warmth and depth. Use 0.5 teaspoon to avoid overpowering the delicate apple flavor. Cinnamon also brings a subtle spice that pairs beautifully with the natural sweetness of dates. If you’re experimenting with spice, a pinch of nutmeg or a dash of clove can add a new dimension.
Everything's prepped? Good. Let's get into the real action and watch the transformation unfold.
The Method — Step by Step
- First, add the sliced apples, chopped dates, and filtered water to the Instant Pot. Stir gently to distribute the ingredients evenly. The aroma will start to lift, hinting at the sweet journey ahead. Don’t rush—let the ingredients mingle for a minute before sealing the pot.
- Seal the lid and set the Instant Pot to “Manual” or “Pressure Cook” on high for 8 minutes. The quick pressure buildup will break down the apple fibers faster than a slow simmer. While the pot is building pressure, you’ll hear a faint hissing that signals the cooking magic is in motion.
- After the 8 minutes, perform a quick release by carefully turning the vent to let the steam escape. This step keeps the sauce from overcooking and preserves its bright, fresh flavor. The pot will hiss loudly—embrace it as a sign of success.
- Transfer the contents to a blender or use an immersion blender directly in the pot. Blend until the mixture is silky smooth, but leave a few apple chunks if you like a bit of texture. The sauce should have a glossy sheen and a thick, creamy consistency that clings to a spoon.
- Stir in the ground cinnamon, then taste. If the sauce feels a little flat, add a pinch more cinnamon or a splash of vanilla extract for depth. This is the moment of truth—make sure every bite sings with flavor.
- Let the sauce cool for 5 minutes before serving. As it cools, the flavors meld together, creating a richer, more harmonious profile. This resting period also allows the sauce to thicken slightly, achieving the perfect consistency.
- Serve immediately over pancakes, yogurt, or as a dip for apple slices. If you prefer a chilled version, refrigerate for at least an hour; the sauce will thicken further and develop a firmer texture.
- Enjoy the silky, naturally sweet apple sauce that feels like a warm hug. I dare you to taste this and not go back for seconds. Remember, the key to perfection lies in the pressure cooker’s power and the right balance of natural sweeteners.
That’s it — you did it. But hold on, I've got a few more tricks that'll take this to another level. These insider tips will help you avoid common pitfalls and elevate the flavor profile even further.
Insider Tricks for Flawless Results
The Temperature Rule Nobody Follows
Many cooks think a lower pressure setting will yield a better texture, but the Instant Pot’s high pressure is actually what breaks down the apple fibers the fastest. If you try to cook at low pressure, the sauce will remain too chunky. The 8‑minute high‑pressure cycle is the sweet spot for a silky finish. Stick to this setting and you’ll consistently get the same mouth‑watering result.
Why Your Nose Knows Best
Before blending, give the sauce a quick sniff. A faint, sweet apple aroma indicates the apples have released their juices properly. If the scent is flat, give it a minute longer in the pot. Your nose is a reliable guide to the sauce’s readiness, and it’ll help you avoid overcooking.
The 5‑Minute Rest That Changes Everything
After blending, let the sauce rest for exactly five minutes. During this brief period, the flavors meld, and the sauce thickens just enough to coat the spoon. Skipping this step can leave the sauce a little watery and less cohesive. Trust me, the five minutes make all the difference.
Blend, Don’t Mash
Some recipes call for mashing apples to create a chunky texture, but a smooth sauce is the hallmark of this Instant Pot version. Use a hand blender for a perfect blend or a regular blender for a quicker result. The smoother the sauce, the easier it is to spoon over pancakes or swirl into yogurt.
Serve with a Twist
A sprinkle of toasted coconut flakes or a dash of nutmeg can transform the sauce into a new flavor adventure. Add them right before serving to keep their texture and aroma intact. These small additions elevate the dish from simple to spectacular.
Keep It Fresh
If you’re not using the sauce immediately, store it in an airtight container in the refrigerator. It will keep for up to a week, and the flavors actually deepen over time. When you’re ready to serve, add a splash of water or milk to loosen the sauce and bring it back to a silky consistency.
Creative Twists and Variations
This recipe is a playground. Here are some of my favorite ways to switch things up:
Spiced Apple Caramel
Add a pinch of ground ginger and a splash of vanilla extract to the sauce for a warm, aromatic caramel note. It pairs wonderfully with toasted pecans or a scoop of vanilla ice cream.
Citrus Burst
Squeeze half a lemon or orange into the sauce to cut the sweetness and add a bright, zesty lift. This version works great as a topping for oatmeal or as a dip for grilled chicken.
Nutty Delight
Stir in a tablespoon of almond butter or peanut butter for a creamy, protein‑rich twist. The nutty flavor complements the natural sweetness and adds a satisfying depth.
Chocolate Apple Swirl
Fold in a few tablespoons of dark chocolate chips or cocoa powder after blending. The chocolate adds richness and makes the sauce perfect for dessert lovers.
Herb‑Infused
A handful of fresh mint or basil leaves blended into the sauce creates an unexpected herbal nuance that pairs beautifully with goat cheese or ricotta.
Low‑Sugar Version
Replace the maple sugar with stevia or a sugar‑free sweetener and add an extra date for natural sweetness. This version keeps the calorie count low while still delivering that luscious, sweet flavor.
Storing and Bringing It Back to Life
Fridge Storage
Transfer the sauce to a sealed container and refrigerate. It will keep for up to seven days. Before serving, give it a quick stir and add a splash of milk or water to restore its silky texture.
Freezer Friendly
Freezing is a great option for long‑term storage. Portion the sauce into freezer‑safe containers or ice cube trays. It will stay good for up to three months. Thaw in the refrigerator overnight and reheat gently on the stove or in the microwave.
Best Reheating Method
The easiest way to reheat is on low heat in a saucepan, stirring constantly to prevent sticking. Alternatively, microwave on low for 30‑second bursts, stirring each time. Add a tiny splash of water before reheating—this steams the sauce back to perfection.