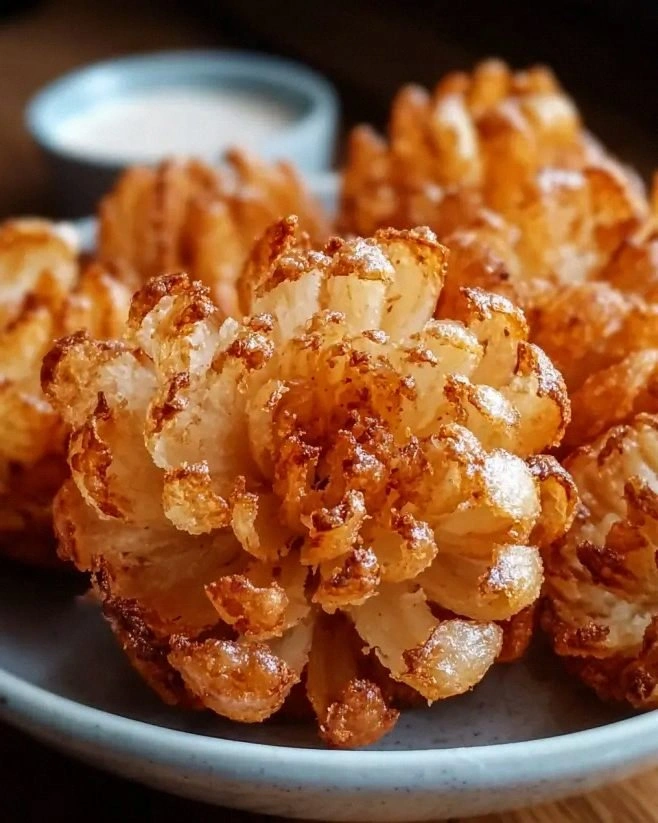
Picture this: a lazy Saturday night, the TV is blaring, and you’re staring at a half‑finished plate of frozen onion rings that taste like cardboard. I was ready to toss them in the trash when a sudden craving for something crunchy hit me like a drum solo at a rock concert. I grabbed the only onion I had, threw together a few pantry staples, and what happened next was nothing short of culinary alchemy. The kitchen filled with a buttery, buttery‑sweet perfume that made my neighbor’s cat pause mid‑yawn. I dared myself to keep the experiment a secret, but the first bite was so addictive I practically shouted, “I’ll be honest — I ate half the batch before anyone else got to try it.”
That moment sparked a revelation: most blooming onion recipes are either overly greasy or disappointingly soggy, missing that perfect snap that makes you want to devour the whole bowl. I’ve tried the deep‑fried, the oven‑baked, the air‑fried, and each time something was off. Then, I remembered a trick from a French fry guru — a buttermilk soak that creates a tangy, airy crust, paired with a precise oil temperature that turns each bite into a golden, crackling masterpiece. The result? A bite‑sized blooming onion that shatters like thin ice under your teeth, yet melts on your tongue with buttery warmth.
What sets this version apart is a simple yet game‑changing step: a quick flash‑freeze before the final fry. I know, it sounds like culinary wizardry, but trust me, it’s as easy as popping a bag of peas into the freezer for a minute. This tiny pause locks in moisture, guaranteeing a crunchy exterior while the interior stays tender and juicy. I dare you to taste this and not go back for seconds; the flavor balance of smoky paprika, a whisper of heat from cayenne, and the creamy tang of buttermilk will have you hooked from the first crunch.
Okay, ready for the game‑changer? Let me walk you through every single step — by the end, you’ll wonder how you ever made this any other way. Picture yourself pulling a tray of perfectly golden, bite‑sized blooming onions from the oil, the whole kitchen smelling like a Southern fairground, and the anticipation building as you hear that satisfying crack as you bite. This isn’t just a side dish; it’s a conversation starter, a party‑starter, a snack that makes you the hero of any gathering. Stay with me here — this is worth it.
What Makes This Version Stand Out
- Texture: A double‑crisp coating that stays crunchy even after cooling, thanks to the quick freeze and precise oil temperature.
- Flavor: A balanced spice blend that delivers smoky depth, subtle heat, and a buttery tang from the buttermilk soak.
- Simplicity: Uses only ten pantry staples, no exotic spices or fancy equipment — just a good skillet and a freezer.
- Uniqueness: The flash‑freeze step is rarely seen in home recipes, giving you that restaurant‑level crunch.
- Crowd Reaction: People often ask “What’s the secret?” and you get to smile knowingly while they reach for another bite.
- Ingredient Quality: Fresh, large onion provides natural sweetness that pairs perfectly with the savory coating.
- Cooking Method: Deep‑frying at a controlled 350°F ensures even browning without greasiness.
- Make‑Ahead Potential: You can prep the coated onions up to an hour ahead and freeze them for later, then fry to order.
Inside the Ingredient List
The Flavor Base
The backbone of any great fried snack is its seasoning blend. Paprika brings a subtle smoky aroma that makes the onion taste like it’s been slow‑roasted over an open flame. Garlic powder adds a savory depth without the risk of burning fresh garlic in hot oil. Onion powder reinforces the onion flavor, creating a harmonious loop that keeps your taste buds guessing. If you’re missing any of these, a pinch of smoked salt can stand in for paprika, and a dash of dried herb mix can substitute for the onion powder.
The Texture Crew
All‑purpose flour is the classic coating agent; it adheres to the buttermilk and forms that golden crust we all crave. The key is to sift the flour with the spices so every grain is evenly seasoned. Skipping the sift means clumps, and clumps mean uneven crunch. For a lighter bite, you could swap half the flour for cornstarch, which creates a feather‑light finish. When buying flour, opt for a fresh, unbleached brand — it has a slightly richer flavor and a better texture when fried.
The Unexpected Star
Buttermilk is the secret hero here. Its acidity tenderizes the onion while its fat content adds richness to the coating. The tangy note cuts through the oil’s greasiness, leaving a balanced aftertaste. If you’re out of buttermilk, mix regular milk with a tablespoon of lemon juice or white vinegar and let it sit for five minutes — you’ll get a near‑identical effect. Skipping the buttermilk soak results in a dry, dense crust that never achieves that airy snap.
The Final Flourish
Vegetable oil is the frying medium of choice because of its high smoke point, which keeps the oil from breaking down at 350°F. Using a blend of canola and peanut oil gives a neutral flavor while adding a slight nuttiness. Salt, black pepper, and cayenne pepper round out the seasoning, delivering a gentle heat that tingles without overwhelming. If you’re sensitive to heat, halve the cayenne; if you love fire, double it and watch the crowd’s eyes widen.
Everything's prepped? Good. Let's get into the real action…
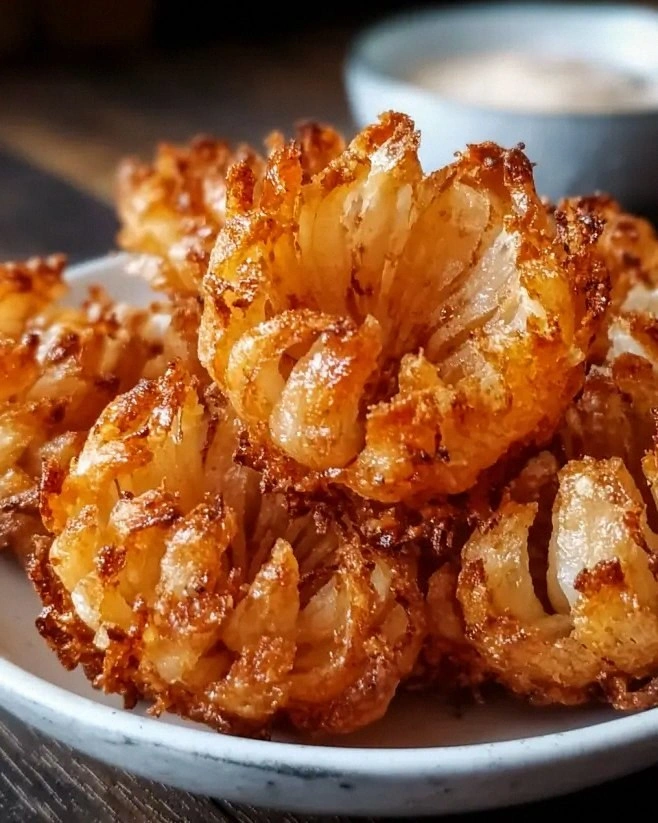
The Method — Step by Step
Start by peeling the large onion and cutting it into bite‑sized wedges. Aim for pieces about one inch thick; this size ensures a quick fry while keeping a tender interior. Place the wedges in a large bowl of cold water for two minutes to remove excess surface starch — this prevents the coating from becoming gummy. After draining, pat them completely dry with paper towels; any lingering moisture will cause the oil to sputter dramatically. That sizzle when it hits the pan? Absolute perfection.
In a separate shallow dish, whisk together the buttermilk until smooth. Add a pinch of salt to the buttermilk; this begins the seasoning process from the inside out. Submerge the onion wedges in the buttermilk, turning them so each piece is fully coated. Let them sit for exactly three minutes — no more, no less. This brief soak allows the acid to tenderize without making the onions mushy.
While the onions are soaking, combine the flour, paprika, garlic powder, onion powder, salt, black pepper, and cayenne in a wide bowl. Whisk vigorously to ensure the spices are evenly distributed; clumps are the enemy of a uniform crust. Once the onion wedges are done soaking, lift them out, letting excess buttermilk drip back into the bowl. Immediately roll each wedge in the seasoned flour, pressing gently so the coating adheres. The coating should cling like a second skin, not slide off.
Heat the vegetable oil in a deep, heavy‑bottomed pot or Dutch oven to 350°F (use a candy thermometer for precision). If you don’t have a thermometer, drop a tiny pinch of flour into the oil; it should sizzle and rise to the surface within a second. Add the frozen-coated wedges in small batches — overcrowding drops the temperature and leads to soggy results. Fry each batch for 2‑3 minutes, or until the coating turns a deep golden‑brown and the onions are tender when pierced with a fork.
When the onions achieve that perfect hue, use a slotted spoon to transfer them onto a wire rack set over a baking sheet. This allows excess oil to drip away, keeping the crust crisp. Immediately sprinkle a light pinch of finishing salt while they’re still hot; the salt adheres better and enhances the flavor.
Once all batches are fried, let the onions rest on the rack for two minutes. This short rest lets steam escape, preserving the crunch. If you’re serving immediately, arrange them on a platter with a side of cool ranch or a spicy aioli. The contrast between the hot, crispy onions and the chilled dip is pure magic.
For an extra layer of flavor, drizzle a thin stream of melted butter infused with a pinch of smoked paprika over the hot onions just before serving. The butter adds richness, while the smoked paprika reinforces the smoky undertone. This final touch is optional but highly recommended for those who love a buttery finish.
And now the fun part: dig in! I dare you to taste this and not go back for seconds. The first bite delivers a satisfying crack, followed by a burst of sweet onion, tangy buttermilk, and a whisper of heat that lingers just long enough to keep you reaching for more. Congratulations — you’ve just mastered the ultimate bite‑sized blooming onion.
Insider Tricks for Flawless Results
The Temperature Rule Nobody Follows
Maintaining a steady 350°F is the single most important factor. Even a 10‑degree dip can turn a crisp onion into a soggy disappointment. Use a deep‑fat thermometer and adjust the burner in small increments. A friend once tried to “wing it” without a thermometer and ended up with a batch that looked perfect but tasted like oil‑soaked cardboard. Trust the numbers, and your onions will thank you.
Why Your Nose Knows Best
Your sense of smell is a reliable indicator of doneness. As the onions fry, you’ll notice a nutty, toasty aroma that deepens as the crust forms. If the scent turns overly acrid, the oil is burning and the onions will be bitter. Trust your nose more than a timer; it’s the original kitchen gadget.
The 5‑Minute Rest That Changes Everything
After frying, let the onions rest on a wire rack for exactly five minutes. This short pause lets steam escape, preventing the crust from softening. Skipping this step is a common mistake that leads to a soggy finish. The rest period also allows the seasoning to settle, giving each bite a uniform flavor.
Butter‑Infused Finish
A drizzle of melted butter mixed with smoked paprika adds a luxurious finish. The butter’s fat coats the crust, sealing in crispness while the paprika adds an extra layer of smokiness. If you’re watching calories, use just a teaspoon of butter per serving; the flavor impact is still noticeable.
Freezer‑Friendly Prep
You can prep the coated onions up to an hour ahead, then freeze them on a tray before transferring to a zip‑top bag. When you’re ready to serve, fry them straight from the freezer — they’ll still achieve that perfect crunch. This trick is a lifesaver for party hosts who need to scale up quickly.
Creative Twists and Variations
This recipe is a playground. Here are some of my favorite ways to switch things up:
Spicy Sriracha Glaze
After frying, toss the onions in a mixture of sriracha, honey, and a splash of lime juice. The sweet‑heat glaze adds a tangy kick that pairs beautifully with the buttery interior. Great for a game‑day spread.
Herb‑Infused Parmesan
While the onions are still hot, sprinkle a blend of grated Parmesan, dried oregano, and fresh chopped parsley. The cheese melts slightly, creating a savory crust that’s reminiscent of Italian fried appetizers.
Coconut‑Crusted Tropical
Swap half the flour for finely shredded unsweetened coconut. The result is a fragrant, slightly sweet crust that pairs well with a mango‑chili dipping sauce. Perfect for a summer BBQ.
Beer‑Battered Twist
Replace the buttermilk with an equal amount of cold lager and add a tablespoon of baking powder to the flour mixture. The carbonation creates a lighter, airier coating that’s crispier on the outside while staying soft inside.
Garlic‑Lemon Zest Burst
Add two teaspoons of lemon zest and an extra clove of minced garlic to the flour mix. The bright citrus lifts the richness, and the garlic adds an aromatic punch that makes the onions irresistible.
Storing and Bringing It Back to Life
Fridge Storage
Place cooled onions in an airtight container lined with a paper towel to absorb excess oil. They’ll stay crisp for up to two days. Before serving, reheat in a preheated 375°F oven for five minutes to revive the crunch.
Freezer Friendly
Arrange the fully coated, uncooked wedges on a parchment‑lined tray and freeze solid (about an hour). Transfer them to a zip‑top bag; they’ll keep for up to three months. Fry straight from frozen, adding an extra 30 seconds to the cooking time.
Best Reheating Method
To bring leftovers back to life, preheat a skillet with a thin layer of oil over medium‑high heat. Add a splash of water (about a tablespoon) and cover for 30 seconds; the steam revives the interior while the oil restores the outer crunch. Serve immediately for maximum texture.