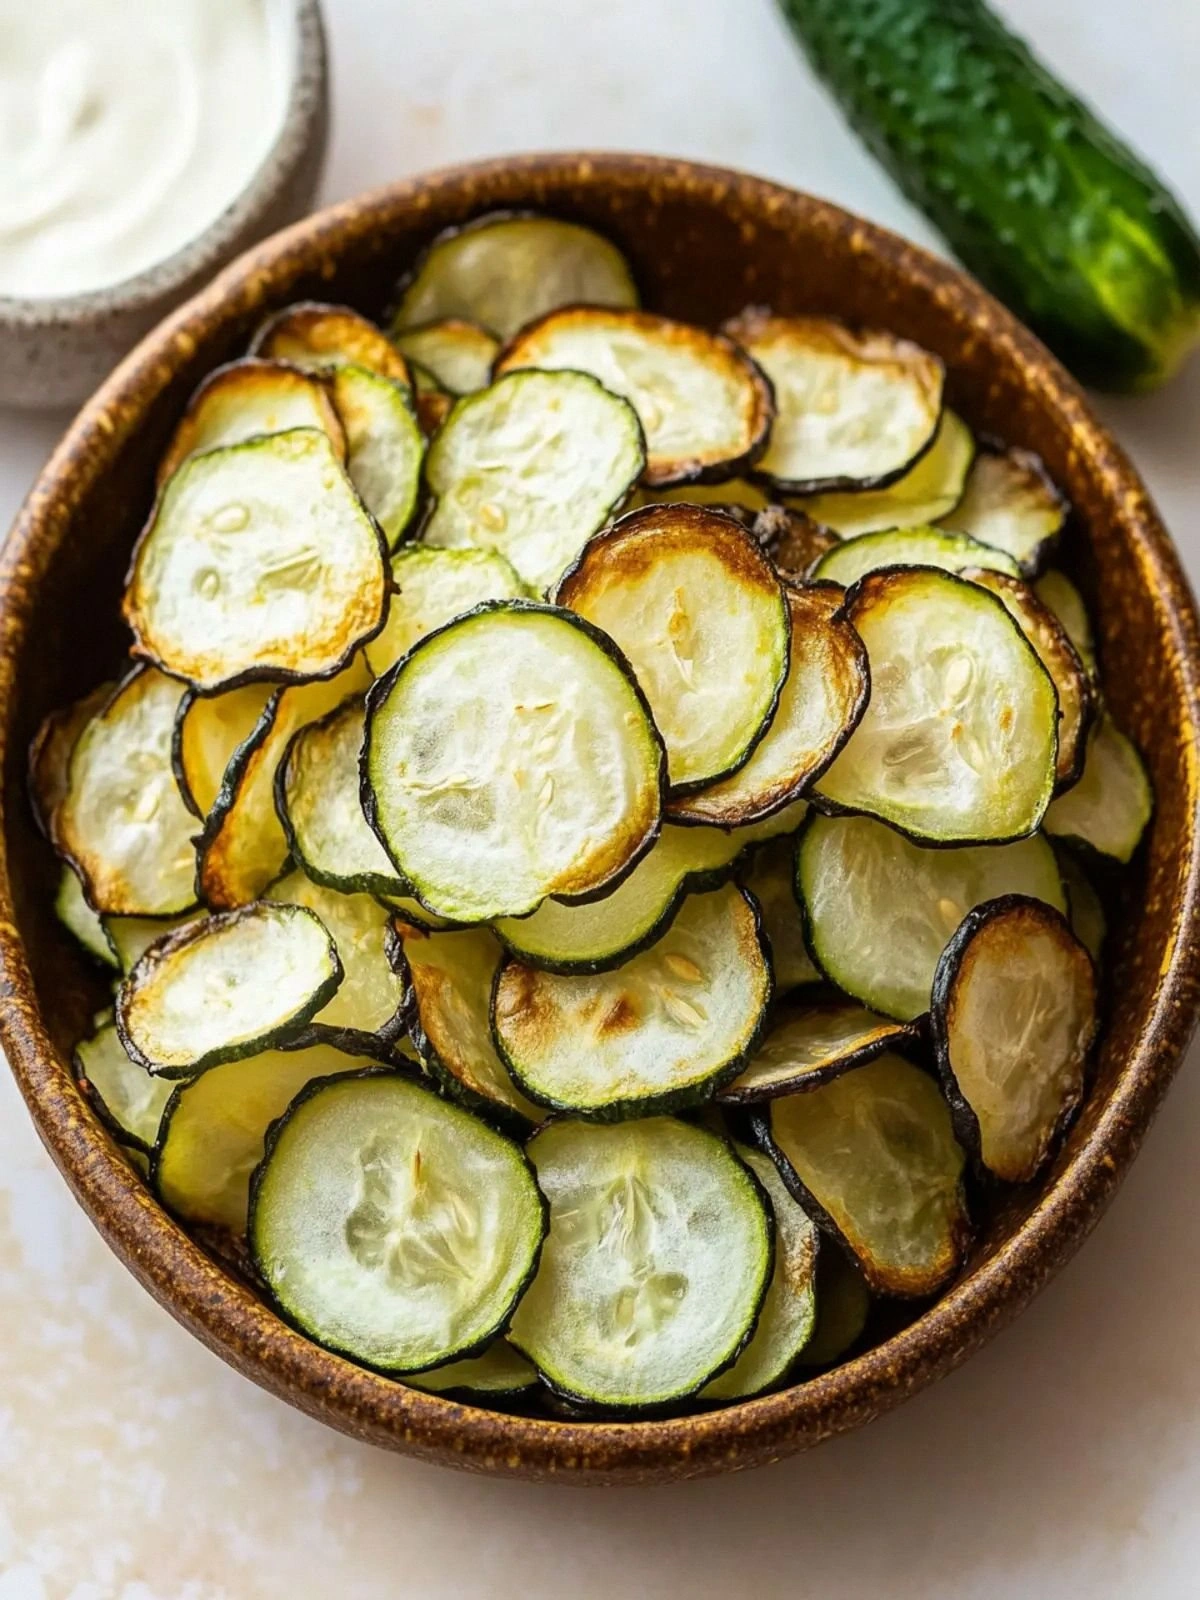
I was standing in my kitchen, staring at a pile of sliced cucumbers that had been left in the fridge for days, when a friend texted me, “I need a snack that’s both crunchy and guilt‑free.” I stared back, wondering if I could turn those green sticks into something that would make my taste buds dance. The idea hit me like a thunderclap: baked cucumber chips, but with a twist that would make even the most seasoned snack lover swoon. I grabbed my trusty skillet, pulled out my favorite olive oil, and set the stage for what would become the ultimate cucumber chip experience.
Picture this: a bright, sun‑kissed kitchen, the scent of fresh cucumbers mingling with a hint of apple cider vinegar, and the rhythmic hiss of oil as it warms. The sound is a promise of crispness to come, while the sight of thin, even slices glistening in the light feels like a work of art. The first bite delivers a satisfying snap, the crunch echoing like a tiny cymbal, followed by a subtle tang that lingers on the palate. It’s the kind of snack that feels both indulgent and clean, a paradox that makes you wonder how you ever lived without it. I dare you to taste this and not go back for seconds.
What sets this version apart from every other cucumber chip recipe you’ve tried is the meticulous balance of flavor and texture. The use of apple cider vinegar not only adds brightness but also helps the chips retain their crispness for longer. The thin, even slices are the secret weapon; a mandoline ensures uniformity, turning each chip into a perfectly engineered bite. And the sprinkle of sea salt—just half a teaspoon—adds that final pop of savory without overpowering the natural cucumber note. Together, these elements create a snack that feels like a revelation, a crunchy delight that’s both refreshing and satisfying.
But there’s a twist you won’t expect: a subtle layer of olive oil that caramelizes just enough to give the chips a golden hue while keeping them light. This isn’t your typical greasy snack; it’s a clean, guilt‑free treat that you can eat guiltlessly at any time of day. I’ll be honest — I ate half the batch before anyone else got to try it. Picture yourself pulling this out of the oven, the whole kitchen smelling incredible, and sharing a handful with friends who’ll never look at cucumber slices the same way again. Let me walk you through every single step — by the end, you’ll wonder how you ever made it any other way.
What Makes This Version Stand Out
- Taste: The delicate sweetness of the cucumber is elevated by a subtle tang from apple cider vinegar, creating a flavor profile that’s bright, refreshing, and utterly addictive. This balance turns an ordinary snack into a gourmet experience.
- Texture: The chips achieve a perfect crunch that shatters like thin ice, yet remain tender inside, giving you that satisfying snap without the dreaded brittleness of over‑baked snacks.
- Simplicity: With only four ingredients, this recipe is a breeze to assemble, yet it delivers a depth of flavor that would normally require a pantry full of spices.
- Uniqueness: The combination of olive oil and vinegar, along with a precise slicing technique, sets this version apart from the countless other cucumber chip variations you’ll find online.
- Crowd Reaction: Friends who have tried this version report that they can’t stop reaching for more, and many say they’ve never been able to eat a regular cucumber slice again.
- Ingredient Quality: The recipe relies on fresh, high‑quality cucumbers, which are essential for the crispness and natural sweetness that define this snack.
- Cooking Method: Baking, rather than frying, keeps the snack light and healthy while still delivering that coveted crunch.
- Make‑Ahead Potential: These chips can be prepared ahead of time, stored in an airtight container, and re‑baked to regain crispness, making them perfect for parties or busy schedules.
Alright, let's break down exactly what goes into this masterpiece…
Inside the Ingredient List
The Fresh Hero
Two medium cucumbers are the star of the show, bringing that crisp, cool bite that’s essential to a successful chip. Choose cucumbers that feel firm and have a bright green hue; avoid ones with soft spots or blemishes, as they’ll compromise the crunch. If you prefer a sweeter flavor, look for varieties like Persian or English cucumbers, which have a higher sugar content. Skipping this ingredient would turn your snack into a bland, soggy affair—no one wants that.
The Flavor Layer
One tablespoon of olive oil coats each slice, creating a thin, golden crust that caramelizes in the oven. This oil not only adds a subtle richness but also helps the cucumber slices stay crisp by preventing moisture from seeping in. If you’re watching calories, a light drizzle of extra‑virgin olive oil will suffice; just make sure each chip gets a thin, even coat. Without the oil, the chips would bake flat and lose their desirable crunch.
The Texture Enhancer
Two teaspoons of apple cider vinegar provide a bright, acidic note that balances the natural sweetness of the cucumber and enhances the overall flavor. The acidity also helps to keep the chips from becoming soggy by reducing surface moisture. If you’re in a pinch, white wine vinegar or lemon juice can be used as alternatives, though they’ll alter the final taste profile slightly. Skipping the vinegar will leave the chips with a flat, uninteresting flavor.
The Final Flourish
Half a teaspoon of sea salt adds that final pop of savory, cutting through the sweetness and highlighting every bite. Sea salt is preferred over table salt because it provides a more complex mineral profile and a cleaner finish. If you’re sensitive to sodium, reduce the amount or use a low‑sodium sea salt blend. Without any salt, the chips would taste bland and unremarkable.
Everything's prepped? Good. Let's get into the real action…
The Method — Step by Step
- Preheat your oven to 200°C (400°F). This temperature is key for achieving that golden crust without burning the delicate cucumber slices. While the oven warms, gather your ingredients and set your baking sheet ready. A light dusting of parchment paper will prevent sticking and make cleanup a breeze. Let the oven heat for a full five minutes to ensure an even bake from the start.
- Slice the cucumbers. Use a mandoline or a sharp knife to create uniform slices about 1–2 mm thick. Consistency is crucial; uneven slices bake at different rates, leading to a mix of crispy and soggy chips. If you’re using a knife, try to keep the cuts as even as possible by cutting across the cucumber’s length. Remember, the thinner the slice, the crisper the result.
- Coat with olive oil. Place the cucumber slices in a bowl and drizzle with one tablespoon of olive oil. Toss gently so each slice is lightly glazed. The oil forms a protective layer that caramelizes, giving the chips a subtle sheen. If you’re feeling adventurous, add a pinch of smoked paprika for an extra kick. This step is pure magic; the oil will work its wonders as the chips bake.
- Season with vinegar and salt. Sprinkle two teaspoons of apple cider vinegar and half a teaspoon of sea salt over the oiled slices. Toss again to distribute the flavors evenly. The vinegar not only brightens the taste but also helps keep the chips from becoming soggy. If you prefer a milder acidity, reduce the vinegar to one teaspoon. This step is where the flavor truly comes alive.
- Arrange on the baking sheet. Lay the seasoned slices in a single layer, ensuring they don’t overlap. Overlapping leads to steaming rather than crisping, which defeats the purpose of this snack. Use a second sheet if you have more slices than fit on one. Keep a close eye on the oven; the chips are done when they turn a light golden brown and emit a toasty aroma.
- Bake for 12–15 minutes. Flip the chips halfway through the baking time to ensure even crispness on both sides. The first five minutes should give you a faint golden glow; by the end, the edges will start pulling away slightly. The oven’s heat will caramelize the surface, giving each chip a beautiful, edible crust. Keep the door slightly ajar if you’re using a conventional oven to allow moisture to escape.
- Cool and serve. Remove the sheet from the oven and let the chips cool on a wire rack for five minutes. The residual heat will finish crisping them to perfection. Transfer to a bowl and enjoy while they’re still warm for the best crunch. If you’re storing leftovers, keep them in an airtight container to preserve crispness. And remember, the best part is that they’re still delicious a day later if you re‑bake them briefly.
That's it — you did it. But hold on, I've got a few more tricks that'll take this to another level…
Insider Tricks for Flawless Results
The Temperature Rule Nobody Follows
Many people bake at 180°C, but 200°C is the sweet spot for crispness. The higher temperature creates a quick, even crust without drying out the interior. If your oven runs hot, reduce the time by a minute or two. This trick ensures a golden finish that’s both crunchy and visually appealing.
Why Your Nose Knows Best
Trust your senses: when the chips emit a subtle toasty scent, it’s the cue that they’re ready. The aroma is a natural indicator of caramelization. Don’t rely solely on the clock; the smell will tell you when the chips have reached peak flavor.
The 5‑Minute Rest That Changes Everything
Letting the chips rest for five minutes after baking allows the steam to escape, preventing sogginess. During this short pause, the interior firm up, and the exterior retains its crispness. If you skip this step, the chips may feel slightly damp when you bite into them.
Keep It Dry
Cucumbers are high in moisture; if you’re not careful, the chips can become soggy. Pat the slices dry with a clean towel before oiling and seasoning. This simple step ensures the oil adheres properly and the chips bake evenly.
Use Parchment, Not Aluminum
Parchment paper prevents sticking without imparting a metallic taste. If you use aluminum foil, the chips may stick or develop uneven browning. Parchment also makes cleanup a breeze, saving you time after the snack is finished.
Re‑Bake for Freshness
If you’re storing the chips, a quick re‑bake at 200°C for five minutes will revive their crunch. Add a splash of water to the baking sheet to create steam, which helps keep the chips moist inside while crisping the outside. This trick keeps your snacks fresh for days.
Creative Twists and Variations
Spicy Sriracha Zing
Swap the sea salt for a pinch of smoked sea salt and drizzle a few drops of sriracha over the chips before baking. The heat from the sriracha caramelizes, giving a subtle smoky sweetness that pairs wonderfully with the cucumber’s freshness. This variation is a hit at game nights when you want something with a bit of bite.
Herb‑Infused Delight
Add a tablespoon of finely chopped fresh dill or basil to the oil and vinegar mixture before coating the slices. The herbs release their aroma during baking, infusing each chip with a fragrant, green note. This version is perfect for a summer picnic or as a side to grilled fish.
Mediterranean Medley
Incorporate a teaspoon of oregano and a dash of lemon zest into the seasoning. The oregano gives a savory depth, while the lemon zest brightens the overall flavor profile. This twist transforms the snack into a Mediterranean appetizer, ideal for tapas nights.
Sweet & Smoky
Drizzle a thin layer of honey over the chips after baking, then sprinkle a pinch of smoked paprika. The honey adds a gentle sweetness, and the paprika provides a smoky undertone that balances the cucumber’s natural crispness. This version works well as a sweet‑savory snack during holiday gatherings.
Ginger‑Garlic Crunch
Mix minced garlic and grated fresh ginger into the olive oil before coating the slices. The garlic’s pungency and ginger’s zing add a warm, aromatic layer to the chips. This variation is especially satisfying after a long day, offering a comforting, savory bite.
Crispy Kale Fusion
Combine thinly sliced cucumber with chopped kale leaves before baking. The kale adds a slightly bitter note that contrasts beautifully with the cucumber’s sweetness. Toss the mixture in the same olive oil, vinegar, and salt blend for a nutrient‑rich, crunchy snack.
Storing and Bringing It Back to Life
Fridge Storage
Place the cooled chips in an airtight container or a zip‑lock bag, leaving a small air pocket to avoid moisture buildup. Store in the refrigerator for up to three days. The chips may soften slightly, but they’ll remain safe to eat. If you notice any loss of crispness, a quick re‑bake will restore the texture.
Freezer Friendly
For longer storage, place the chips on a parchment‑lined tray and freeze until solid. Transfer to a freezer bag and seal tightly. They’ll keep for up to two months. When ready to eat, pop them out and let them thaw at room temperature for 10 minutes before a quick re‑bake.
Best Reheating Method
Preheat your oven to 200°C and spread the chips on a baking sheet in a single layer. Bake for five minutes or until the edges crisp up again. A splash of water on the sheet before baking creates steam, which helps keep the chips moist inside while crisping the outside. This method revives the original crunch without drying out the cucumber.