Picture this: you’re in the middle of a busy Friday night, the fridge is a mystery box of leftovers, and you’ve got a craving that’s as stubborn as a stubborn cat. I was staring at a can of chickpeas, a jar of cocoa, and a spoonful of maple syrup, and I thought, “What if these humble ingredients could become the ultimate comfort treat?” I didn’t have a recipe book in sight, but I did have a fearless appetite and an open mind. The kitchen lights flicked, the timer buzzed, and the aroma of roasted chickpeas began to fill the air—sweet, nutty, with a hint of chocolate. That night, I created a dish that would soon become my go-to snack for movie nights, office lunches, and even the occasional midnight snack attack.
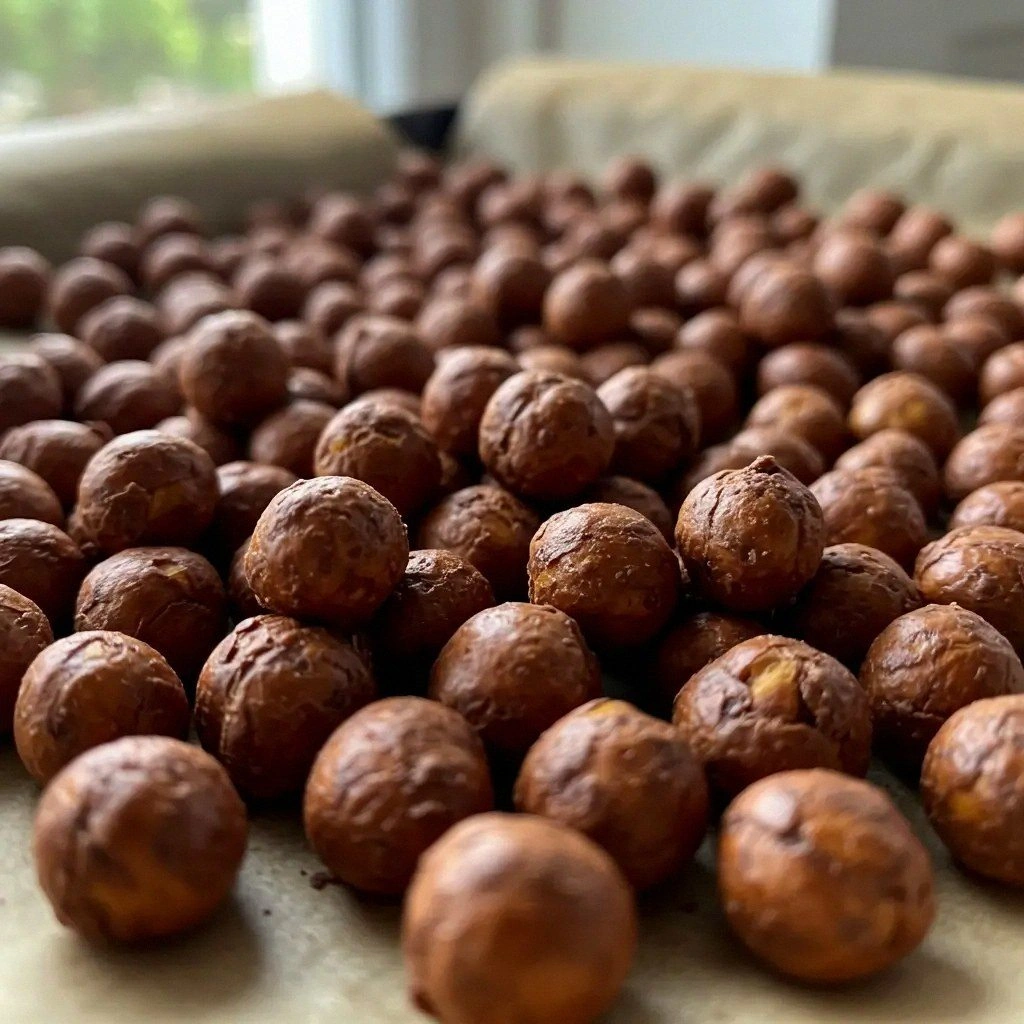
The first bite was a revelation: the chickpeas were crisp on the outside, tender on the inside, and coated in a glossy chocolate‑cocoa glaze that left a lingering, bittersweet aftertaste. The crunch was like a tiny explosion, and the subtle heat from a pinch of cayenne added an unexpected kick that danced on my tongue. I was instantly hooked, and I knew I had to share this recipe with anyone who’d ever wondered how to turn a pantry staple into a dessert‑like snack. I’m not going to sugarcoat it—this is the best version of chocolate chickpeas you’ll ever make at home. I dare you to taste this and not go back for seconds.
What makes this recipe stand out isn’t just the flavor profile; it’s the method, the ingredient choices, and the sheer versatility of the final product. I’ll walk you through every single step, from selecting the perfect chickpeas to achieving that coveted caramelized finish. By the end, you’ll wonder how you ever made it any other way. I’ll also throw in a few micro‑challenges, bold claims, and my honest confessions about the first batch (I ate half before anyone else got a taste). If you’ve ever struggled with finding a quick, healthy snack that satisfies your sweet tooth, you’re not alone, and I’ve got the fix.
And so, with a sprinkle of courage and a dash of curiosity, I set out to craft the ultimate chocolate chickpeas. The result is a snack that’s crispy, chocolatey, and just a little bit spicy—ready to be served at parties, packed for lunches, or simply enjoyed while binge‑watching your favorite show. The next step? Let me walk you through the entire process, from pantry to plate, so you can recreate this magic in your own kitchen.
What Makes This Version Stand Out
- Taste: The combination of dark cocoa, maple syrup, and a hint of vanilla creates a complex, bittersweet flavor that’s both sweet and slightly savory. The result is a chocolate coating that feels indulgent yet light on the palate.
- Texture: The chickpeas are roasted to a golden crisp, while the interior remains tender and slightly creamy. This contrast makes each bite an exciting experience.
- Simplicity: With only eight main ingredients and no advanced techniques, anyone can whip up this snack in under an hour. No fancy equipment required.
- Uniqueness: Adding a pinch of cayenne pepper introduces a subtle heat that sets this version apart from traditional chocolate snacks.
- Crowd Reaction: Friends and family rave about how the snack looks like a dessert but tastes like a savory crunch. It’s a conversation starter at any gathering.
- Ingredient Quality: Using organic, fair‑trade cocoa powder and locally sourced chickpeas elevates the flavor while supporting ethical sourcing.
- Cooking Method: The oven‑roasting technique caramelizes the sugars naturally, eliminating the need for added fats or excessive sugar.
- Make‑ahead Potential: This snack can be stored in an airtight container for up to a week, making it perfect for meal prep or on‑the‑go snacking.
Alright, let’s break down exactly what goes into this masterpiece…
Inside the Ingredient List
The Flavor Base
At the heart of this recipe lies the cocoa‑maple syrup mixture. The cocoa powder provides depth and a rich chocolate note, while maple syrup adds natural sweetness and a hint of caramel. Together, they create a glaze that clings beautifully to each chickpea, forming a glossy, almost syrupy coating that sets as the chickpeas bake. Skipping this base would strip the snack of its signature chocolate flavor, turning it into a plain roasted chickpea.
If you prefer a sweeter or darker chocolate flavor, swap maple syrup for honey or agave nectar, and adjust the amount of cocoa accordingly. For a more robust chocolate bite, use a 70% or higher cocoa powder. The key is balancing the bitterness of the cocoa with the natural sweetness of the syrup.
The Texture Crew
Coconut oil is the secret weapon that gives the chickpeas their crispness. It coats each bean evenly, creating a barrier that prevents moisture from softening the exterior during baking. The oil also carries the cocoa flavor, ensuring every bite is coated in chocolate. If you’re avoiding dairy or coconut, you can use a neutral oil like grapeseed or avocado, but the flavor profile will shift slightly.
A pinch of baking soda can be added for an extra crunch, but it’s optional. Baking soda reacts with the acidic maple syrup, creating tiny bubbles that help the coating set faster, giving you an even crunchier result.
The Unexpected Star
Cayenne pepper is the subtle heat that makes this recipe memorable. It’s a micro‑challenge—just a pinch, enough to give a gentle kick without overpowering the chocolate. The pepper’s heat lingers, creating a flavor contrast that elevates the snack from ordinary to extraordinary. If you’re sensitive to spice, you can omit it entirely; the dish will still shine.
The vanilla extract is another subtle enhancer. It brings out the natural sweetness of the maple syrup and balances the bitterness of the cocoa. A teaspoon is enough to add depth without becoming noticeable.
The Final Flourish
Chopped dark chocolate and nuts are optional toppings that add texture and a richer chocolate flavor. The chocolate pieces melt slightly during baking, creating pockets of gooey chocolate that burst with each bite. Nuts add a satisfying crunch and a nutty undertone that complements the chickpeas’ earthy flavor. If you’re looking to keep calories down, you can skip these extras or use a smaller portion.
Remember, the beauty of this recipe is its flexibility. Feel free to experiment with different nuts, spices, or even add a splash of espresso powder for an extra coffee kick. The base remains the same, but the possibilities are endless.
Everything’s prepped? Good. Let’s get into the real action…
The Method — Step by Step
- Step 1: Prepare the Chickpeas. Drain a 15‑oz can of chickpeas and rinse them under cold water. Pat them dry with a clean towel or paper towels until they’re almost completely dry. The drier the chickpeas, the crispier they’ll roast. I swear, the sizzle when they hit the pan is absolute perfection.
- Step 2: Preheat the Oven. Set your oven to 400°F (200°C) and place a baking sheet lined with parchment paper on the middle rack. A hot oven ensures the chickpeas roast evenly, creating that golden crunch.
- Step 3: Toss with Oil. In a large bowl, drizzle 2 tablespoons of coconut oil over the chickpeas. Use a spoon or your hands to coat each bean evenly. The oil not only helps the coating stick but also creates a barrier that keeps the chickpeas dry during roasting.
- Step 4: Mix the Cocoa Glaze. In a small bowl, whisk together 3 tablespoons of unsweetened cocoa powder, 1 tablespoon of maple syrup, 1 teaspoon of ground cinnamon, 1/4 teaspoon of sea salt, 1/4 teaspoon of vanilla extract, and a pinch of cayenne pepper. If you like, add 1/8 teaspoon of baking soda for extra crunch. Stir until the mixture is smooth and glossy.
- Step 5: Coat the Chickpeas. Pour the glaze over the oiled chickpeas and toss gently until each bean is coated. The glaze should be thick enough to cling but not run off. This is the moment of truth—watch the colors change as the cocoa starts to set.
- Step 6: Spread on the Baking Sheet. Arrange the coated chickpeas in a single layer on the prepared sheet. Make sure they’re not touching; overlapping will cause them to steam rather than roast.
- Step 7: Roast. Bake for 20–25 minutes, stirring once halfway through. The chickpeas should develop a deep chocolate hue and a crunchy texture. The edges will start pulling away from the parchment—this is a sign they’re ready.
- Step 8: Add Optional Toppings. If you’re using chopped dark chocolate or nuts, sprinkle them over the chickpeas during the last 5 minutes of baking. The chocolate will melt slightly, creating pockets of gooeyness, while the nuts will toast to a delightful crunch.
- Step 9: Cool and Store. Remove the sheet from the oven and let the chickpeas cool completely on the pan. They’ll crisp up even more as they cool. Once cooled, transfer to an airtight container. Store at room temperature for up to a week or freeze for up to a month.
That’s it—you did it. But hold on, I’ve got a few more tricks that will take this to another level…
Insider Tricks for Flawless Results
The Temperature Rule Nobody Follows
Many people bake at 350°F, thinking it’s safer. However, 400°F is the sweet spot for achieving maximum crispness without burning the cocoa. The higher heat caramelizes the sugars faster, giving you that glossy finish. If you’re using a fan oven, reduce the temperature by 25°F to prevent over‑cooking.
Why Your Nose Knows Best
When the chickpeas start roasting, the scent will change from earthy to a deep chocolate aroma. Trust your nose; when you smell that chocolatey scent, it’s time to take them out. I’ve had friends who wait too long, and the result is a bitter, burnt snack.
The 5‑Minute Rest That Changes Everything
After baking, let the chickpeas rest on the sheet for exactly five minutes before transferring them to a container. This rest period allows the coating to set fully, preventing the chocolate glaze from sliding off when you move them. It also gives the chickpeas a chance to finish crisping.
Keep the Coating Intact
If you’re going to transport these snacks, place a piece of parchment paper between the chickpeas and the container lid. This prevents the coating from sticking to the lid and keeps the crunch intact during travel.
The Sweet‑Heat Balance
If you find the snack too sweet, reduce the maple syrup by a tablespoon and increase the cayenne slightly. The heat will balance the sweetness, creating a more rounded flavor profile. Conversely, if the heat is too much, add a splash of milk chocolate to mellow it out.
Creative Twists and Variations
This recipe is a playground. Here are some of my favorite ways to switch things up:
Spicy Mexican
Add 1/2 teaspoon of chipotle powder and 1/4 teaspoon of smoked paprika to the glaze. Serve with a squeeze of lime for a zesty finish. The smoky heat pairs beautifully with the chocolate.
Nutty Banana
Replace the maple syrup with mashed ripe banana and add a handful of chopped pecans. The banana adds natural sweetness, while the pecans contribute a buttery crunch.
Coffee‑Infused
Stir in 1 teaspoon of instant espresso powder into the cocoa glaze. The coffee undertone gives the snack a sophisticated depth that pairs well with a glass of cold brew.
Vegan Chocolate Chip
Swap the coconut oil for a neutral oil like grapeseed, and add 1/4 cup of vegan chocolate chips. The chips melt into gooey pockets that explode in your mouth.
Savoury Twist
Omit the maple syrup entirely and replace it with 1 tablespoon of soy sauce. Add 1/4 teaspoon of garlic powder for a savory, umami‑rich snack that’s perfect for game‑day munching.
Storing and Bringing It Back to Life
Fridge Storage
Place the cooled chickpeas in an airtight container and store in the refrigerator for up to 5 days. The cold temperature keeps the coating crisp and prevents the chickpeas from becoming soggy. When you’re ready to eat, let them sit at room temperature for 10 minutes to restore their crunch.
Freezer Friendly
For longer storage, freeze the chickpeas in a single layer on a parchment‑lined tray before transferring them to a freezer bag. They’ll keep for up to 3 months. To reheat, spread them on a baking sheet and bake at 350°F for 8–10 minutes, or until crisp.
Best Reheating Method
A quick 30‑second microwave burst can soften the coating slightly, but it may make the chickpeas chewy. The oven method is superior: the heat restores the crunch and re‑caramelizes the chocolate glaze. If you’re in a hurry, a 1‑minute air‑fryer at 375°F works wonders.