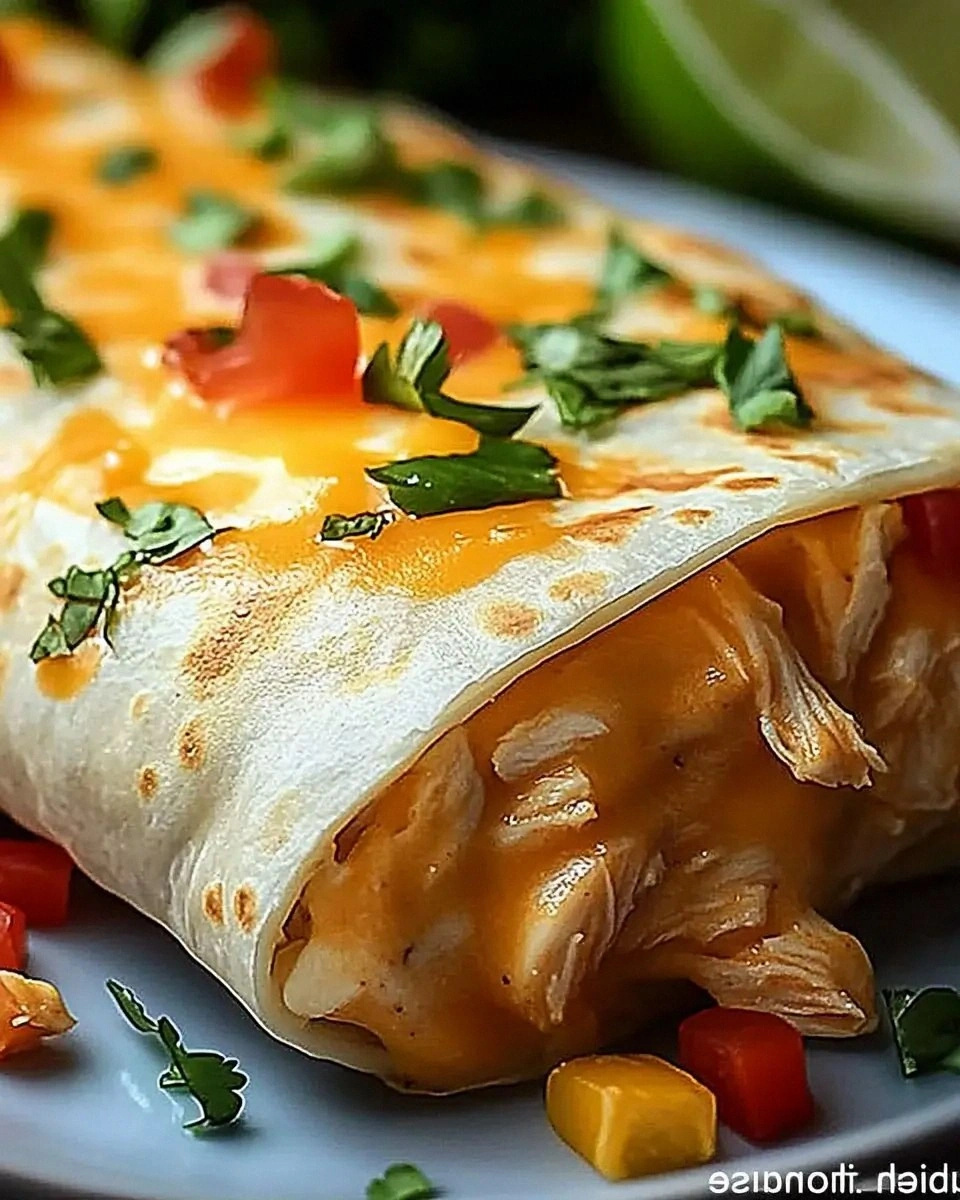
Picture this: I’m in my cramped kitchen, the clock ticking, a half‑finished batch of frozen burritos staring at me like a culinary dare. I had promised friends a “Mexican night” and my pantry was whispering, “We’ve got the basics, but where’s the wow factor?” In a moment of reckless inspiration (and a desperate need to avoid ordering pizza), I grabbed the last of the chicken, tossed it into a pot, and decided to reinvent the humble chimichanga. The result? A baked chicken chimichanga that sings with crisp edges and a melt‑in‑your‑mouth interior, so addictive that I’m willing to bet you’ll be sneaking bites straight from the oven.
The moment the chimichangas hit the baking sheet, the kitchen filled with a chorus of aromas: smoky cumin, sweet salsa, and the comforting scent of melted cheese that made my stomach do a little happy dance. I could hear the faint crackle of the oil as the tortillas brushed against the hot pan, and the texture of the filling was already promising a perfect balance of creamy beans and tender chicken. My senses were on high alert, and I could practically taste the crunchy bite before the timer even started. That sizzle when it hits the pan? Absolute perfection.
Most recipes out there either fry the chimichangas until they’re greasy or bake them so long they turn into cardboard. I’ve been there, and I’ve learned the hard way that you need a method that locks in moisture while still delivering that coveted crunch. This version uses a light drizzle of olive oil and a high‑heat blast to create a golden, flaky crust without drowning the filling in oil. The secret? A quick flash‑bake that sets the tortilla, followed by a gentle finish that ensures every bite stays delightfully crisp.
But here’s the kicker: I’m throwing in a splash of fresh cilantro at the end, a dash of garlic powder that whispers through the layers, and a drizzle of sour cream that adds a tangy finish you never saw coming. I dare you to taste this and not go back for seconds. Let me walk you through every single step — by the end, you’ll wonder how you ever made it any other way.
What Makes This Version Stand Out
- Crunch Factor: A high‑heat bake locks in a crisp that shatters like thin ice when you bite, giving you that restaurant‑level snap without deep‑frying.
- Moisture Lock: The chicken stays juicy thanks to a quick sear before it meets the tortilla, so you never get that dreaded dry interior.
- Flavor Layering: From chili powder to cumin, each spice is layered thoughtfully, creating a depth that feels like a fiesta in your mouth.
- Simple Prep: With just a handful of pantry staples you can assemble the whole batch in under 20 minutes – perfect for busy weeknights.
- Healthier Twist: Baking replaces deep‑frying, cutting down on oil while still delivering that golden, crunchy exterior you love.
- Make‑Ahead Magic: Assemble the chimichangas ahead of time, pop them in the oven when guests arrive, and you’ve got a stress‑free centerpiece.
- Crowd‑Pleaser: Even the pickiest eaters can’t resist the combination of gooey cheese, creamy beans, and that irresistible crunch.
- Versatile Base: The recipe is a solid canvas for endless variations – from spicy jalapeño to sweet pineapple twists.
Inside the Ingredient List
The Flavor Base
We start with 2 cups of cooked shredded chicken – the heart of this dish. Using pre‑cooked chicken not only saves time but also ensures the meat stays tender, especially when it’s wrapped in a hot tortilla. If you’re feeling adventurous, try a blend of shredded rotisserie chicken and a hint of smoked turkey for an extra depth of flavor. The key is to keep the meat moist; a quick toss in a splash of salsa before assembling can add a subtle zing.
The Texture Crew
Next up, 1 cup of refried beans and 1 cup of shredded cheese. The beans act as a buttery glue that holds the chicken together, while the cheese melts into a luscious river that drapes over every bite. Skipping the beans? You’ll lose that creamy mouthfeel that balances the crisp tortilla. For cheese lovers, a mix of Monterey Jack and sharp cheddar gives a perfect melt and a hint of sharpness that cuts through the richness.
The Unexpected Star
Olive oil, at 1/4 cup, is the unsung hero that transforms a baked chimichanga from soggy to spectacular. By lightly brushing the tortillas, you create a golden, crackling surface without the excess fat of deep‑frying. If you’re out of olive oil, a high‑smoke‑point oil like avocado works just as well. And don’t forget the fresh cilantro – a quarter cup of chopped leaves adds a bright, herbaceous finish that lifts the entire dish.
The Final Flourish
The spice blend – 1 tsp chili powder, 1 tsp cumin, ½ tsp garlic powder, ½ tsp onion powder, ¼ tsp salt, and ¼ tsp black pepper – is the orchestra that conducts all the flavors. Chili powder brings heat, cumin adds earthiness, and the garlic and onion powders give that comforting background note. Adjust the salt to taste, but remember that the salsa will also contribute saltiness, so a light hand is best. If you crave extra heat, a pinch of cayenne or a few diced jalapeños can turn this into a fire‑breather.
Everything's prepped? Good. Let's get into the real action...
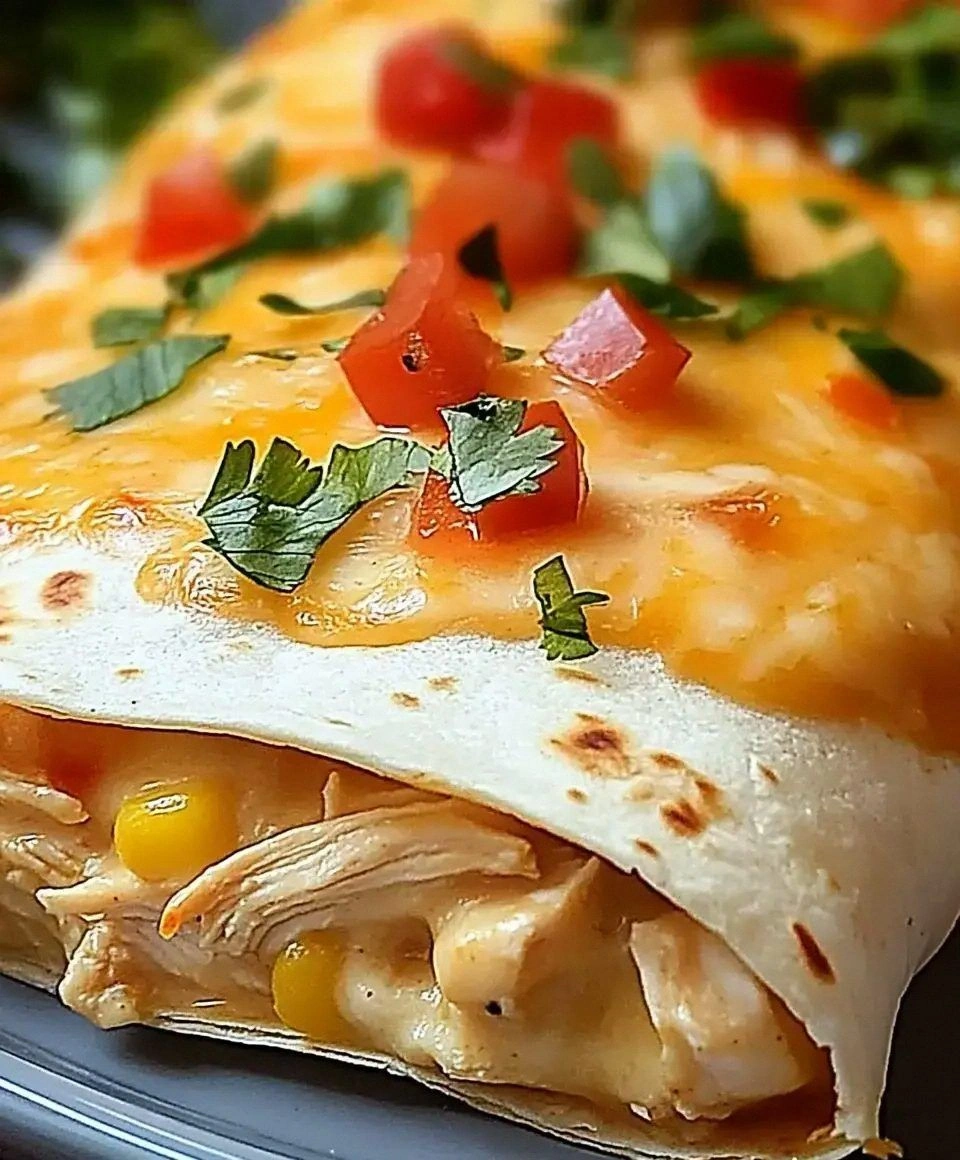
The Method — Step by Step
Preheat your oven to 425°F (220°C) and line a large baking sheet with parchment paper. This high temperature is the secret weapon that creates that coveted crunch without drying out the filling. While the oven heats, place the parchment on the sheet – the paper prevents sticking and makes cleanup a breeze. Okay, ready for the game‑changer? The heat will seal the tortilla’s edges in just minutes.
In a large mixing bowl, combine the shredded chicken, refried beans, shredded cheese, chili powder, cumin, garlic powder, onion powder, salt, and black pepper. Stir until everything is evenly coated – you want each bite to have a balanced flavor. I dare you to taste a spoonful now; the mixture should be fragrant, with the spices dancing on your tongue. This next part? Pure magic.
Lay out the flour tortillas on a clean surface. Using a brush, lightly coat each tortilla with olive oil on both sides – remember the kitchen hack above for extra crispness. The oil creates a barrier that locks in steam, ensuring the interior stays moist while the exterior turns golden. If the tortillas feel too dry, a quick spray of water will make them more pliable.
Place a generous spoonful (about ¼ cup) of the chicken‑bean mixture in the center of each tortilla. Fold the sides over the filling, then roll tightly, sealing the edge with a dab of water or a quick press with a fork. The seal is crucial – if the edges open, you’ll lose that beautiful crunch. And now the fun part: arranging them seam‑side down on the prepared baking sheet.
Brush the tops of the assembled chimichangas with a final drizzle of olive oil. This top coat is what gives the golden‑brown finish we all crave. Slide the sheet into the preheated oven and bake for 12‑15 minutes, or until the tortillas are deep golden and the cheese is bubbling. You’ll know they’re done when the edges start to pull away from the pan.
While the chimichangas are baking, warm the salsa in a small saucepan over low heat. This step ensures the salsa stays warm for dipping and melds the flavors together. Add a splash of lime juice if you want a brighter note – I love that citrus pop. Keep an eye on it; you don’t want it to boil, just a gentle simmer.
When the timer dings, remove the chimichangas and let them rest for 3‑4 minutes. This short rest lets the steam settle, keeping the interior fluffy while the crust stays crisp. Sprinkle the chopped cilantro over the top for a fresh burst of color and aroma. Picture yourself pulling this out of the oven, the whole kitchen smelling incredible…
Serve each chimichanga with a dollop of sour cream and a side of the warm salsa. The cool sour cream cuts through the spice, creating a perfect balance. If you’re feeling extra indulgent, drizzle a little extra olive oil for shine. And now the final flourish: a quick squeeze of lime over everything for that zingy finish. That’s it — you did it. But hold on, I've got a few more tricks that'll take this to another level...
Insider Tricks for Flawless Results
The Temperature Rule Nobody Follows
Most home cooks set the oven to 350°F and wonder why the crust never gets that perfect snap. Cranking it up to 425°F creates an instant sear on the tortilla, locking in moisture and forming that golden crust. I once tried a lower temperature and ended up with soggy, limp chimichangas – a disaster I won’t repeat. Trust the heat; it’s the difference between “meh” and “wow.”
Why Your Nose Knows Best
Never rely solely on a timer. The moment the kitchen fills with that toasted aroma, you know the chimichangas are nearing perfection. If you smell a faint caramel note, that’s your cue to pull them out a minute early – they’ll continue cooking slightly from residual heat. Trust your senses; they’re the original kitchen thermometer.
The 5‑Minute Rest That Changes Everything
After the oven, let the chimichangas sit for exactly five minutes before cutting. This short rest allows the cheese to set, preventing a gooey spill when you bite in. It also lets the steam redistribute, keeping the interior fluffy. Skipping this step is the fastest way to end up with a soggy mess – I learned that the hard way once.
Don’t Overcrowd the Baking Sheet
Give each chimichanga breathing room. If they’re too close, the steam gets trapped, and the tortillas steam instead of bake, losing that coveted crunch. A good rule of thumb: leave at least an inch between each piece. If you need to bake a larger batch, use two sheets and rotate them halfway through the cooking time.
Flavor Boost with a Lime Zest Finish
Just before serving, grate a tiny amount of fresh lime zest over the top. The zest adds a bright, citrusy pop that lifts the heavy, cheesy flavors. It’s a tiny step with a massive impact – think of it as the culinary equivalent of a mic drop.
Creative Twists and Variations
This recipe is a playground. Here are some of my favorite ways to switch things up:
Spicy Jalapeño Explosion
Add finely diced jalapeños to the chicken‑bean mixture and increase the chili powder by half a teaspoon. The heat builds a thrilling kick that’s perfect for spice lovers. Serve with extra sliced jalapeños on the side for those who want to turn up the dial.
Sweet‑And‑Savory Pineapple
Stir in ½ cup of crushed pineapple and a pinch of brown sugar into the filling. The tropical sweetness balances the savory spices, creating a surprising harmony. Top with a drizzle of chipotle mayo for a smoky‑sweet finish.
Cheesy Four‑Cheese Delight
Swap the single shredded cheese for a blend of Monterey Jack, cheddar, pepper jack, and mozzarella. This quartet melts into a gooey masterpiece that stretches with every bite. It’s the ultimate comfort‑food upgrade.
Veggie‑Packed Power
Replace half of the chicken with sautéed bell peppers, corn, and black beans. The added vegetables boost nutrition and add vibrant color. Even the most devoted meat‑eaters will appreciate the fresh crunch.
Breakfast Chimichanga
Use scrambled eggs, crumbled breakfast sausage, and a dash of hot sauce in place of the chicken. Top with a spoonful of avocado crema for a morning twist that’s as satisfying as it is unexpected.
Storing and Bringing It Back to Life
Fridge Storage
Allow the chimichangas to cool completely, then place them in an airtight container lined with a paper towel to absorb excess moisture. They’ll stay fresh for up to three days. Reheat in a preheated 375°F oven for 8‑10 minutes, and they’ll regain that original crunch.
Freezer Friendly
Wrap each cooled chimichanga individually in plastic wrap, then seal them in a freezer‑safe zip‑top bag. They freeze beautifully for up to two months. When ready to eat, bake from frozen at 425°F for 20‑25 minutes, adding a splash of water to the tray to create steam that revives the interior.
Best Reheating Method
For the ultimate reheating, preheat a skillet over medium‑high heat, add a tiny drizzle of olive oil, and toast each chimichanga for 2‑3 minutes per side. The skillet restores the crisp exterior while keeping the inside moist. Add a tiny splash of water to the pan and cover for the last minute to steam the filling back to perfection.