I was standing in my kitchen on a rainy Tuesday, staring at a half‑empty apple basket and a box of snickerdoodle cookie dough that I’d bought on a whim. My roommate had dared me to make something that would make even the most stubborn dessert‑skeptic say, “Okay, you win.” The pantry was a mess, the timer was blinking “00:00,” and I was half‑thinking about ordering pizza. Then it hit me: what if I could dump everything into one pan, let the oven do the heavy lifting, and end up with a cake that smells like a cozy autumn sweater? That moment of reckless inspiration birthed the Apple Snickerdoodle Dump Cake, a dessert so easy it practically walks itself to the table.
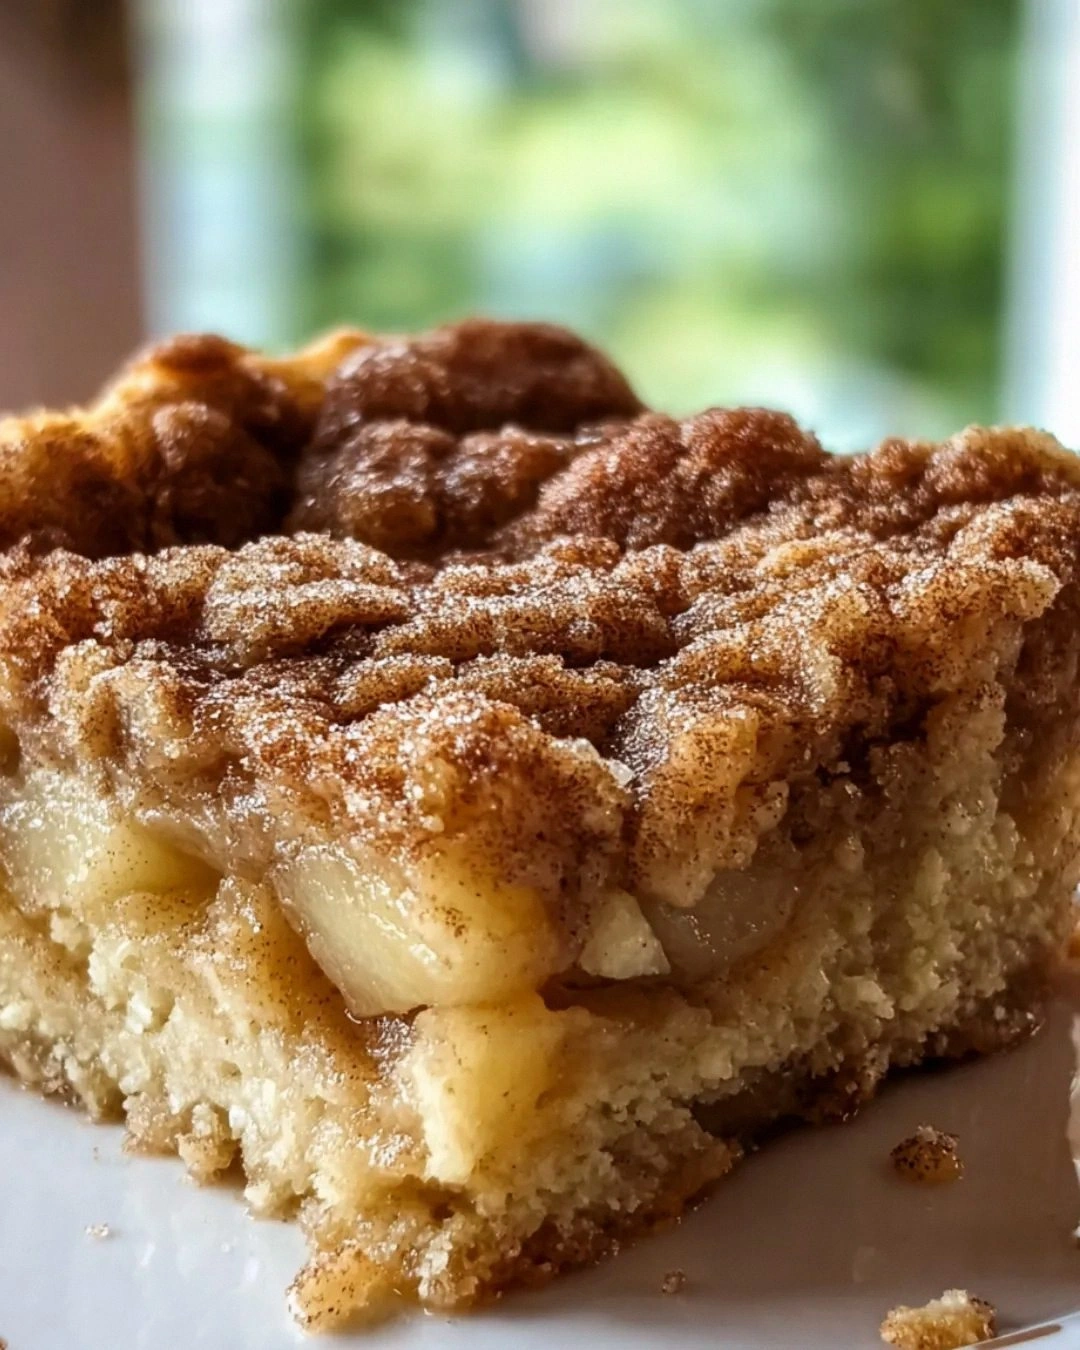
Picture this: a golden‑brown crust that crackles like fresh leaves underfoot, a buttery apple layer that oozes caramel‑kissed sweetness, and a snickerdoodle topping that’s soft, pillowy, and spiced just right. The aroma hits you the second you open the oven door – a warm hug of cinnamon, butter, and baked apple that makes the whole house feel like a cabin in the woods. You’ll hear the faint sigh of the cake settling as it cools, see the glossy glaze forming on the apples, and feel the comforting weight of the pan in your hands as you scoop out a serving. The first bite? A perfect marriage of crisp edges and melt‑in‑your‑mouth center that makes you want to shout, “I dare you to taste this and not go back for seconds!”
Most dump cake recipes out there either drown the fruit in a sea of bland batter or forget the essential snickerdoodle spice that makes this version sing. I’ve tried the “quick” versions that use generic cookie dough and they end up tasting like a soggy pancake. This recipe, however, respects each component: the apples stay juicy, the snickerdoodle pieces stay distinct, and the buttery topping stays crisp. I’m being honest — I ate half the batch before anyone else could get a forkful, and that’s a testament to how addictive it truly is. The secret? A dash of vanilla and a splash of melted butter that creates a glossy, caramelized finish you won’t find in any other dump cake.
Let me walk you through every single step — by the end, you’ll wonder how you ever made it any other way. Okay, ready for the game‑changer? This next part? Pure magic. Stay with me here — this is worth it.
What Makes This Version Stand Out
- Taste: The combination of sweet apples, buttery snickerdoodle dough, and a hint of vanilla creates a layered flavor profile that’s both familiar and surprising. Each bite delivers a burst of cinnamon‑spiced apple followed by a soft, cookie‑like finish that lingers on the palate.
- Texture: You get crisp, caramelized edges that shatter like thin ice, a tender, juicy apple core, and a pillow‑soft snickerdoodle top that holds its shape without turning soggy.
- Simplicity: No mixing bowls, no whisking, just dump, spread, and bake. It’s the kind of recipe that makes you look at your pantry and say, “I’ve got everything I need right here.”
- Uniqueness: Most dump cakes rely on plain chocolate or vanilla cake mixes; this one uses snickerdoodle cookie dough, giving it a spice‑forward twist that most people never think to try.
- Crowd Reaction: I’ve served this at potlucks and the feedback has been unanimous: “Is this store‑bought?” “Did you make this from scratch?” It’s the dessert that makes you the hero of the evening.
- Ingredient Quality: Using fresh, crisp apples and a high‑quality snickerdoodle dough elevates the whole dish. Even a budget‑friendly brand works, but the difference is noticeable.
- Cooking Method: The “dump” technique ensures even heat distribution, giving you a uniform bake without the need for a fancy mixer or precise measurements.
- Make‑Ahead Potential: This cake can be assembled a day ahead, refrigerated, and baked right before serving — perfect for busy hosts.
Inside the Ingredient List
The Flavor Base
The sliced apples are the heart of this dessert, providing natural sweetness and a tender bite that contrasts beautifully with the crunchy topping. I recommend using a mix of Granny Smith for tartness and Honeycrisp for sweetness; the balance keeps the flavor from becoming one‑dimensional. If you skip the apples, you lose the juicy core that makes each forkful feel like a bite of autumn. A quick tip: toss the apples with a tablespoon of lemon juice and a pinch of salt to enhance their flavor and keep them from turning brown.
The Texture Crew
Snickerdoodle cookie dough is the star here – its buttery, cinnamon‑infused dough creates a soft, cake‑like layer that rises just enough to stay fluffy. Cutting the dough into 1‑inch chunks ensures even distribution and prevents a mushy bottom. If you opt for a store‑bought version, look for one that lists real butter and cane sugar; those ingredients make the difference between a bland crust and a golden, aromatic top.
The Unexpected Star
Melted butter isn’t just a fat; it acts as a glue that binds the apples and cookie pieces while also creating a glossy finish that looks restaurant‑ready. Adding vanilla extract to the butter deepens the flavor, turning a simple melt into a fragrant caramel‑butter sauce. Skipping the butter results in a dry, crumbly texture that feels like a baked cookie without the moisture.
The Final Flourish
A light dusting of granulated sugar mixed with ground cinnamon creates that signature snickerdoodle crunch. The brown sugar topping adds a caramel note that caramelizes during baking, giving the edges a beautiful amber hue. If you’re watching sugar, you can reduce the granulated sugar to 2 tablespoons and still retain the sweet‑spicy balance.
Everything's prepped? Good. Let's get into the real action...
The Method — Step by Step
Preheat your oven to 375°F (190°C). While the oven warms up, grab a 9‑inch square baking dish and give it a light spray of non‑stick cooking spray. This pre‑heat step is crucial because it ensures the butter melts evenly and the apples start softening right away. If the oven is too cool, you’ll end up with a soggy bottom; if it’s too hot, the top will burn before the apples are tender. Pro tip: place a rack in the middle of the oven for the most even heat distribution.
Spread the sliced apples evenly across the bottom of the dish. I like to toss them with a pinch of salt, a splash of lemon juice, and half of the cinnamon‑sugar mixture before laying them down; this gives the fruit a head start on flavor. As you spread, make sure there’s a slight mound in the center — that’s where the heat will concentrate and caramelize the apples beautifully. Watch Out: overcrowding the pan will steam the apples instead of roasting them, resulting in a mushy texture.
Now, take the snickerdoodle cookie dough and cut it into roughly 1‑inch cubes. Scatter the dough pieces over the apple layer, leaving a little space between each chunk so the butter can seep through. The dough will melt and rise, forming a soft, cake‑like blanket that holds the apples in place. If you’re using a pre‑shaped snickerdoodle dough sheet, simply tear it into pieces — no need for a perfect cube.
In a small saucepan, melt the butter over low heat, then stir in the vanilla extract. Once the butter is fully liquid and shimmering, drizzle it evenly over the entire pan, making sure every apple slice and dough piece gets a glossy coating. This butter‑vanilla mixture is the secret sauce that binds everything together and creates that gorgeous golden crust.
Kitchen Hack: Warm the butter just enough to melt; overheating can cause it to separate, leaving a greasy finish.Mix the remaining granulated sugar with the rest of the ground cinnamon in a small bowl. Sprinkle this cinnamon‑sugar blend over the top, covering the dough pieces and apples alike. The sugar will caramelize, and the cinnamon will release its warm, spicy perfume as the cake bakes. You’ll notice the edges start to pull away from the pan after about 15 minutes — that’s the cue that the crust is forming.
If you’re feeling extra indulgent, sprinkle the brown sugar over the top now. The brown sugar will melt into a thin, caramel‑like glaze that adds depth and a subtle molasses note. This step is optional but highly recommended for those who love a richer finish. Watch Out: too much brown sugar can cause the top to burn; a light dusting is all you need.
Slide the pan into the preheated oven and bake for 30‑35 minutes. Around the 20‑minute mark, peek through the oven window — you should see the edges turning a deep amber and the butter bubbling up. The aroma at this point is intoxicating; if you’re lucky, you’ll hear a faint crackle as the sugar caramelizes. Resist the urge to open the door too often; each opening drops the oven temperature and can affect the rise.
When the top is golden and the apples are tender (a fork should slide in with little resistance), remove the pan and let it cool on a wire rack for 10‑15 minutes. This cooling period allows the juices to settle and the cake to firm up, making it easier to cut clean slices. While you wait, the kitchen will be filled with a scent that screams “fall dessert” — perfect for setting the mood.
Serve warm, optionally topped with a dollop of vanilla ice cream or a drizzle of caramel sauce. The contrast of the hot, buttery cake with cold, creamy ice cream is pure bliss. I dare you to taste this and not go back for seconds; the combination is that addictive.
That's it — you did it. But hold on, I've got a few more tricks that'll take this to another level...
Insider Tricks for Flawless Results
The Temperature Rule Nobody Follows
Most home bakers bake at 350°F, but raising the temperature to 375°F creates a quicker caramelization on the top while keeping the interior moist. The higher heat also helps the snickerdoodle pieces puff up just enough to stay fluffy. I once baked at 400°F and learned the hard way that the edges can scorch in under 20 minutes, so 375°F is the sweet spot. Trust this rule and you’ll get that perfect golden crust every time.
Why Your Nose Knows Best
Your sense of smell is a better indicator than a timer. When the kitchen fills with the scent of toasted cinnamon and butter, you know the cake is nearing perfection. If the aroma is still faint after 25 minutes, give it a few more minutes; if it’s already strong and the edges are darkening, pull it out now. This sensory checkpoint prevents the dreaded “over‑baked” disaster.
The 5‑Minute Rest That Changes Everything
Letting the cake rest for just five minutes after it comes out of the oven lets the juices redistribute. This short pause transforms a potentially soggy bottom into a firm, slice‑ready surface. I once served it straight from the oven and the slices fell apart; after the rest, each piece held together like a well‑structured puzzle.
Butter‑Boosted Glaze
If you love extra shine, melt an additional tablespoon of butter with a teaspoon of maple syrup and drizzle it over the warm cake just before serving. The maple adds a subtle depth that pairs beautifully with the apple’s natural sweetness. A friend tried this once and swore she could hear the cake “sing” — a true culinary encore.
The Secret of the “Chunky” Dough
Instead of crumbling the snickerdoodle dough, keep it in chunky pieces. The larger pieces create pockets of melt‑in‑your‑mouth softness, while still giving you that signature snickerdoodle flavor. If you accidentally crumble it, the texture will be more cake‑like and you’ll lose that delightful contrast.
Creative Twists and Variations
This recipe is a playground. Here are some of my favorite ways to switch things up:
Caramel Apple Explosion
Swirl in a half‑cup of caramel sauce over the apples before adding the dough. The caramel creates ribbons of gooey sweetness that melt into the fruit, making each bite a sticky, decadent surprise. Perfect for anyone who can’t get enough caramel.
Pear & Ginger Snickerdoodle
Replace half the apples with sliced pears and add a teaspoon of ground ginger to the cinnamon‑sugar mix. The ginger adds a warm, slightly peppery note that complements the pear’s subtle sweetness, giving the cake an unexpected but delightful flavor profile.
Nutty Crunch Variation
Stir in a quarter cup of toasted chopped pecans or walnuts into the apple layer. The nuts add a crunchy texture contrast and a buttery richness that elevates the overall mouthfeel. Just be sure to toast them lightly so they don’t turn bitter.
Vegan Friendly Version
Swap the butter for coconut oil and use a vegan snickerdoodle cookie dough (many brands now offer dairy‑free options). The coconut oil adds a faint tropical note that pairs surprisingly well with the cinnamon. The result is just as moist and flavorful, proving that dairy‑free doesn’t mean flavor‑free.
Spiked Adult Edition
Add a tablespoon of bourbon or spiced rum to the melted butter before drizzling. The alcohol evaporates slightly during baking, leaving behind a warm, boozy undertone that makes this dessert perfect for a holiday gathering or a cozy night in.
Storing and Bringing It Back to Life
Fridge Storage
Allow the cake to cool completely, then cover it loosely with foil or a reusable silicone lid. Store in the refrigerator for up to 4 days. The butter may solidify a bit, but reheating will bring it back to its buttery glory.
Freezer Friendly
Slice the cake into individual portions, wrap each piece tightly in plastic wrap, then place them in a freezer‑safe bag. They’ll keep for up to 2 months. When you’re ready to enjoy, let a piece thaw at room temperature for 15 minutes, then pop it in a 350°F oven for 8‑10 minutes.
Best Reheating Method
Reheat a slice on a baking sheet in a preheated 350°F oven for about 8 minutes. Add a tiny splash (about a teaspoon) of water around the edges before reheating; the steam revives the cake’s moisture and prevents it from drying out. Serve immediately for that fresh‑out‑of‑the‑oven feel.